Introduction
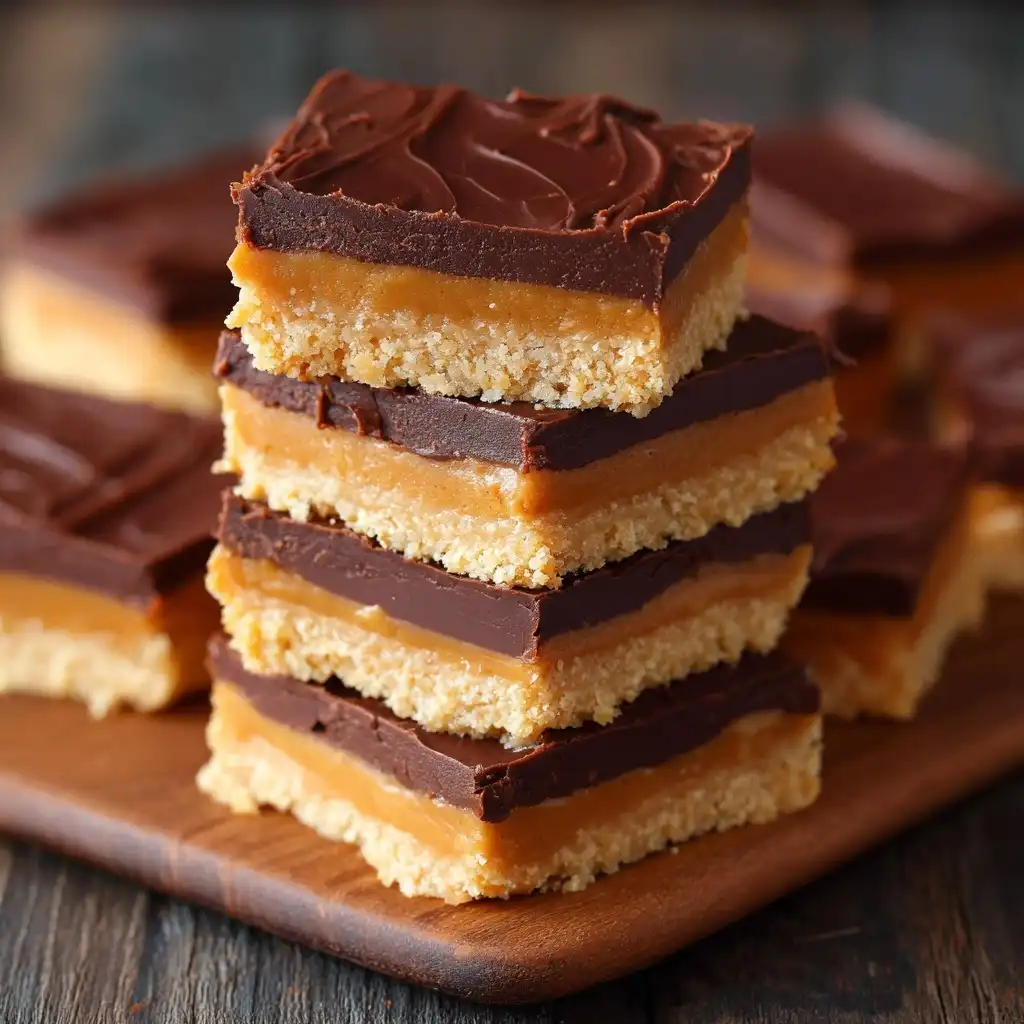
Imagine biting into a rich, creamy, no-bake treat that delivers the unmistakable magic of a Reese’s Peanut Butter Cup—without turning on your oven, without melting chocolate over a double boiler, and without waiting hours for layers to set. That’s the irresistible promise of No-Bake Peanut Butter Bars. These decadent, slice-and-serve squares combine the velvety smoothness of natural peanut butter, the sweet-tangy depth of powdered sugar, the gentle crunch of graham cracker crumbs, and a luscious dark or semi-sweet chocolate topping—all bound together with just a touch of melted butter and a whisper of vanilla. They’re not only astonishingly simple to make (ready in under 30 minutes active time), but they also deliver that iconic peanut butter–chocolate harmony in every bite: salty-sweet, creamy-crisp, nostalgic yet elevated. Whether you’re meal prepping energy-boosting snacks, packing school lunches, hosting last-minute guests, or simply treating yourself after a long day, these bars check every box—delicious, dependable, dairy-free adaptable, gluten-free friendly (with substitutions), and endlessly customizable.
The History
No-bake bars have deep roots in American home cooking culture, flourishing especially during the mid-20th century when convenience, frugality, and accessibility defined kitchen innovation. The rise of shelf-stable ingredients like evaporated milk, powdered sugar, graham crackers, and jarred peanut butter—popularized by brands such as Skippy and Jif in the 1930s–40s—laid the groundwork for “refrigerator desserts” that required no oven, minimal equipment, and little technical skill. While exact origin claims are elusive and often contested across regional cookbooks and community church collections, early iterations of peanut butter–chocolate no-bake bars began appearing in women’s magazines and Betty Crocker pamphlets by the late 1950s. These recipes were frequently inspired by the explosive popularity of Reese’s Peanut Butter Cups, first introduced by H.B. Reese in 1928 and acquired by Hershey in 1963—making the candy a cultural touchstone ripe for reinterpretation. Over decades, home cooks refined the formula: swapping margarine for butter, adding sea salt for balance, experimenting with nut flours and alternative sweeteners, and elevating texture with toasted nuts or flaky salt garnishes. Today’s No-Bake Peanut Butter Bars stand proudly at the intersection of retro charm and modern sensibility—honoring their humble, resourceful origins while embracing clean-label preferences, dietary inclusivity, and gourmet-level flavor layering.
Ingredients Breakdown
Every exceptional no-bake bar begins with intentionality—not just in measurement, but in ingredient selection and function. Here’s why each component matters:
- Peanut Butter (1 cup, creamy & natural preferred): Acts as the structural backbone and primary flavor driver. Natural peanut butter (just peanuts + salt) yields superior richness and avoids added sugars or palm oil, which can cause separation or greasiness. Avoid “no-stir” varieties with stabilizers—they often contain hydrogenated oils that compromise texture and mouthfeel.
- Powdered Sugar (2½ cups, sifted): Provides sweetness, bulk, and binding power. Its fine granulation dissolves seamlessly into the peanut butter base, creating a dense, fudge-like consistency. Sifting prevents gritty pockets and ensures a velvety finish.
- Graham Cracker Crumbs (1¼ cups, about 12 full sheets): Contribute subtle honeyed sweetness, gentle whole-grain notes, and essential textural contrast. They absorb excess oil, stabilize the mixture, and lend a tender-yet-firm bite. For gluten-free versions, certified GF graham-style crackers work flawlessly.
- Unsalted Butter (¼ cup, melted): Adds richness, sheen, and cohesion. Melting it ensures even distribution and helps bind dry ingredients without overworking. Salted butter may be used—but reduce added salt accordingly.
- Pure Vanilla Extract (1½ tsp): Enhances aroma and rounds out peanut butter’s earthiness. Opt for Madagascar bourbon vanilla for warm, caramel-tinged complexity.
- Fine Sea Salt (¼ tsp, plus flaky salt for finishing): A critical balancing agent—it doesn’t make the bars “salty,” but rather heightens sweetness and deepens nuttiness. Flaky Maldon or fleur de sel sprinkled post-chill adds an elegant, sparkling contrast.
- Dark Chocolate (1½ cups, 60–70% cacao, finely chopped): Forms the glossy, bittersweet top layer. Higher cocoa content cuts through sweetness and mirrors Reese’s signature contrast. Avoid chocolate chips—they contain stabilizers that inhibit smooth melting and cause streaking.
- Coconut Oil (1 tbsp, refined or unrefined): Optional but highly recommended. It lowers chocolate’s melting point slightly, promotes ultra-smooth spreading, speeds setting time, and prevents bloom (those harmless but unattractive grayish streaks).
Optional enhancements include a splash of maple syrup (for nuanced sweetness), a pinch of espresso powder (to amplify chocolate depth), or a dusting of crushed roasted peanuts for visual appeal and crunch.
Step-by-Step Recipe
- Prepare the Pan: Line an 8×8-inch metal baking pan with two overlapping sheets of parchment paper, leaving generous overhang on two opposite sides (this is essential for clean, effortless lifting later). Lightly grease the parchment with neutral oil or nonstick spray.
- Make the Crumb Base: In a medium bowl, whisk together graham cracker crumbs, sifted powdered sugar, melted butter, vanilla extract, and fine sea salt until fully combined and resembling wet sand. Press firmly and evenly into the bottom of the prepared pan using the back of a measuring cup or flat-bottomed glass. Apply steady, downward pressure—especially along the edges—to create a compact, uniform crust. Refrigerate for 15 minutes to firm up.
- Prepare the Peanut Butter Layer: In a large heatproof bowl, combine creamy peanut butter and ¼ cup of the powdered sugar. Microwave in 20-second bursts, stirring between each, until warm and fluid (about 45–60 seconds total). Do not overheat—warmth helps it blend smoothly, but boiling causes separation. Stir in remaining powdered sugar, ½ cup at a time, until thick, glossy, and completely homogenous. Fold in graham cracker crumbs and mix until no dry streaks remain. The mixture will be thick and pliable—like stiff playdough.
- Assemble the Bars: Spoon the peanut butter mixture over the chilled crumb base. Use lightly greased hands or an offset spatula to press and spread it into an even, seamless layer—aim for ½-inch thickness. Smooth the top with a bench scraper or straight-edged spatula. Return to refrigerator for 20 minutes.
- Melt the Chocolate Topping: Combine chopped dark chocolate and coconut oil in a heatproof bowl. Microwave in 20-second intervals, stirring vigorously after each, until fully melted and silky (typically 60–90 seconds). Alternatively, use a double boiler over barely simmering water, stirring constantly until smooth. Let cool slightly (1–2 minutes) so it’s warm—not hot—to prevent melting the peanut butter layer beneath.
- Top & Chill: Pour melted chocolate over the chilled peanut butter layer. Tilt and gently tap the pan to encourage even flow. Use an offset spatula to spread any thin spots. Immediately sprinkle with flaky sea salt. Refrigerate uncovered for at least 2 hours—or ideally overnight—for complete firmness and clean slicing.
- Slice & Serve: Using parchment overhang, lift the entire slab onto a cutting board. With a sharp, hot knife (dip blade in hot water and wipe dry between cuts), slice into 16 even 2×2-inch bars. Wipe and reheat knife as needed for pristine edges.
Tips
- Temperature Is Everything: Work with room-temperature peanut butter (not cold from the fridge) and ensure melted butter is warm—not scalding—before mixing. Chilled ingredients cause seizing or graininess.
- Sift Your Sugar: Skipping this step risks tiny lumps that won’t fully incorporate, resulting in sandy patches in your bars.
- Press Like You Mean It: Under-pressing the base leads to crumbling; over-pressing the PB layer makes it overly dense. Aim for firm, even pressure—not aggressive force.
- Chill Between Layers: Don’t skip refrigeration steps. Each chill sets structure, prevents smudging, and ensures clean layer definition.
- Use a Metal Pan: Aluminum conducts cold efficiently—speeding chill time and improving chocolate set. Glass or ceramic pans insulate and slow the process.
- Knife Prep Matters: A dull or cold knife will drag and tear. Always use a sharp chef’s knife dipped in hot water and wiped dry before each cut.
- Room for Error? Add More PB: If your mixture feels too crumbly after mixing, stir in 1 tsp additional natural peanut butter—just enough to bind, not liquefy.
- Storage Secret: Keep bars refrigerated in an airtight container layered with parchment. They’ll stay fresh and sliceable for up to 10 days—or freeze for up to 3 months (thaw 10 minutes before serving).
Variations and Customizations
These bars are a canvas—not a cage. Embrace creativity while honoring their core integrity:
- Gluten-Free Version: Swap graham crackers for certified GF honey graham-style crackers or a blend of almond flour (¼ cup) + GF oat flour (½ cup) + 2 tbsp coconut sugar for depth.
- Vegan Adaptation: Use vegan butter (like Miyoko’s or Earth Balance), maple syrup–sweetened peanut butter (check label), and dairy-free dark chocolate (Enjoy Life or Hu Kitchen). Ensure powdered sugar is beet-derived (many cane sugars are filtered with bone char).
- Protein-Packed Upgrade: Add 2 scoops (¼ cup) unflavored or vanilla plant-based protein powder to the peanut butter layer—reduce powdered sugar by ¼ cup to compensate for absorption.
- Flavor Twists: Infuse warmth with ¼ tsp ground cinnamon or cardamom; add brightness with 1 tsp orange zest; deepen richness with ½ tsp instant espresso powder; or swirl in 2 tbsp blackstrap molasses for mineral-rich complexity.
- Crunch Factor: Fold ⅓ cup toasted peanuts, chopped pretzels, or cacao nibs into the peanut butter layer—or press them gently into the chocolate before chilling.
- Drizzle Dreams: After chocolate sets, melt white chocolate or peanut butter chips and pipe delicate zigzags across the top. A light dusting of freeze-dried raspberries adds tart pop and pastel elegance.
- Mini Bar Format: Press mixture into a lined muffin tin (with paper liners) and top with chocolate. Chill 90 minutes—perfect for portion control and party favors.
- Low-Sugar Option: Replace half the powdered sugar with erythritol-based confectioners’ blend (like Swerve), add 1 tsp stevia glycerite, and boost flavor with extra vanilla and salt to compensate for muted sweetness.
Health Considerations and Nutritional Value
While undeniably indulgent, these bars offer surprising nutritional merit when approached mindfully. A standard 2×2-inch bar (1/16th of the full recipe) contains approximately 210–230 calories, with 12–14g of heart-healthy monounsaturated fats from peanut butter and dark chocolate, 5–6g of plant-based protein, and 2–3g of fiber (primarily from graham cracker crumbs and natural peanut butter). The absence of refined grains (thanks to minimal crumb usage), zero trans fats, and reliance on whole-food fats make them a far more nutrient-dense choice than many store-bought candy bars or baked treats. Dark chocolate contributes flavonoids linked to improved endothelial function and antioxidant support, while natural peanut butter supplies magnesium, vitamin E, niacin, and resveratrol. That said, mindful enjoyment remains key: the powdered sugar content contributes ~14g of added sugar per bar—well within the FDA’s recommended daily limit of 50g, but worth noting for those managing blood sugar or following low-glycemic protocols. For insulin sensitivity, consider pairing a bar with a handful of almonds or Greek yogurt to further slow glucose absorption. Those with peanut allergies should avoid entirely—but sunflower seed butter or tahini variations offer safe, delicious alternatives with comparable creaminess and mineral density. As always, consult a registered dietitian for personalized guidance aligned with specific health goals or medical conditions.
Ingredients
- 1 cup creamy natural peanut butter (no added sugar or palm oil)
- 2½ cups powdered sugar, sifted
- 1¼ cups graham cracker crumbs (about 12 full 2½”x2½” crackers)
- ¼ cup unsalted butter, melted and slightly cooled
- 1½ teaspoons pure vanilla extract
- ¼ teaspoon fine sea salt, plus flaky sea salt for finishing
- 1½ cups high-quality dark chocolate (60–70% cacao), finely chopped
- 1 tablespoon refined or unrefined coconut oil
Directions
- Line an 8×8-inch metal baking pan with parchment paper, allowing overhang on two opposite sides. Lightly grease parchment.
- In a medium bowl, whisk graham cracker crumbs, ½ cup of the powdered sugar, melted butter, vanilla, and fine sea salt until moistened and clumping. Press firmly and evenly into pan bottom. Refrigerate 15 minutes.
- In a large heatproof bowl, combine peanut butter and ¼ cup powdered sugar. Microwave in 20-sec bursts, stirring between, until warm and fluid (~45–60 sec). Stir in remaining powdered sugar (2 cups), ½ cup at a time, until thick, glossy, and smooth. Fold in graham cracker crumbs until fully incorporated.
- Spoon peanut butter mixture over chilled base. Press and spread into an even ½-inch layer using greased hands or an offset spatula. Refrigerate 20 minutes.
- In a small heatproof bowl, combine chopped chocolate and coconut oil. Microwave in 20-sec bursts, stirring vigorously after each, until fully melted and smooth (60–90 sec). Cool 1–2 minutes.
- Pour chocolate over peanut butter layer. Tilt and tap pan to level; smooth with offset spatula. Sprinkle immediately with flaky sea salt.
- Refrigerate uncovered for at least 2 hours—or preferably overnight—for optimal firmness.
- Using parchment overhang, lift slab onto cutting board. Slice into 16 even squares with a hot, sharp knife (wipe and reheat between cuts). Store refrigerated in airtight container up to 10 days—or freeze up to 3 months.
FAQ
- Can I use crunchy peanut butter?
- Absolutely—but expect a slightly more textured, less uniform bar. For best results, stir well before measuring to distribute oil evenly. Some prefer a 50/50 blend of creamy and crunchy for balanced mouthfeel.
- Why does my peanut butter layer separate or look oily?
- Natural peanut butter separates over time—always stir the jar thoroughly before measuring. Also, overheating during microwaving or using warm (not hot) melted butter prevents splitting. If separation occurs, stir vigorously off-heat—it often comes back together.
- Can I make these ahead for a party?
- Yes! They improve with time. Prepare up to 3 days in advance and keep refrigerated. For events, slice 1–2 hours before serving—bars hold shape beautifully and taste even richer after resting.
- My chocolate cracked when I cut the bars. What went wrong?
- Too-rapid temperature change. Always bring bars to cool room temperature (5–10 minutes) before slicing—or use a consistently hot knife. Also, ensure chocolate was cooled slightly before pouring over the cold PB layer.
- Is there a substitute for graham crackers?
- Yes! Digestive biscuits, vanilla wafers, shortbread cookies, or even crushed rice cakes (for ultra-light crunch) work well. Adjust salt slightly depending on base cookie’s sodium content.
- Can I use milk or white chocolate?
- You can—but we strongly recommend sticking with dark chocolate. Milk chocolate adds excessive sweetness that overwhelms the peanut butter, while white chocolate lacks the bitter counterpoint essential to the Reese’s experience. If using, reduce powdered sugar in the base by ¼ cup.
- How do I prevent the bars from sticking to the knife?
- Wipe the knife clean with a hot, damp cloth after every 1–2 cuts. Never saw—press down firmly and glide smoothly. A thin film of neutral oil on the blade also helps.
- Are these bars safe for kids’ lunchboxes?
- Yes—if kept cool. Pack in an insulated lunchbox with a small frozen gel pack. They’ll remain sliceable and delicious for up to 4 hours at room temperature—ideal for school or daycare.
- Can I double the recipe?
- Yes—but bake in a 9×13-inch pan and increase chill time by 30 minutes. For best texture and ease of cutting, we recommend making two separate 8×8 batches instead.
- What if I don’t have a microwave?
- No problem! Melt peanut butter gently in a heatproof bowl set over a saucepan of barely simmering water (double boiler method), stirring constantly. Same goes for chocolate—low, patient heat is your friend.
Summary
No-Bake Peanut Butter Bars capture the soul of a Reese’s Peanut Butter Cup—creamy, salty-sweet, and irresistibly chocolate-dipped—without a single minute of oven time or complicated technique. Made with just 8 wholesome, accessible ingredients and ready in under 30 minutes of hands-on effort, they’re the ultimate fusion of nostalgia, nutrition, and no-fuss elegance.
Whether you’re customizing for dietary needs, elevating with gourmet touches, or simply craving that perfect peanut butter–chocolate harmony, these bars deliver extraordinary flavor, stunning texture, and joyful simplicity—one perfectly portioned, parchment-wrapped square at a time.