Introduction:
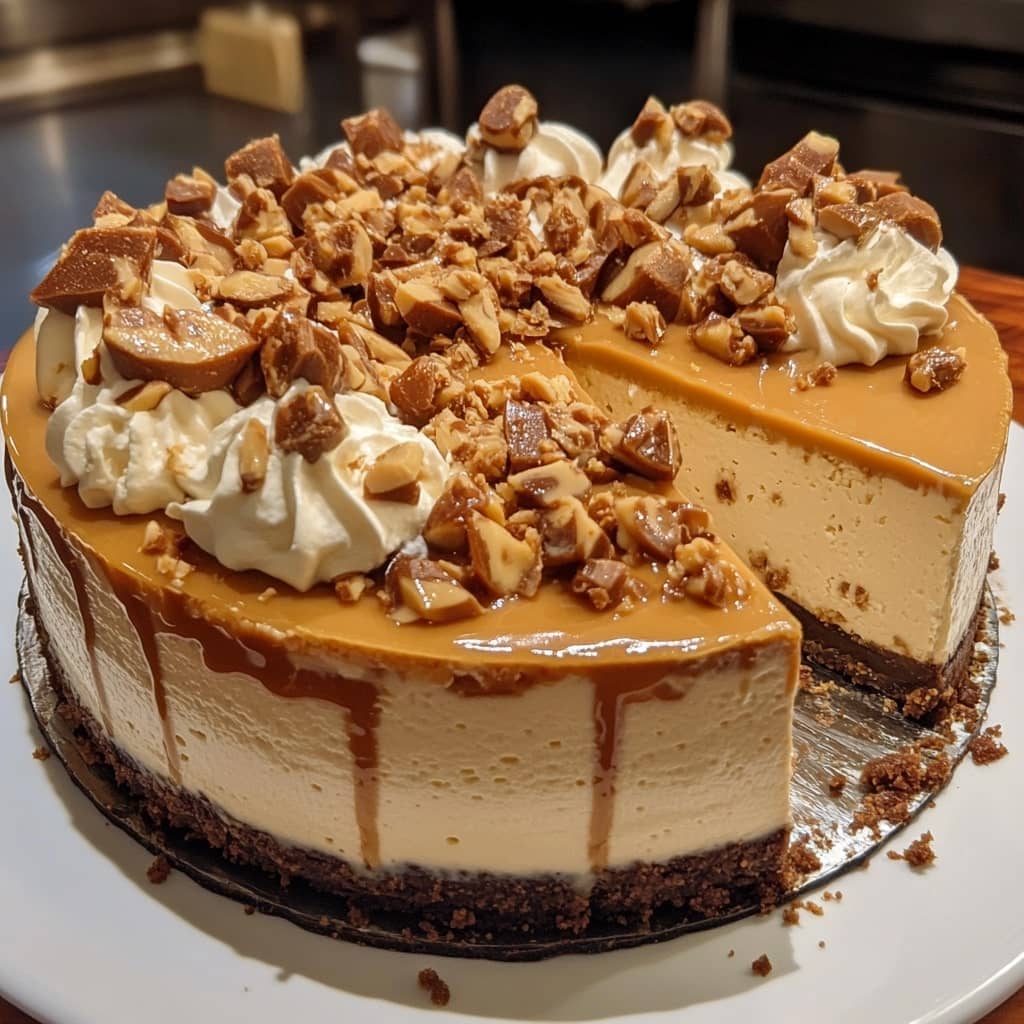
Loaded Butterscotch Cheesecake is a decadent dessert that combines the creamy richness of cheesecake with the delightful sweetness of butterscotch. This indulgent treat features a smooth and velvety butterscotch-flavored cheesecake base, a buttery graham cracker crust, and is topped with extra layers of luscious butterscotch sauce and crunchy toffee bits for a perfect balance of textures. Ideal for any celebration or as a special weekend indulgence, this cheesecake delivers a rich, melt-in-your-mouth experience that will have your taste buds craving more.
The History of:
Butterscotch, the sweet flavor that defines this cheesecake, dates back to the early 19th century in the United Kingdom. The word “butterscotch” comes from the process of “scotching” or hardening the sugar and butter mixture by boiling it. Over the years, the sweet and buttery flavor has become a popular addition to candies, desserts, and baked goods, and today it’s used in everything from ice creams to cakes. The combination of cheesecake and butterscotch adds a modern twist to a classic favorite, turning it into an irresistible dessert.
Ingredients Breakdown:
For the crust:
- 1 1/2 cups graham cracker crumbs
- 1/4 cup sugar
- 1/2 cup unsalted butter, melted
- Pinch of salt
For the cheesecake filling:
- 3 (8 oz) packages cream cheese, softened
- 1 cup granulated sugar
- 1/2 cup brown sugar, packed
- 3 large eggs
- 1 1/2 cups sour cream, room temperature
- 1 teaspoon vanilla extract
- 1/4 cup butterscotch sauce (store-bought or homemade)
For the butterscotch topping:
- 1/2 cup brown sugar
- 1/4 cup unsalted butter
- 1/4 cup heavy cream
- 1/2 teaspoon vanilla extract
- 1/4 cup toffee bits or crushed candy (optional, for extra crunch)
Step-by-Step Recipe:
- Prepare the crust: Preheat the oven to 325°F (163°C). In a bowl, combine the graham cracker crumbs, sugar, melted butter, and a pinch of salt. Press the mixture into the bottom of a springform pan to form a tight crust. Bake for 10 minutes, then let it cool while you prepare the cheesecake filling.
- Make the cheesecake filling: In a large bowl, beat the softened cream cheese, granulated sugar, and brown sugar together until smooth and fluffy. Add the eggs one at a time, mixing well after each addition. Mix in the sour cream and vanilla extract until fully incorporated.
- Add butterscotch: Gently fold in the butterscotch sauce into the cheesecake batter, blending it until smooth. Pour the batter over the prepared crust, spreading it evenly.
- Bake the cheesecake: Bake at 325°F (163°C) for 55–60 minutes, or until the center is set and the top is lightly golden. The cheesecake should jiggle slightly when shaken. Turn off the oven and let the cheesecake cool in the oven with the door ajar for 1 hour.
- Chill: After the hour, transfer the cheesecake to the fridge and chill for at least 4 hours, or overnight for the best results.
- Make the butterscotch topping: In a small saucepan, melt the brown sugar, butter, and heavy cream over medium heat. Stir until the mixture comes to a boil and the sugar is dissolved. Let it simmer for 2-3 minutes to thicken slightly. Remove from heat and stir in the vanilla extract. Let the sauce cool before drizzling it over the cheesecake.
- Top the cheesecake: Once the cheesecake is chilled, pour the cooled butterscotch sauce over the top and sprinkle with toffee bits or crushed candy for an extra crunch.
Tips for the Perfect Loaded Butterscotch Cheesecake:
- Room temperature ingredients: Ensure the cream cheese, eggs, and sour cream are at room temperature before mixing. This will help create a smoother, creamier texture.
- Do not overmix: When mixing the cheesecake filling, be careful not to overmix, as this can cause the cheesecake to crack. Mix until just combined.
- Prevent cracks: To avoid cracks on the surface, bake the cheesecake in a water bath. This helps regulate the temperature and prevents the top from drying out.
- Chill thoroughly: For the best texture, let the cheesecake chill for several hours, preferably overnight. This allows the flavors to meld and the cheesecake to set perfectly.
- Serve with extra toppings: To make the cheesecake even more indulgent, serve it with whipped cream, extra toffee bits, or a sprinkle of sea salt.
Variations and Customizations:
- Nutty crust: Add finely chopped pecans or walnuts to the graham cracker crust for a crunchy twist.
- Caramel drizzle: For a more caramel-flavored cheesecake, replace the butterscotch sauce with caramel sauce.
- Chocolate layer: For a chocolatey touch, add a layer of chocolate ganache on top of the cheesecake before adding the butterscotch sauce.
- Baked or no-bake: If you prefer a no-bake cheesecake, simply use the same filling recipe but pour it into a prepared crust and refrigerate until set.
Health Considerations and Nutritional Value:
This Loaded Butterscotch Cheesecake is a rich and indulgent dessert, making it a treat best enjoyed in moderation. It contains high amounts of fat and sugar, especially from the cream cheese and butterscotch sauce. While it is a source of calcium from the cream cheese and sour cream, it is not a health-conscious choice. To make it slightly lighter, consider using low-fat cream cheese and sour cream, but keep in mind that it may affect the texture and taste.
For those with dietary restrictions, it’s possible to make a gluten-free crust by substituting the graham crackers with gluten-free alternatives, and dairy-free options can be explored by using non-dairy cream cheese and milk alternatives.
FAQ:
- Can I make this cheesecake in advance?
Yes! You can make the cheesecake up to two days in advance and store it in the fridge. Just add the butterscotch sauce and toppings just before serving. - Can I freeze this cheesecake?
Yes, this cheesecake freezes well. Wrap it tightly in plastic wrap and foil, and freeze for up to 3 months. Let it thaw overnight in the fridge before serving. - Can I use store-bought butterscotch sauce?
Absolutely! While homemade butterscotch sauce adds a rich flavor, you can use store-bought butterscotch sauce to save time. - What should I do if my cheesecake cracks?
If your cheesecake cracks, don’t worry! You can cover it with butterscotch sauce or whipped cream, which will help hide any imperfections.

Loaded Butterscotch Cheesecake
Ingredients
Crust
- 1 3/4 cups 235g graham cracker crumbs
- 1/4 cup 56g packed light brown sugar
- 7 tbsp 98g unsalted butter, melted
Filling
- 24 oz 678g cream cheese, at room temperature
- 3/4 cup 168g packed light brown sugar
- 3 tbsp 24g all-purpose flour
- 1 tsp vanilla extract
- 1/2 cup 112g sour cream
- 1/2 cup 120ml heavy whipping cream
- 1 cup 169g butterscotch chips
- 3.4 oz package dry butterscotch pudding mix
- 4 large eggs at room temperature
Topping
- 1 cup 169g butterscotch chips
- 4 1/2 tbsp 68ml heavy whipping cream
- Additional butterscotch chips for decorating
Instructions
Make the Crust
- Preheat the oven to 325°F (163°C). Line the bottom of a 9-inch (23cm) springform pan with parchment paper and grease the sides.
- In a small bowl, combine the ingredients for the crust. Press the mixture into the bottom and up the sides of the springform pan.
- Bake the crust for 8-10 minutes, then set it aside to cool.
- Wrap the outside of the pan with aluminum foil to prevent water from the water bath from seeping in (or follow my method for preparing a pan for a water bath). Set the prepared pan aside.
Make the Filling
- Lower the oven temperature to 300°F (148°C).
- In a large mixing bowl, blend the cream cheese, sugar, and flour with an electric mixer on low speed until combined. (This helps avoid adding too much air, which can cause cracks in the cheesecake.) Scrape down the sides of the bowl as needed.
- Add the vanilla extract and sour cream to the mixture. Beat on low speed until fully combined, then set aside.
- In a medium microwave-safe bowl, add the heavy cream and butterscotch chips. Heat in 15-30 second increments, stirring well between each until the butterscotch chips have melted.
- Add the melted butterscotch mixture to the cheesecake batter in two parts, mixing until fully incorporated after each addition, and scrape down the sides of the bowl as needed.
- Add the dry butterscotch pudding mix and mix until fully combined, scraping down the sides of the bowl as needed.
- Add the eggs one at a time, mixing until well incorporated after each addition and scraping the sides of the bowl after each.
- Pour the filling into the cooled crust. Place the springform pan inside a larger pan, then fill the outside pan with enough warm water to reach halfway up the sides of the springform pan. Be sure the water doesn’t go above the top edge of the aluminum foil.
- Bake for 1 hour and 30-35 minutes. The center should be set but still jiggle slightly. (Refer to how to tell when your cheesecake is done baking.)
- Turn off the oven and leave the cheesecake inside with the door closed for 30 minutes.
- Crack the oven door open and leave the cheesecake inside for another 10 minutes. This cooling method helps prevent cracks by allowing the cheesecake to cool slowly.
- Remove the cheesecake from the oven and set it on a cooling rack to cool to room temperature. Then refrigerate it for 5-6 hours or overnight until fully chilled and firm.
Finish It Off
- Once the cheesecake is cold and firm, remove it from the springform pan and place it on a serving plate.
- For the butterscotch topping, place the butterscotch chips in a heatproof bowl.
- Microwave the heavy whipping cream until it just starts to boil, then pour it over the butterscotch chips. Let it sit for 2-3 minutes, then whisk until smooth.
- Let the ganache cool for about 5 minutes (until it thickens but is still pourable and spreadable). Then pour the topping over the cheesecake and spread it evenly.
- Top with additional butterscotch chips if desired.
- Cover the cheesecake and refrigerate until ready to serve. The cheesecake is best enjoyed within 4-5 days.