Rainbow Sponge Cake with Buttercream Stars: A Celebration on a Plate
The Rainbow Sponge Cake with Buttercream Stars is more than just a dessert—it’s a vibrant, joyful masterpiece that brings color, flavor, and whimsy to any occasion. Whether it’s a birthday party, baby shower, pride celebration, or simply a sweet treat to brighten someone’s day, this cake never fails to impress. Its fluffy layers of rainbow-hued sponge are crowned with pristine white buttercream stars, creating an eye-catching design that’s as delicious as it is beautiful. In this comprehensive guide, we’ll walk you through every step—from the fascinating history of layered cakes to the science behind perfect buttercream piping—so you can create your own stunning version at home.
The History of Layered Cakes and Rainbow Treats
Layered cakes have been a symbol of celebration for centuries. The concept dates back to ancient Rome, where multi-tiered desserts made with honey, nuts, and spiced wine were served during festivals. However, the modern idea of layer cakes as we know them began in 18th-century Europe, particularly in France and England, where advancements in baking technology allowed for lighter, fluffier textures using creamed butter and sugar.
The rainbow cake, specifically, gained popularity in the United States during the mid-20th century. It emerged as part of the broader trend toward colorful, fun desserts influenced by post-war optimism and the rise of food dyes. Initially associated with children’s parties and festive holidays like Easter, the rainbow cake evolved into a symbol of inclusivity and joy, especially embraced by LGBTQ+ communities during Pride Month celebrations.
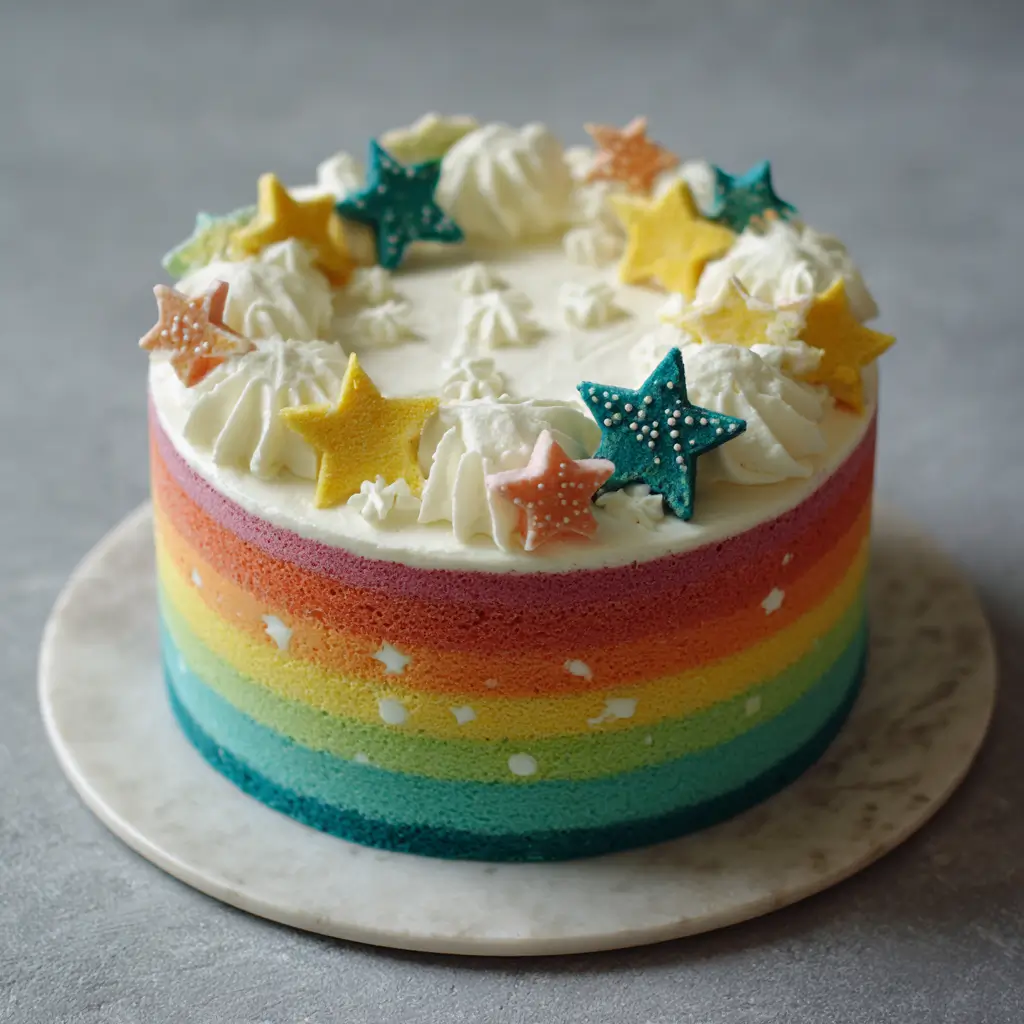
The addition of buttercream stars—a technique inspired by classic American pastry decorating—elevates the rainbow cake from playful to elegant. Star-shaped piped frosting has roots in Victorian-era confectionery, when intricate icing designs became a hallmark of refined dessert presentation. Today, combining bold colors with delicate buttercream artistry makes the Rainbow Sponge Cake with Buttercream Stars a modern classic that honors tradition while embracing creativity.
Ingredients Breakdown: What Makes This Cake Shine?
To craft a perfect Rainbow Sponge Cake with Buttercream Stars, it’s essential to understand each ingredient’s role in creating structure, moisture, color, and flavor. Below is a detailed breakdown:
- All-Purpose Flour: Provides the structural base of the cake. It contains moderate protein levels (around 10–12%), which helps form gluten for stability without making the cake too dense.
- Granulated Sugar: Adds sweetness, tenderness, and aids in browning. It also helps aerate the batter when creamed with butter, contributing to a light texture.
- Baking Powder: The primary leavening agent. It produces carbon dioxide when mixed with liquid and heat, causing the cake to rise evenly.
- Salt: Enhances flavor and balances sweetness. Even a small amount prevents the cake from tasting flat.
- Unsalted Butter: Adds richness and contributes to a tender crumb. Using unsalted allows better control over salt content.
- Eggs: Act as emulsifiers, bind ingredients together, add moisture, and provide structure through proteins that coagulate during baking.
- Whole Milk: Moistens the batter and activates gluten formation subtly. Whole milk ensures a richer mouthfeel compared to lower-fat alternatives.
- Pure Vanilla Extract: Deepens flavor and adds aromatic complexity. Real vanilla extract is preferred over imitation for its nuanced profile.
- Food Coloring (Gel-Based): Gel food colors are highly concentrated and won’t alter the batter’s consistency like liquid dyes might. Red, orange, yellow, green, blue, and purple gels are used to create vivid rainbow layers.
- Salted Butter (for buttercream): Forms the foundation of the frosting. Salted butter enhances flavor, though unsalted can be used with added salt for precision.
- Powdered Sugar (Confectioners’ Sugar): Sweetens and thickens the buttercream. Sifted to avoid lumps and ensure smoothness.
- Heavy Cream or Milk (for buttercream): Adjusts consistency for optimal spreadability and pipeability.
- Clear Vanilla Extract (optional for buttercream): Used if you want pure white frosting without tinting from brownish vanilla.
Step-by-Step Recipe: How to Make Rainbow Sponge Cake with Buttercream Stars
Ingredients
For the Rainbow Sponge Cake:
- 2 ½ cups (315g) all-purpose flour
- 2 ½ tsp baking powder
- ½ tsp salt
- 1 cup (2 sticks / 226g) unsalted butter, softened to room temperature
- 2 cups (400g) granulated sugar
- 4 large eggs, room temperature
- 1 tbsp pure vanilla extract
- 1 cup (240ml) whole milk, room temperature
- Gel food coloring in red, orange, yellow, green, blue, purple (no liquid dyes)
For the Vanilla Buttercream Stars:
- 1 ½ cups (3 sticks / 340g) salted butter, softened
- 6 cups (720g) powdered sugar, sifted
- 2–3 tbsp heavy cream or whole milk
- 1 ½ tsp clear vanilla extract (or regular)
- A pinch of salt (optional, if using unsalted butter)
Equipment Needed:
- 6 x 6-inch round cake pans (or divide into three 8-inch pans with fewer layers)
- Parchment paper rounds
- Mixing bowls
- Electric hand mixer or stand mixer
- Spatulas
- Cake leveler or serrated knife
- Offset spatula
- Piping bags
- Star tip (Wilton 1M or similar open star)
- Cake turntable (optional but helpful)
- Cooling racks
Directions
- Preheat & Prepare: Preheat oven to 350°F (175°C). Grease six 6-inch cake pans thoroughly and line the bottoms with parchment paper. Set aside.
- Dry Ingredients: In a medium bowl, whisk together flour, baking powder, and salt. Set aside.
- Cream Butter & Sugar: In a large mixing bowl, beat softened butter and granulated sugar with an electric mixer on medium-high speed until light and fluffy (about 3–4 minutes). Scrape down the sides as needed.
- Add Eggs & Vanilla: Add eggs one at a time, beating well after each addition. Mix in vanilla extract. Ensure each egg is fully incorporated before adding the next.
- Alternate Dry & Wet Ingredients: With mixer on low, add one-third of the dry ingredients, followed by half the milk. Repeat, ending with the last third of dry mix. Mix only until just combined—do not overmix. Overmixing develops gluten and leads to a tough cake.
- Divide Batter: Divide the plain batter evenly among six separate bowls (approximately 1 cup per bowl). Use a kitchen scale for accuracy.
- Color the Layers: Tint each bowl with gel food coloring to create red, orange, yellow, green, blue, and purple layers. Start with a small amount and build up intensity gradually. Stir gently to avoid deflating the batter.
- Bake the Layers: Pour each colored batter into a prepared pan and smooth the tops. Bake for 15–18 minutes, or until a toothpick inserted in the center comes out clean. Rotate pans halfway through for even baking.
- Cool Completely: Remove cakes from oven and let cool in pans for 5 minutes. Then invert onto wire racks, peel off parchment, and allow to cool completely (at least 1–2 hours).
- Make Buttercream: In a large bowl, beat softened butter on medium speed until creamy (2 minutes). Gradually add sifted powdered sugar, 1 cup at a time, mixing on low. After all sugar is added, increase speed to high and beat for 3 minutes. Add vanilla, salt (if using), and 2 tbsp cream. Beat again until light and fluffy. Add more cream (up to 1 tbsp) if too stiff.
- Level the Cakes: Use a cake leveler or sharp knife to trim domed tops so layers are flat and stack evenly.
- Assemble the Cake: Place first layer (e.g., purple) on a cake board or plate. Spread a thin layer of buttercream (about ⅓ cup) using an offset spatula. Repeat with remaining layers in rainbow order: purple, blue, green, yellow, orange, red (red on top). Apply gentle pressure to align layers.
- Crumbs Coat (Crumb Coat): Apply a thin layer of buttercream over the entire cake to seal in crumbs. Chill in the refrigerator for 20–30 minutes until firm.
- Final Frosting: Apply a generous layer of buttercream over the crumb coat. Smooth sides and top with an offset spatula or bench scraper. For a polished finish, use a hot spatula wiped with a damp cloth.
- Pipe Buttercream Stars: Fill a piping bag fitted with a Wilton 1M star tip with remaining buttercream. Starting from the outer edge of the top, pipe swirl stars in a spiral pattern toward the center. You can also pipe stars around the side edge for extra flair.
- Chill Before Serving: Refrigerate the cake for at least 30 minutes to set the frosting. Let sit at room temperature for 20 minutes before slicing for cleaner cuts.
Tips for Success: Expert Advice for the Perfect Rainbow Cake
- Room Temperature Ingredients: Cold ingredients don’t emulsify well, leading to a curdled batter. Take butter, eggs, and milk out 1–2 hours before baking.
- Use Gel Food Coloring: Liquid dyes add moisture and may weaken the batter. Gel colors are concentrated and won’t affect texture.
- Don’t Overmix After Adding Flour: Once dry ingredients are added, mix only until combined. Overmixing = tough cake.
- Even Layering: Use a kitchen scale to divide batter equally. Uneven layers lead to tilting.
- Accurate Oven Temperature: Use an oven thermometer. Many ovens run hot or cold, affecting rise and color.
- Cool Completely Before Frosting: Warm cakes melt buttercream. Patience is key!
- Chill Between Steps: Crumb coating and chilling prevents sliding and smudging.
- Pipe with Confidence: Hold the piping bag at a 90-degree angle and apply steady pressure. Release pressure before lifting to avoid “nibs.”
- Storage Tip: Store leftover cake in an airtight container in the fridge for up to 5 days. Bring to room temperature before serving.
Variations and Customizations: Make It Your Own
This rainbow sponge cake is incredibly versatile. Here are some creative ways to personalize it:
- Flavor Twists: Infuse the cake with citrus zest (lemon or orange), almond extract, or a hint of coconut for tropical flair.
- Filling Options: Add layers of raspberry jam, lemon curd, or chocolate ganache between sponge layers for extra indulgence.
- Dietary Modifications:
- Gluten-Free: Substitute flour with a 1:1 gluten-free baking blend.
- Dairy-Free: Use plant-based butter and milk alternatives (like oat or almond milk), and dairy-free margarine in buttercream.
- Egg-Free: Replace each egg with ¼ cup unsweetened applesauce or commercial egg replacer.
- Vegan Version: Combine gluten-free flour, flax eggs (1 tbsp ground flax + 3 tbsp water per egg), non-dairy milk, vegan butter, and vegan food coloring.
- Mini Rainbow Cupcakes: Divide batter into muffin tins and bake for 15–18 minutes. Top with buttercream stars for adorable individual treats.
- Theme Decorations: Add edible glitter, rainbow sprinkles, fondant shapes, or fresh berries to match occasions like Pride, birthdays, or gender reveals.
- Color Order Reversal: Try ROYGBV (red on bottom) or arrange colors in ombré gradients for a soft effect.
- Chocolate Rainbow Cake: Add cocoa powder to one or more layers for a surprise chocolate stripe.
Health Considerations and Nutritional Value
While undeniably delicious, the Rainbow Sponge Cake with Buttercream Stars is a high-sugar, calorie-dense dessert best enjoyed in moderation. Here’s a nutritional estimate per slice (1/12th of an 8-inch cake):
| Nutrient | Amount per Slice |
|---|---|
| Calories | ~420 kcal |
| Total Fat | 22g |
| Saturated Fat | 13g |
| Cholesterol | 95mg |
| Sodium | 280mg |
| Total Carbohydrates | 54g |
| Dietary Fiber | 0.5g |
| Sugars | 42g |
| Protein | 4g |
Health Notes:
- Sugar Content: High due to both cake and buttercream. Consider reducing sugar slightly in the cake (down to 1¾ cups) or using natural sweeteners like monk fruit blend (though results may vary).
- Butter & Saturated Fat: Present in significant amounts. Opt for grass-fed butter or explore reduced-fat buttercreams using whipped cream or meringue-based frostings (like Italian buttercream).
- Allergens: Contains dairy, eggs, wheat, and soy (in most powdered sugars). Always label clearly for guests with allergies.
- Food Dyes: Artificial colors are safe in regulated amounts, but some prefer natural alternatives (beet juice, turmeric, spirulina). Note: Natural dyes may fade during baking and yield softer hues.
- Balanced Indulgence: Pair a small slice with fresh fruit or serve alongside herbal tea to balance richness.
Frequently Asked Questions (FAQ)
Can I make this cake ahead of time?
Yes! Bake cake layers up to 2 days in advance; wrap tightly in plastic and store at room temperature. Frost the day before serving. Fully assembled cake can be refrigerated for up to 3 days.
Why did my cake layers sink in the middle?
Common causes include underbaking, opening the oven too early, excess leavening, or under-creaming butter and sugar. Ensure accurate measurements and avoid sudden temperature changes.
How do I prevent my colors from bleeding?
Use gel colors sparingly and avoid overmixing. Chill layers slightly before stacking. A crumb coat acts as a barrier.
Can I freeze the cake?
Yes. Unfrosted layers freeze well for up to 3 months—wrap in plastic and foil. Thaw overnight before assembling. Frosted cake can be frozen but may experience slight texture changes in buttercream.
What if I don’t have 6 pans?
Bake in batches. Keep unused batter at room temperature and cover bowls. Re-grease and re-line pans between uses. Alternatively, halve the recipe for 3 layers.
Can I use a different frosting?
Absolutely! Cream cheese frosting adds tanginess, whipped chocolate ganache offers elegance, and Swiss meringue buttercream provides a less sweet option.
How many people does this serve?
A 6-inch, 6-layer cake serves 8–10 modestly. An 8-inch version serves 12–16.
Why use salted butter in buttercream?
It enhances flavor and balances sweetness. If using unsalted, add ¼–½ tsp salt to taste.
Summary
The Rainbow Sponge Cake with Buttercream Stars is a dazzling fusion of vibrant flavor, soft texture, and artistic decoration—perfect for celebrations of all kinds. With careful layering, stable buttercream, and a touch of patience, you can create a show-stopping dessert that delights both the eyes and the palate.