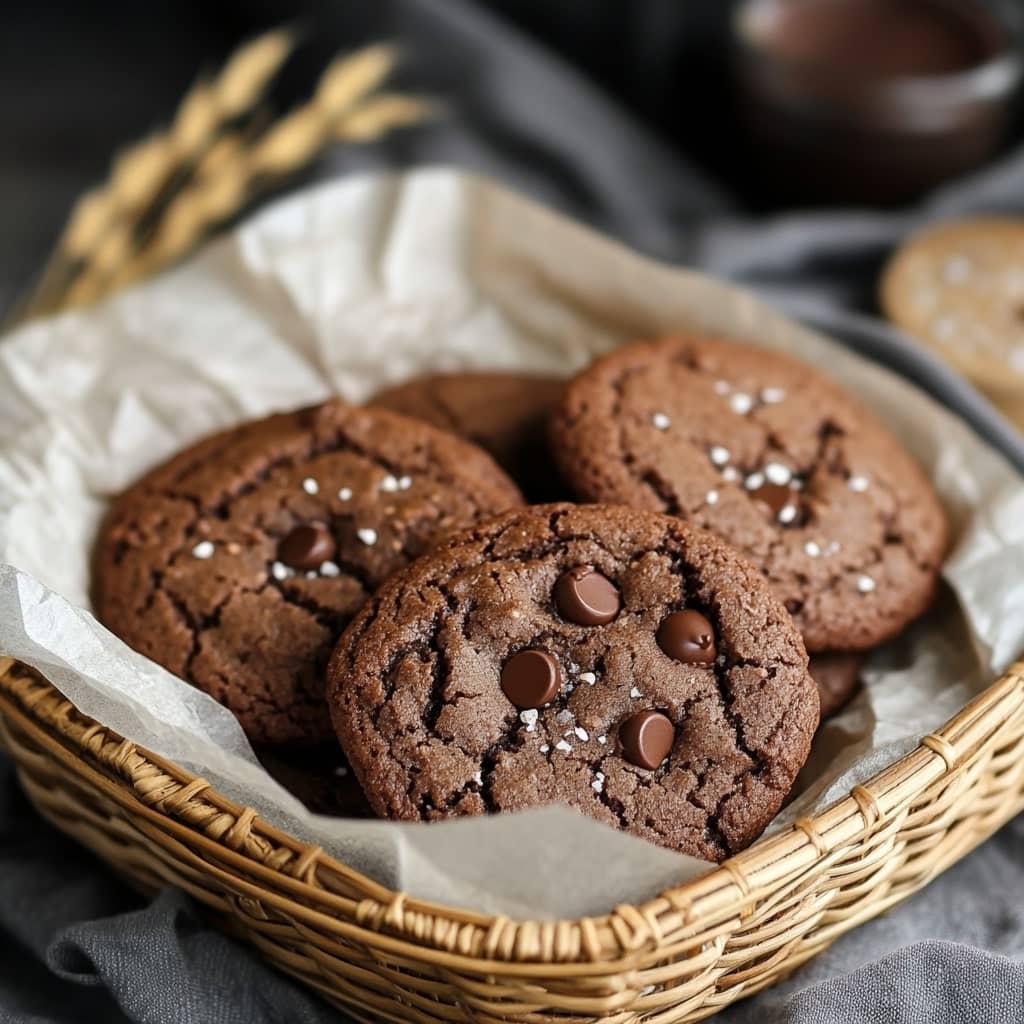
There’s nothing quite like the comfort of a warm, bakery-style chocolate cookie fresh from the oven—but what makes it even better is the ease of a one-bowl recipe that requires no chilling and minimal cleanup. These One-Bowl Bakery-Style Chocolate Cookies are thick, chewy, and packed with rich chocolate flavor, yet they come together in under 30 minutes from start to finish. Perfect for spontaneous baking sessions, weeknight treats, or last-minute dessert cravings, this recipe delivers professional-quality results with a simple, home-baker-friendly process. Whether you’re a seasoned baker or just starting out, these cookies offer big flavor and texture without the wait, making them a go-to recipe when you want impressive cookies in a hurry.
The History of No-Chill One-Bowl Cookies
The concept of one-bowl baking has gained major traction over the last couple of decades, especially with the rise of minimalist cooking and time-saving kitchen hacks. As more people began baking at home, particularly during the pandemic era, simplicity and efficiency became key ingredients in everyday recipes. One-bowl recipes eliminate the need for extra dishes and streamline the mixing process, making baking more approachable and less intimidating for beginners. Meanwhile, the trend toward no-chill cookie dough developed as a response to traditional recipes that require hours of refrigeration, offering a way to enjoy cookies faster without compromising texture. Marrying the one-bowl method with no-chill cookie dough was a natural evolution in modern baking, creating a fast, fuss-free path to bakery-style cookies that are crispy on the edges, soft in the center, and full of deep chocolate richness—perfect for today’s busy home bakers who still want indulgent, fresh-from-the-oven quality.
Ingredients Breakdown
- 1 cup (2 sticks or 226g) unsalted butter, melted and slightly cooled
- 1 cup (200g) packed brown sugar (light or dark)
- 1/2 cup (100g) granulated sugar
- 2 large eggs
- 2 teaspoons vanilla extract
- 2 and 1/4 cups (280g) all-purpose flour
- 3/4 cup (65g) unsweetened cocoa powder
- 1 teaspoon baking soda
- 1/2 teaspoon salt
- 1 and 1/2 cups (270g) semi-sweet or dark chocolate chips or chunks
Melted butter helps create a chewy, dense texture and allows for quick mixing without a mixer. Brown sugar adds moisture and depth, while granulated sugar provides structure and sweetness. Eggs help bind the dough and add richness. Vanilla enhances the overall flavor profile. All-purpose flour forms the dough’s base, while cocoa powder adds deep chocolate flavor. Baking soda ensures a gentle rise and soft texture, and salt balances the sweetness. Chocolate chips or chunks add bursts of melty, indulgent chocolate throughout the cookie for a truly bakery-style finish.
Step-by-Step Recipe
Begin by preheating your oven to 350°F (177°C) and lining baking sheets with parchment paper. In a large mixing bowl, whisk together the melted butter, brown sugar, and granulated sugar until smooth and glossy. Add in the eggs and vanilla extract and whisk again until fully combined. Sprinkle the flour, cocoa powder, baking soda, and salt directly over the wet ingredients. Using a rubber spatula or wooden spoon, gently fold the dry ingredients into the wet mixture until just combined—do not overmix. Stir in the chocolate chips or chunks until evenly distributed. Using a large cookie scoop or spoon, portion out the dough into balls (about 2–3 tablespoons each) and place them a few inches apart on the prepared baking sheets. Bake for 10–12 minutes, or until the edges are set but the centers still look slightly soft. Remove from the oven and let cookies cool on the baking sheet for 5 minutes before transferring to a wire rack to cool completely. Enjoy warm for gooey centers or store for later once cooled.
Tips for the Perfect Cookie
Use high-quality cocoa powder for the best chocolate flavor—Dutch-process cocoa can yield a richer color and smoother taste. Don’t skip letting the melted butter cool slightly before adding the sugars to avoid cooking the eggs. Mix the dough just until the ingredients come together; overmixing can result in tough cookies. For bakery-style presentation, press a few extra chocolate chips or chunks on top of the dough balls before baking. If you want a slightly thicker cookie, shape the dough into taller mounds rather than flattening them. Keep an eye on baking time—pull the cookies out when they look just underbaked in the center, as they will continue to cook on the sheet. These cookies freeze well both as dough balls and fully baked, making them ideal for make-ahead treats.
Variations and Customizations
This recipe is incredibly versatile and can be adapted in countless ways. Swap chocolate chips for white chocolate, peanut butter chips, or toffee bits for a twist. Stir in chopped nuts like walnuts, pecans, or hazelnuts for extra texture. Add a teaspoon of instant espresso powder to the dough to enhance the chocolate flavor and add complexity. Mix in dried fruit like cherries or cranberries for a sweet and tangy contrast. For a spicy variation, try adding a pinch of cayenne or cinnamon. Use gluten-free all-purpose flour to make a gluten-free version, or substitute a plant-based butter and flax eggs to make them dairy-free and vegan. Add a sprinkle of flaky sea salt on top before baking for a gourmet touch, or sandwich a scoop of ice cream between two cookies for an impressive dessert.
Health Considerations and Nutritional Value
As with most rich chocolate cookies, these are meant to be a treat and are best enjoyed in moderation. Each cookie can contain between 200 and 300 calories, depending on size and ingredients. The use of butter, sugar, and chocolate contributes to high saturated fat and sugar content. However, small changes can make the recipe slightly lighter: try reducing the sugar slightly, using dark chocolate with a higher cocoa content, or substituting half the butter with applesauce or mashed banana for less fat and added moisture. Those with dietary restrictions should check for allergens like dairy, gluten, and eggs, though substitutions are available. Despite being an indulgent dessert, these cookies can absolutely fit into a balanced diet when enjoyed responsibly and paired with nutritious meals.
FAQ
Can I make the dough ahead of time? Yes, though this recipe doesn’t require chilling, you can refrigerate the dough for up to 2 days. Let it sit at room temperature for 15–20 minutes before scooping and baking.
Can I freeze the cookie dough? Absolutely. Freeze pre-portioned dough balls on a baking sheet, then transfer to a freezer bag. Bake from frozen, adding 1–2 minutes to the bake time.
Why are my cookies not spreading? If the flour is overmeasured, it can prevent spreading. Spoon and level your flour, and don’t overmix the dough.
Can I use a mixer instead of mixing by hand? Yes, a stand or hand mixer works fine, but the recipe is designed to be mixed easily with just a whisk and spatula.
How do I store the cookies? Keep baked cookies in an airtight container at room temperature for up to 5 days. They also freeze well for longer storage.
Can I make these cookies smaller or larger? Definitely. Adjust the scoop size and baking time accordingly—smaller cookies bake faster, while larger ones may need a few more minutes in the oven.

One-Bowl Bakery-Style Chocolate Cookies (No Chill!)
Ingredients
- 1 ¾ cups 250g all-purpose flour
- ¾ teaspoon baking soda for thicker cookies, refer to the FAQ above about reducing this amount
- ¼ teaspoon salt increase to ¾ teaspoon if using unsalted butter
- 10 tablespoons 140g salted butter, softened to room temperature
- ¾ cup 165g packed dark brown sugar
- ⅓ cup plus 1 tablespoon 80g granulated sugar
- 1 teaspoon 5ml pure vanilla extract
- 1 teaspoon 5ml honey or light corn syrup (see Expert Tips above for more on these ingredients)
- 1 large egg at room temperature
- 7 oz 200g dark chocolate (55–70% cocoa), chopped into chunks, plus extra for topping
- Flaky sea salt optional, for sprinkling on top
- Note: For premium flavor and texture consider using single-origin couverture chocolate discs or chopping up your favorite 70% dark chocolate bars. If you prefer a milder taste, semisweet chocolate chips work wonderfully. For the most accurate results, it’s highly recommended to measure all ingredients by weight using a kitchen scale.
Instructions
- In a medium mixing bowl, whisk together the flour, baking soda, and salt until evenly combined. Set aside. In a separate large bowl—or the bowl of a stand mixer—add the softened butter, both sugars, and vanilla extract. Using the creaming method, mix vigorously by hand with a wide rubber spatula, pressing and smearing the butter into the sugars until the mixture becomes smooth and slightly fluffy. Alternatively, you can use a hand mixer, or a stand mixer fitted with the paddle attachment on medium-low speed for 1–2 minutes. The texture should resemble a thick paste or damp sand, not a light or overly aerated mixture. Stir in the honey, then mix in the egg until fully incorporated and smooth.
- Next, add the dry ingredients (the flour mixture) into the wet ingredients all at once. Stir gently until most of the flour is absorbed. Before the dough is fully combined, fold in the chopped chocolate chunks, continuing to stir just until everything is evenly mixed. The dough should be soft and slightly moist, but not sticky.
- Cover the surface of the dough directly with plastic wrap and refrigerate for at least 8 hours and up to 24 hours for the best flavor and texture. This rest period allows the ingredients to meld and the dough to firm up. If you’re in a hurry, you can bake the cookies after 4 hours of chilling, though for ideal results, 8 hours is strongly recommended.
- When you’re ready to bake, preheat the oven to 350°F (175°C) and line two large baking sheets with parchment paper. Scoop the chilled dough using a 1 ½-ounce cookie scoop and roll each portion into a smooth ball. If the dough feels too firm after refrigeration, let it sit at room temperature for 20–30 minutes until it’s easier to work with. If you don’t have a scoop, simply divide the dough into 16 equal portions. Arrange the dough balls on the prepared baking sheets, leaving about 2 inches of space between each. Do not flatten them before baking.
- Note: For slightly smaller cookies, divide the dough into 18 portions and reduce the baking time by 1–2 minutes.
- For an extra bakery-style touch, press a few additional chocolate chunks on top of each dough ball before baking. Bake six cookies per sheet for 9–11 minutes, or until the cookies are puffed, lightly golden around the edges, and still soft in the center. Avoid overbaking—they will continue to set up on the hot baking sheet after coming out of the oven. If baking the smaller cookies, check for doneness at 8–10 minutes. Once out of the oven, let the cookies rest on the baking sheets for 2 minutes before carefully transferring them to a wire rack to cool completely. While the cookies are still warm, sprinkle with flaky sea salt if desired for a final touch.

