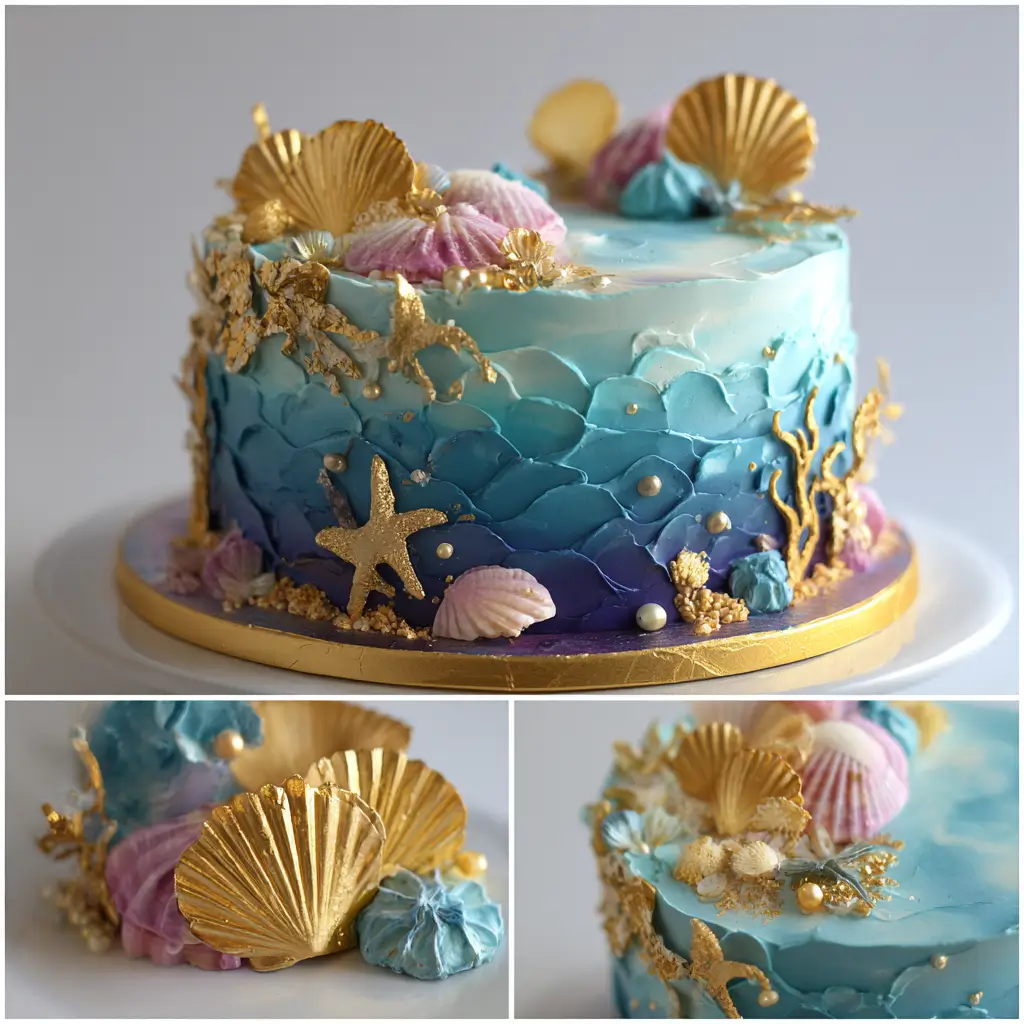
Ombre Sea-Ocean Cake with Mermaid Flair: A Magical Underwater Delight
Dive into a whimsical world beneath the waves with the breathtaking Ombre Sea-Ocean Cake with Mermaid Flair—a stunning dessert that captures the essence of the deep blue sea, shimmering coral reefs, and the mystical allure of mermaids. This cake isn’t just a treat for the taste buds; it’s a visual masterpiece perfect for birthdays, baby showers, under-the-sea-themed parties, or any occasion where magic and fantasy take center stage. With its cascading ombre layers mimicking the ocean’s depths, edible pearls, shimmering luster dust, seashell accents, and vibrant colors ranging from aquamarine to midnight navy, this cake is as enchanting as a mermaid’s song.
The History: From Oceanic Inspiration to Baking Artistry
While cakes have been celebrated in human culture for centuries, themed and decorative baking reached new heights in the 20th century with the rise of food coloring, fondant, and airbrushing techniques. The concept of an “ocean cake” likely emerged from seaside celebrations, nautical themes, and children’s fascination with marine life. However, the modern interpretation of the Ombre Sea-Ocean Cake with Mermaid Flair owes much to pop culture phenomena like Disney’s *The Little Mermaid*, the resurgence of mermaidcore aesthetics in fashion and design, and social media platforms such as Pinterest and Instagram, where bakers showcase their edible artistry.
The use of ombre effects—gradually blending one color into another—originated in textiles and painting but was later adopted by pastry chefs to create depth and realism in cakes. When applied to oceanic designs, the ombre technique beautifully represents how light fades as you descend into the sea: from sunlit turquoise at the surface to mysterious indigo in the abyss. Combined with mermaid elements—pearls, scales, seashells, and flowing hair—this cake transcends dessert and becomes a centerpiece of storytelling and imagination.
Ingredients Breakdown: Crafting the Depths of the Sea
To create a cake that looks like it was pulled from Neptune’s palace, you’ll need both classic baking staples and specialty ingredients that add sparkle, color, and texture. Below is a detailed breakdown of every component:
Cake Layers (Vanilla Base):
- 2 ½ cups (315g) all-purpose flour
- 2 ½ tsp baking powder
- ½ tsp salt
- ¾ cup (170g) unsalted butter, softened
- 2 cups (400g) granulated sugar
- 4 large eggs, room temperature
- 1 tbsp pure vanilla extract
- 1 cup (240ml) whole milk, room temperature
- ½ cup (120g) sour cream or Greek yogurt (for moisture)
Ombre Coloring (Ocean Gradient):
- Gel food coloring in sky blue, aqua, teal, royal blue, and navy (avoid liquid coloring—it can alter batter consistency)
Mermaid Buttercream Frosting:
- 2 cups (450g) unsalted butter, softened
- 8 cups (960g) powdered sugar, sifted
- ¼ cup (60ml) heavy cream or milk
- 2 tsp vanilla extract
- Pinch of salt
- Luster dust in pearl, silver, seafoam green, and iridescent blue (food-safe)
- Edible glitter or shimmer spray (optional)
Decorative Elements:
- Edible seashells (sugar or chocolate)
- Edible pearls (available in craft stores or online)
- Blue, purple, and green sanding sugar or sprinkles
- Sea creature toppers (mermaids, dolphins, starfish—edible or non-edible if not consumed)
- Crystal-clear rock candy “coral” pieces
- Modeling chocolate or fondant for scale details
- Edible paint (for hand-painted details on fondant)
- 24k gold or silver leaf flakes (optional, for luxury accent)
Step-by-Step Recipe: Building Your Underwater Masterpiece
Step 1: Bake the Cake Layers
- Preheat oven to 350°F (175°C). Grease and line three 8-inch round cake pans with parchment paper.
- In a bowl, whisk together flour, baking powder, and salt. Set aside.
- Cream butter and sugar until light and fluffy (about 3–5 minutes).
- Add eggs one at a time, mixing well after each. Stir in vanilla.
- Alternate adding dry ingredients and milk in three parts, beginning and ending with dry. Mix until just combined.
- Stir in sour cream for extra moisture.
- Divide batter evenly into five separate bowls (one for each ombre shade).
- Color each bowl with increasing amounts of blue gel: start with a tiny drop for pale blue, then gradually increase to achieve aqua, teal, royal blue, and navy.
- Pour each colored batter into prepared pans. Tap gently to remove bubbles.
- Bake for 20–25 minutes or until a toothpick comes out clean. Cool completely before assembling.
Step 2: Prepare Mermaid Buttercream
- Cream butter until smooth. Gradually add powdered sugar, one cup at a time, beating on low.
- Add vanilla, salt, and cream. Whip on high for 3–5 minutes until fluffy.
- Divide frosting into portions. Tint one portion a soft seafoam green, another pale blue, and leave the rest white.
- Sprinkle in luster dust gradually, mixing until the frosting shimmers like ocean waves. Reserve some plain white for crumb coat.
Step 3: Assemble the Ombre Cake
- Level each cooled cake layer with a serrated knife.
- Place the darkest (navy) layer on a cake board or turntable. Add a dollop of white frosting and spread evenly.
- Stack royal blue, then teal, aqua, and finish with the palest blue on top.
- Apply a thin crumb coat using plain white frosting. Chill for 30 minutes.
- Refrigerate the cake to set the crumb coat.
Step 4: Frost and Decorate
- Frost the entire cake with shimmering sea-colored buttercream. Use an offset spatula for smooth sides and a bench scraper for clean edges.
- For a wave-like texture, use a spoon or comb to create ripples around the base and middle.
- Begin decorating: press edible pearls in clusters, place seashells asymmetrically, and sprinkle sanding sugar along the bottom tier like shoreline foam.
- Attach fondant or chocolate mermaid scales around the base or cascade them down one side.
- Add rock candy “coral” clusters near the base. Insert edible sea creatures carefully.
- Spray lightly with edible shimmer mist for a dewy, underwater glow.
- Hand-paint fine details (like kelp or fish) using edible food paints.
Tips for Perfection: Secrets from the Deep
- Use gel colors: Liquid dyes dilute batter and weaken structure. Gel maintains consistency and provides intense color.
- Chill layers before stacking: Cold cakes are less prone to crumbling and sliding.
- Rotate while frosting: Use a cake turntable for even application and professional swirls.
- Work in a cool room: Warm temperatures can melt buttercream and dull luster effects.
- Plan your ombre order: Arrange layers from dark (bottom) to light (top) to mimic ocean depth.
- Practice piping: Use star tips to create wave patterns or rosettes resembling sea foam.
- Secure decorations: Use a dab of frosting or edible glue to anchor heavier items like fondant mermaids.
Variations and Customizations: Make It Your Own Lagoon
This cake is highly customizable to suit different tastes, dietary needs, and themes:
- Chocolate Version: Substitute vanilla cake with chocolate. Use deep blue and violet hues for a moonlit ocean effect.
- Gluten-Free: Replace all-purpose flour with a 1:1 gluten-free blend. Ensure other ingredients are certified GF.
- Vegan Option: Use plant-based butter, flax eggs, almond milk, and vegan sugar. Opt for dairy-free whipped topping instead of buttercream.
- Flavor Twists: Infuse cake with coconut milk for a tropical touch or add lemon zest for a crisp, sea-breeze flavor.
- Theme Variations: Turn it into a pirate treasure cake with gold coins, or a coral reef celebration with bright pink and orange accents.
- Kid-Friendly: Use gummy sea animals, colorful sprinkles, and avoid small choking hazards for little ones.
- Adult Elegance: Add a splash of blue curaçao to the simple syrup for brushing layers, or serve with champagne.
Health Considerations and Nutritional Value
While undeniably indulgent, this cake can be adapted for better nutritional balance:
- Sugar Content: High due to frosting and decorations. Consider reducing sugar in batter or using a sugar substitute like erythritol for diet-conscious versions.
- Butter and Fat: Significant saturated fat from butter. Can be partially replaced with avocado or applesauce in the cake (not recommended for frosting).
- Allergens: Contains dairy, eggs, wheat, and potential soy (in food coloring). Always label clearly for guests.
- Portion Control: Serve small slices—the richness means a little goes a long way.
- Nutritional Estimate (per slice, 1/12 of cake): ~450–550 calories, 20g fat, 65g carbohydrates, 5g protein. Values vary based on ingredients and frosting amount.
- Edible Decorations: Ensure all luster dust, glitter, and paints are labeled “edible” and FDA-approved. Non-edible toppers should be removed before serving.
Ingredients
(Full list consolidated for shopping convenience)
- 2 ½ cups all-purpose flour (or GF substitute)
- 2 ½ tsp baking powder
- ½ tsp salt
- ¾ cup unsalted butter (plus 2 cups for frosting)
- 2 cups granulated sugar
- 4 large eggs
- 1 tbsp vanilla extract (plus 2 tsp more)
- 1 cup whole milk (or alternative)
- ½ cup sour cream or Greek yogurt
- 8 cups powdered sugar
- ¼ cup heavy cream or milk
- Pinch of salt
- Gel food coloring: sky blue, aqua, teal, royal blue, navy
- Luster dust: pearl, silver, seafoam, iridescent blue
- Edible glitter or shimmer spray
- Edible seashells, pearls, sprinkles, sanding sugar
- Sea creature toppers (edible preferred)
- Rock candy pieces or clear crystals
- Modeling chocolate or fondant (optional)
- Edible paints and brushes
- Gold or silver leaf (optional)
Directions
Condensed step-by-step guide for quick reference:
- Preheat oven to 350°F. Prepare three 8-inch cake pans.
- Mix dry ingredients. Cream butter and sugar, then add eggs and vanilla.
- Alternate dry mix and milk into batter. Stir in sour cream.
- Divide batter into 5 bowls. Color each with increasing blue gel to create ombre shades.
- Bake layers 20–25 min. Cool completely.
- Make buttercream: beat butter, gradually add powdered sugar, cream, vanilla, and salt.
- Tint portions with luster dust for shimmer. Reserve plain white for crumb coat.
- Level cakes. Stack from darkest (bottom) to lightest (top) with frosting between layers.
- Apply crumb coat. Chill 30 minutes.
- Frost with shimmering colored buttercream. Smooth with bench scraper.
- Decorate: add pearls, shells, sprinkles, coral, and sea creatures.
- Enhance with edible glitter spray and hand-painted details.
- Chill 1 hour before serving. Slice with a warm knife for clean cuts.
FAQ
Can I make this cake ahead of time?
Yes! Bake layers up to 2 days in advance and store wrapped at room temperature. Frost and decorate the day before the event. Store refrigerated, then bring to room temperature 1–2 hours before serving for best texture.
How do I prevent my ombre layers from bleeding color?
Ensure each layer is fully cooled before stacking. A crumb coat acts as a barrier. Avoid over-saturating batter with color—gel dyes are potent.
Can I use whipped cream instead of buttercream?
You can, but it won’t hold decorations as well and has a shorter shelf life. Stabilized whipped cream (with gelatin) works better for warm environments.
Are luster dust and edible glitter safe?
Only if labeled “edible” and purchased from reputable baking suppliers. Non-toxic craft glitter is NOT safe for consumption.
How do I transport this cake?
Use a sturdy cake box with non-slip mat. Keep refrigerated if frosted with buttercream. Drive slowly and keep the cake level.
Can I freeze the cake layers?
Yes. Wrap cooled layers tightly in plastic and foil. Freeze up to 1 month. Thaw overnight in fridge before frosting.
Summary
The Ombre Sea-Ocean Cake with Mermaid Flair is a mesmerizing fusion of culinary art and oceanic fantasy, featuring gradient blue layers that evoke the shifting tides and dazzling edible embellishments that bring mermaid mythology to life. Whether for a child’s birthday or an elegant soirée, this cake promises to captivate every guest with its beauty, flavor, and magical aura.