Introduction
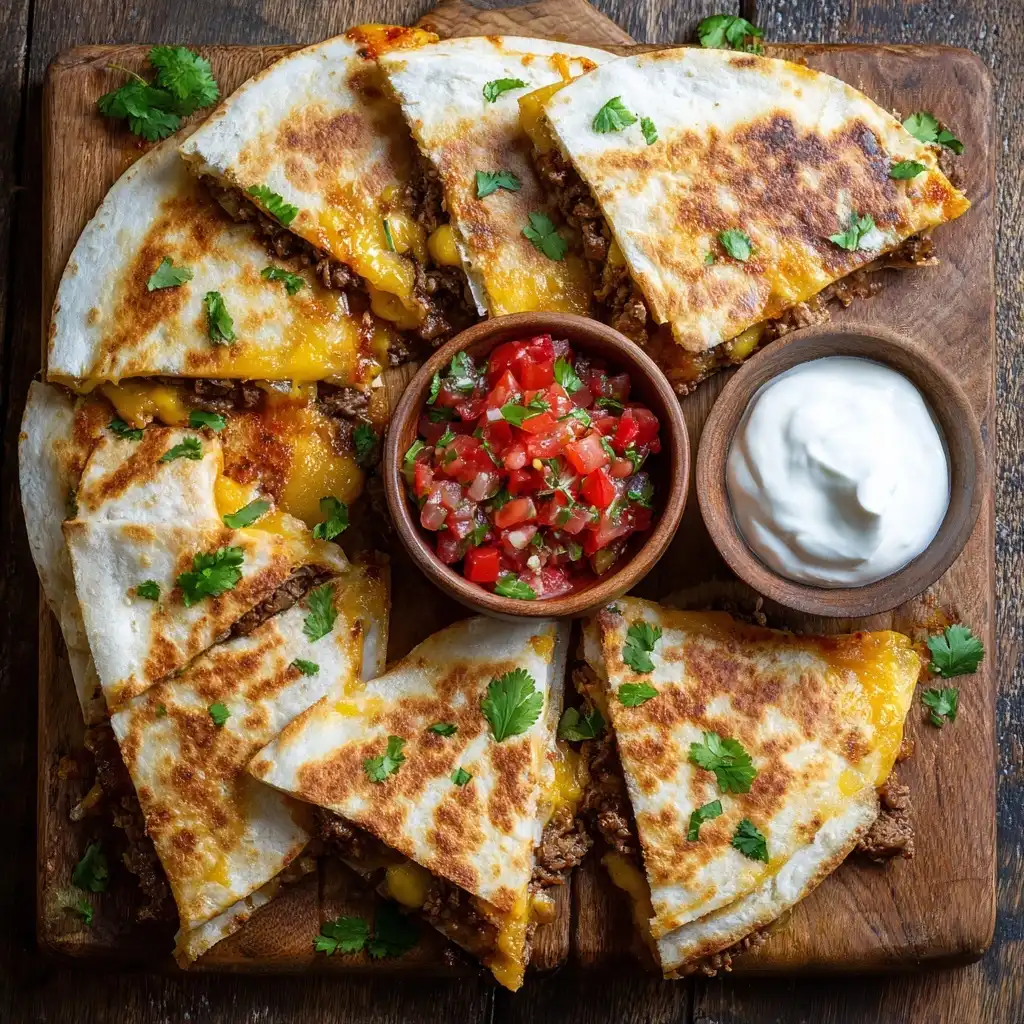
Mini Sheet Pan Quesadillas are the ultimate crowd-pleasing, time-saving, and flavor-packed twist on the beloved Mexican classic. Designed for effortless entertaining, weeknight dinners, meal prep, or even playful brunches, these bite-sized, golden-brown delights combine melty cheese, customizable fillings, and perfectly crisp tortillas—all baked uniformly on a single sheet pan. Unlike traditional stovetop quesadillas that require individual flipping and constant attention, this innovative method delivers consistent results with minimal hands-on effort, zero greasy splatter, and maximum surface-area browning. Whether you’re feeding a family of four or hosting a party of twenty, Mini Sheet Pan Quesadillas scale beautifully, reheat exceptionally well, and invite endless creativity—making them not just a recipe, but a versatile culinary platform rooted in convenience without compromise.
The History
While the exact origins of the quesadilla trace back to 16th-century colonial Mexico—where Spanish settlers introduced dairy (particularly cheese) to indigenous Mesoamerican corn tortillas—the modern miniaturized, sheet-pan-baked iteration is a distinctly 21st-century American kitchen evolution. Traditional quesadillas were humble, regional staples: in central Mexico, they often featured simple queso fresco folded into soft corn tortillas over comal heat; in northern Mexico, flour tortillas and aged cheeses like asadero became standard. The shift toward mini versions began gaining traction in the early 2000s with the rise of appetizer culture, tapas-style dining, and children’s menus demanding portion-controlled, easy-to-handle bites. However, it wasn’t until the mid-2010s—fueled by food blogs, viral Pinterest pins, and the “meal prep revolution”—that home cooks began experimenting with batch-baking quesadillas en masse. The sheet pan method emerged as a brilliant solution to common pain points: uneven cooking, cheese leakage, tortilla tearing, and the sheer tedium of assembling dozens individually. Influenced by trends like “sheet pan everything,” “build-your-own” dining, and the growing demand for freezer-friendly, make-ahead snacks, Mini Sheet Pan Quesadillas represent a perfect fusion of heritage technique and contemporary lifestyle needs—honoring tradition while boldly optimizing for real-world kitchens.
Ingredients Breakdown
Understanding each component is key to mastering texture, flavor balance, and structural integrity in Mini Sheet Pan Quesadillas. Below is a detailed, chef-level analysis of every ingredient—not just what to use, but *why* and *how* it functions:
- Tortillas: Use 8–10 inch flour tortillas (not “burrito size” or “street taco” size)—they offer ideal pliability, structural strength when folded, and optimal surface area for even browning. Look for brands with simple ingredients (flour, water, salt, oil) and avoid those with excessive gums or preservatives, which can cause gumminess or uneven crisping. Corn tortillas *can* be used for gluten-free versions but require extra care—they’re more fragile and benefit from brief dry-heating before assembly to improve foldability.
- Cheese: A blend is non-negotiable for superior melt, stretch, and flavor depth. Start with a high-moisture, excellent-melting base like Monterey Jack or Oaxaca (for authentic stringiness), then layer in a flavorful accent—sharp cheddar for tang, pepper jack for heat, cotija for salty funk, or smoked gouda for complexity. Avoid pre-shredded cheese—it contains anti-caking starches (e.g., cellulose) that inhibit melting and create grainy textures. Always grate fresh.
- Fats: Butter (unsalted, for control) provides rich browning and tender crispness; clarified butter or ghee raises the smoke point for deeper golden color without burning. Neutral oils like avocado or light olive oil work well for dairy-free versions and add subtle sheen. Never skip the fat—it’s essential for Maillard reaction development and preventing sticking.
- Fillings: Moisture control is critical. Pre-cook all vegetables (onions, peppers, mushrooms, zucchini) to drive off excess water—raw veggies steam the tortilla and cause sogginess. Proteins (shredded chicken, ground turkey, black beans, chorizo) must be fully cooked and patted dry. Fresh herbs (cilantro, epazote) and acidic elements (lime zest, pickled jalapeños) should be added *after baking* to preserve brightness.
- Seasonings: Salt is foundational—not just for flavor, but for protein denaturation (helping cheese bind). Garlic powder, onion powder, cumin, and smoked paprika add warmth and depth, while a pinch of cayenne or chipotle powder introduces layered heat. Freshly ground black pepper adds aromatic complexity that pre-ground lacks.
- Finishing Touches: These elevate the experience post-bake: flaky sea salt (Maldon), lime wedges, crema or sour cream drizzle, pickled red onions, avocado slices, or micro cilantro. They add contrast in temperature, texture, acidity, and freshness—balancing the richness of melted cheese and toasted tortilla.
Step-by-Step Recipe
- Prep & Preheat: Position oven rack in the upper third of your oven. Preheat to 425°F (220°C). Line a standard 18″ x 13″ rimmed half-sheet pan with parchment paper—*do not use foil*, as it conducts heat too aggressively and causes uneven browning. Lightly grease the parchment with 1 tbsp melted butter or oil.
- Tortilla Prep: Stack 8–10 flour tortillas and cover with a slightly damp kitchen towel. Microwave on high for 15–20 seconds to enhance pliability—this prevents cracking when folding. Let rest covered for 2 minutes to steam gently.
- Cheese Grating & Blending: Using a box grater, finely shred 3 cups total cheese (e.g., 2 cups Monterey Jack + 1 cup sharp cheddar). Toss with 1 tsp garlic powder, 1 tsp onion powder, ½ tsp ground cumin, ¼ tsp chipotle powder, and 1 tsp fine sea salt. This ensures even seasoning distribution and prevents clumping.
- Assembly Line Setup: Lay one tortilla flat on a clean work surface. Sprinkle 2 heaping tbsp of seasoned cheese evenly over half the tortilla, leaving a ½-inch border. Add 1 tbsp of *pre-cooked, cooled, and patted-dry filling* (e.g., shredded chicken, sautéed peppers & onions, black beans) directly over the cheese. Top with another 1 tbsp cheese to “seal” the filling. Fold the bare half over the filling to create a half-moon shape. Gently press edges to adhere. Repeat for all tortillas—aim for uniform size and thickness.
- Sheet Pan Arrangement: Place folded quesadillas seam-side down on the prepared sheet pan in a single layer, spaced ½ inch apart to allow for air circulation and even browning. If making more than 12, use two pans—overcrowding creates steam and yields soggy bottoms.
- Butter Basting: In a small bowl, whisk together 4 tbsp melted unsalted butter, 1 tbsp neutral oil (to stabilize), and ¼ tsp smoked paprika. Using a pastry brush, generously coat the *top* of each quesadilla with this mixture—covering every surface ensures full caramelization and prevents drying.
- Baking: Bake for 12–14 minutes, rotating the pan front-to-back at the 7-minute mark. Quesadillas are done when golden brown and deeply crisp on the bottom, with visible bubbling and slight browning along the folded edge. The internal temperature should reach 165°F (74°C) if using meat fillings.
- Cooling & Cutting: Remove pan from oven and let quesadillas rest undisturbed for 3 minutes—this allows residual heat to finish melting cheese and sets the structure. Using a sharp, serrated knife or pizza cutter, slice each half-moon into 3 equal “mini triangles” (or 2 rectangles for kid-friendly shapes). For clean cuts, wipe the blade between slices.
- Finishing: Immediately after cutting, sprinkle with flaky sea salt and a squeeze of fresh lime juice. Serve warm with dipping sauces on the side.
Tips
- Chill Before Baking (Game-Changer): After assembling, place the sheet pan in the freezer for 10–15 minutes. This firms up the cheese and butter, minimizing leakage and promoting crisper edges.
- The “Double-Bake” Trick for Ultimate Crispness: After initial bake, flip each quesadilla using a thin offset spatula, brush the newly exposed top with more butter-oil mix, and bake 2–3 minutes more. This yields double-crisped, shatteringly golden results.
- Moisture Is the Enemy—Always Dry Fillings: Pat proteins and pre-cooked veggies *thoroughly* with paper towels—even a little moisture turns crisp tortillas leathery. For beans, rinse, drain, and spread on a towel-lined plate for 5 minutes.
- Don’t Overfill—Less Is More: Stick to ≤1.5 tbsp total filling per quesadilla. Overstuffing causes bursting, uneven cooking, and messy handling.
- Use a Bench Scraper for Effortless Removal: When cooling, slide a thin, flexible bench scraper under each quesadilla to lift cleanly off parchment—no breaking or sticking.
- Keep Warm Without Sogginess: To hold for serving, place on a wire rack set over a baking sheet in a 200°F (95°C) oven for up to 20 minutes. Never cover with foil—trapped steam softens the crust.
- Freezer-Friendly Assembly: Assemble unbaked quesadillas, freeze solid on parchment-lined trays, then transfer to labeled freezer bags. Bake straight from frozen—add 3–5 minutes to bake time and brush with butter *after* removing from freezer (cold butter won’t adhere well).
- Perfect Browning = Right Rack Position: Baking too low yields pale, doughy bottoms; too high burns tops before insides melt. Upper-third rack ensures balanced radiant heat from above and convection from below.
Variations and Customizations
Mini Sheet Pan Quesadillas thrive on personalization—here’s how to adapt them for every palate, diet, and occasion:
- Dietary Adaptations: Gluten-Free: Use certified GF flour tortillas (like Siete Almond Flour or Mission GF) and verify all seasonings are GF. Dairy-Free: Substitute vegan shreds (Violife or Daiya) + nutritional yeast (2 tbsp per cup cheese) for umami depth; use refined coconut oil or avocado oil for brushing. Low-Carb/Keto: Swap tortillas for large, low-carb almond flour “tortilla chips” or thinly sliced, grilled zucchini rounds—layer cheese and fillings, then bake until set.
- Global Flavor Twists: Mediterranean: Feta + spinach + sun-dried tomatoes + oregano + lemon zest. Indian-Inspired: Paneer + roasted cauliflower + garam masala + cilantro chutney drizzle. Korean BBQ: Gochujang-marinated beef + kimchi (well-drained) + scallions + sesame seeds. Breakfast Style: Scrambled eggs + crispy bacon + cheddar + chives + hot sauce swirl.
- Texture Upgrades: Add crunch with toasted pepitas, crushed tortilla chips, or fried shallots pressed into the buttered top before baking. For chewiness, fold in small pieces of dried mango or cranberries with savory fillings.
- Vegetarian & Vegan Stars: Roasted sweet potato + black bean + chipotle + cotija (vegetarian) or lentil-walnut “chorizo” + caramelized onions + cashew queso (vegan). Add 1 tsp apple cider vinegar to vegan fillings for brightness.
- For Kids & Picky Eaters: Keep fillings mild (mozzarella + ham + apple slices), cut into fun shapes (use mini cookie cutters *before* baking), or serve deconstructed—offer warm tortilla wedges, cheese shreds, and toppings for DIY assembly.
- Brunch & Party Editions: Add a thin layer of cream cheese + smoked salmon + capers + dill before folding. Or go decadent: brie + fig jam + arugula (added post-bake) + honey drizzle.
- Make-Ahead & Meal Prep Hacks: Bake plain cheese-only versions, freeze, then reheat and customize with fresh toppings weekly. Or prepare “filling kits”—pre-portioned, labeled freezer bags of cooked fillings ready to thaw and assemble in minutes.
Health Considerations and Nutritional Value
Mini Sheet Pan Quesadillas can be both indulgent *and* nutritionally thoughtful—with mindful ingredient choices, they deliver balanced macros, functional nutrients, and smart portion control. Here’s a detailed nutritional profile and evidence-based guidance:
- Calorie Awareness: A standard mini quesadilla (1/3 of a 10-inch tortilla, ¼ cup cheese, lean protein) ranges from 120–180 calories—ideal for snacks or appetizers. Swapping whole wheat or sprouted grain tortillas adds 2–3g fiber per serving, supporting satiety and gut health.
- Protein Power: Cheese provides complete protein (casein + whey), while added beans, lentils, or poultry boost totals to 8–12g per mini serving—excellent for muscle maintenance and blood sugar stability. Pairing with fiber-rich fillings slows digestion for sustained energy.
- Smart Fat Strategy: While cheese and butter contribute saturated fat, using grass-fed dairy or adding avocado-based spreads introduces heart-healthy monounsaturated fats and potassium. Limit butter to ½ tsp per quesadilla (≈35 calories) and emphasize flavor-forward spices instead of excess fat.
- Sodium Savvy: Store-bought tortillas and cheeses vary wildly in sodium. Opt for low-sodium tortillas (<200mg/serving) and natural, minimally processed cheeses (avoid American singles or cheese spreads). Boost flavor with herbs, citrus, and spice blends instead of salt.
- Vegetable Integration: Sneak in 2–3 servings of veggies per batch: finely grated carrots, zucchini, or spinach blend seamlessly into cheese without altering texture. Roasted bell peppers or caramelized onions add antioxidants (vitamin C, lycopene) and natural sweetness.
- Gut Health Friendly: Adding fermented elements like well-drained sauerkraut, kimchi, or pickled red onions introduces probiotics and digestive enzymes. Just add *after* baking to preserve live cultures.
- Allergen Notes: Naturally nut-free and soy-free (if avoiding soy-based cheeses). For dairy sensitivity, explore lactose-free cheeses (aged cheddar, Swiss) or A2 milk cheeses, which many find easier to digest.
- What to Limit: Excessive cheese (beyond ¼ cup per quesadilla), high-sodium processed meats (opt for nitrate-free turkey or grilled shrimp), and sugary sauces (swap ketchup for tomato salsa or roasted garlic aioli).
Nutrition Facts (per mini quesadilla, average): Calories: 145 | Protein: 9g | Total Fat: 7g (Saturated: 4g) | Carbohydrates: 11g (Fiber: 1g, Sugar: 0.5g) | Sodium: 280mg | Calcium: 15% DV | Vitamin A: 8% DV
Ingredients
- 8–10 (8–10 inch) high-quality flour tortillas (look for simple ingredients: enriched wheat flour, water, vegetable oil, salt)
- 3 cups freshly grated cheese blend (e.g., 2 cups Monterey Jack + 1 cup sharp white cheddar)
- 1½–2 cups pre-cooked, cooled, and thoroughly patted-dry filling of choice (see Variations section)
- 4 tablespoons unsalted butter, melted
- 1 tablespoon neutral oil (avocado, grapeseed, or light olive oil)
- 1 teaspoon garlic powder
- 1 teaspoon onion powder
- ½ teaspoon ground cumin
- ¼ teaspoon chipotle powder (or smoked paprika for milder heat)
- 1 teaspoon fine sea salt (plus more for finishing)
- Flaky sea salt (Maldon or fleur de sel), for finishing
- Fresh lime wedges, for serving
- Optional garnishes: chopped fresh cilantro, pickled red onions, avocado slices, crumbled cotija
Directions
- Preheat oven to 425°F (220°C). Line a standard 18″ x 13″ rimmed half-sheet pan with parchment paper. Lightly grease parchment with 1 tablespoon of the melted butter/oil mixture.
- In a medium bowl, combine grated cheeses with garlic powder, onion powder, cumin, chipotle powder, and 1 teaspoon fine sea salt. Toss thoroughly until evenly distributed.
- Stack tortillas and cover with a damp kitchen towel. Microwave on high for 15–20 seconds. Let stand covered for 2 minutes to steam and soften.
- Working with one tortilla at a time, lay flat on a clean surface. Sprinkle 2 heaping tablespoons of seasoned cheese over half the tortilla, leaving a ½-inch border. Add 1 tablespoon of prepared filling centered over cheese, then top with another 1 tablespoon of cheese. Fold uncovered half over filling to form a half-moon. Gently press edges to seal. Repeat with remaining tortillas.
- Arrange folded quesadillas seam-side down on prepared sheet pan in a single layer, spaced ½ inch apart.
- In a small bowl, whisk together remaining 3 tablespoons melted butter, 1 tablespoon neutral oil, and ¼ teaspoon smoked paprika. Brush generously over the top of each quesadilla.
- Bake for 12–14 minutes, rotating pan front-to-back at 7 minutes, until deeply golden brown, crisp on the bottom, and bubbling at the edges.
- Remove from oven and let rest on pan for 3 minutes. Using a sharp serrated knife or pizza cutter, cut each half-moon into 3 equal mini triangles (or 2 rectangles).
- Immediately sprinkle with flaky sea salt and a light squeeze of fresh lime juice. Serve warm with desired garnishes and dipping sauces.
FAQ
- Can I make these ahead and reheat?
- Absolutely! Fully baked quesadillas reheat beautifully. Cool completely, store in an airtight container with parchment between layers, and refrigerate up to 4 days. Reheat on a parchment-lined sheet pan at 375°F (190°C) for 8–10 minutes—or in an air fryer at 350°F (175°C) for 4–5 minutes—until crisp and warmed through. Avoid microwaving, which makes them rubbery.
- Why do my quesadillas leak cheese?
- Cheese leakage usually stems from three causes: (1) Overfilling—stick to ≤1.5 tbsp filling per quesadilla; (2) Insufficient cheese “seal”—always top fillings with a final layer of cheese to act as glue; (3) Under-chilled assembly—freezing assembled pan for 10 minutes before baking firms up the cheese matrix dramatically.
- Can I use corn tortillas?
- Yes—but with adjustments. Use 6-inch corn tortillas, briefly heat each on a dry skillet for 15 seconds per side to improve pliability, and assemble immediately. Reduce bake time to 10–12 minutes, as corn tortillas crisp faster and can become brittle. Best for vegetarian or vegan versions.
- What’s the best cheese for maximum melt?
- Oaxaca and Asadero lead for authentic stretch and creaminess. For accessibility, Monterey Jack, young Gouda, or Fontina offer excellent melt with mild flavor. Avoid aged cheeses (Parmesan, aged cheddar) alone—they don’t melt smoothly. Blend them (≤25% of total) for flavor, not function.
- Can I cook these on the stovetop instead?
- You can—but you’ll lose the defining benefits of the sheet pan method: uniformity, hands-off baking, and crisp-all-over texture. Stovetop requires constant monitoring, flipping, and yields variable results. Reserve stovetop for 1–2 quesadillas; use sheet pan for 6+.
- How do I prevent soggy bottoms?
- Sogginess comes from trapped steam. Ensure your sheet pan is *rimmed* (not jelly roll), use parchment (not foil), space quesadillas properly, and never cover while cooling. Also, always pre-cook and dry wet fillings—this is the #1 fix.
- Are these freezer-friendly?
- Yes—both baked and unbaked. For unbaked: Freeze assembled on parchment-lined tray, then bag. Bake from frozen +3–5 min. For baked: Freeze cooled, then reheat as directed above. They maintain texture and flavor remarkably well for up to 3 months.
- What dipping sauces pair best?
- Go beyond basic salsa: Chipotle-lime crema (sour cream + chipotle in adobo + lime zest), roasted tomatillo verde sauce, mango-habanero jam thinned with lime juice, black bean & cumin hummus, or even a light avocado-cilantro vinaigrette.
Summary
Mini Sheet Pan Quesadillas are a revolutionary, scalable, and endlessly adaptable take on a timeless favorite—transforming a traditionally labor-intensive dish into a crisp, golden, crowd-pleasing masterpiece with minimal active time and maximum flavor impact. By leveraging smart techniques like pre-chilling, moisture control, strategic cheese blending, and precision baking, they deliver restaurant-quality texture and taste straight from your home oven—proving that convenience and culinary excellence aren’t mutually exclusive.