Introduction
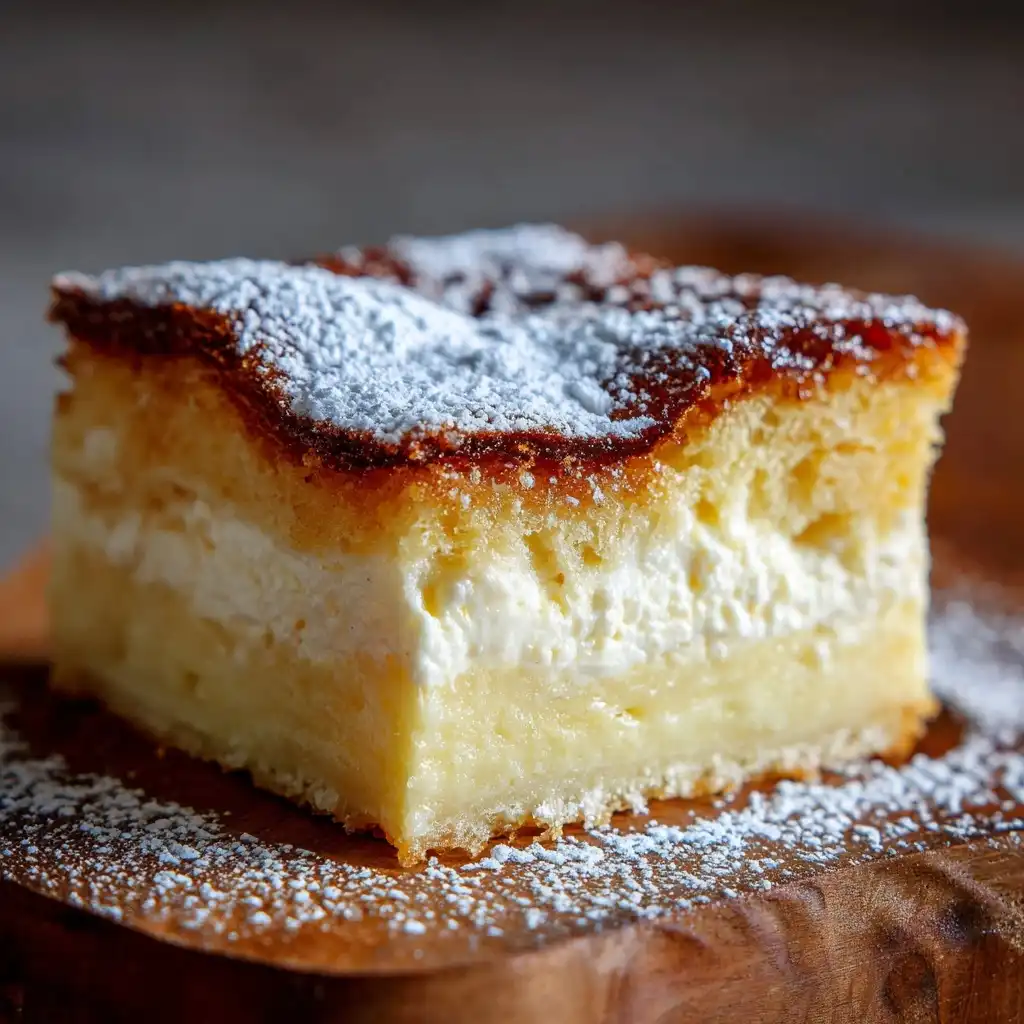
Magic Cake—also known as “Triple-Layer Cake,” “Miracle Cake,” or “3-in-1 Cake”—is a captivating dessert phenomenon that defies conventional baking logic. With just a single batter, this enchanting confection spontaneously separates during baking into three distinct, harmonious layers: a dense, custard-like bottom; a delicate, airy sponge in the middle; and a light, golden-brown cake layer on top. Its alchemy lies not in sorcery, but in precise ingredient ratios, controlled oven dynamics, and the elegant physics of density-driven stratification. Beloved by home bakers and viral food creators alike, Magic Cake offers both visual wonder and textural delight—serving as equal parts science experiment and soul-soothing treat.
The History
Though its exact origins remain deliciously elusive, Magic Cake emerged from the broader tradition of “separating” or “self-layering” cakes popularized across Europe and Latin America in the mid-to-late 20th century. Early iterations appear in French home cookbooks under names like *Gâteau Magique*, where bakers noted how a simple batter—often inspired by clafoutis or flan techniques—would transform in the oven without artificial leavening aids or layering steps. Some culinary historians trace conceptual roots to Portuguese *bolo de fubá* or Spanish *pastel de tres capas*, while others credit Japanese home economists of the 1980s for refining temperature-sensitive methods that emphasized gentle heat and minimal mixing. The cake gained global traction in the 2010s via Korean and Filipino food blogs, then exploded internationally on Instagram and TikTok—where time-lapse videos of its miraculous layer formation garnered millions of views. Today, it stands as a beloved symbol of accessible kitchen magic: no special equipment, no professional training—just curiosity, care, and chemistry.
Ingredients Breakdown
Every ingredient in Magic Cake plays a pivotal structural and functional role—no component is arbitrary. Understanding their interplay is essential to mastering the transformation:
- Eggs: Provide emulsification, structure, and leavening. The yolks enrich the custard base, while whites (when gently folded in) contribute lift to the upper cake layer. Room-temperature eggs integrate more evenly and stabilize the emulsion.
- Granulated Sugar: Not only sweetens but also tenderizes the crumb, interferes with gluten formation, and aids in caramelization of the top layer. A small portion is often reserved for dissolving into warm milk to prevent graininess.
- All-Purpose Flour: Supplies gluten for structure—but used sparingly to avoid toughness. Too much flour inhibits separation; too little yields a fragile, pudding-like collapse. Bleached flour is sometimes preferred for its lower protein content and finer texture.
- Whole Milk: The primary liquid medium—and the key driver of layering. Its water content evaporates at different rates across temperature gradients, while its fat and proteins coagulate selectively. Warm (not hot) milk ensures even incorporation without cooking egg proteins prematurely.
- Unsalted Butter: Adds richness, flavor, and moisture. Melted and cooled butter coats flour particles, reducing gluten development and promoting tenderness. Clarified butter can be used for enhanced stability and a cleaner mouthfeel.
- Vanilla Extract (or Paste): Enhances aroma and balances sweetness. Real Madagascar bourbon vanilla contributes complex floral and woody notes that complement the custard’s creaminess.
- Salt: A tiny amount (⅛ tsp) sharpens flavor perception and stabilizes egg foam if whites are whipped separately.
- Optional Additions: A pinch of cornstarch (1–2 tsp) may improve custard set and reduce weeping; a splash of rum or citrus zest can add aromatic nuance without disrupting layer formation.
Critical note: Ingredient temperatures matter immensely. Cold milk or butter can cause premature curdling or uneven emulsion—both of which sabotage the delicate density gradient required for clean separation.
Step-by-Step Recipe
- Preheat & Prep: Position oven rack in the center. Preheat oven to 325°F (163°C)—a low-and-slow temperature is non-negotiable for gradual, even separation. Grease an 8-inch square or round baking pan (preferably light-colored metal or ceramic) with softened butter, then line the bottom with parchment paper. Lightly dust sides with flour or cocoa powder (for chocolate version) and tap out excess.
- Warm the Milk: In a small saucepan, heat 1¼ cups whole milk with ¼ cup granulated sugar over medium-low heat until steaming (110–115°F / 43–46°C)—do not boil. Remove from heat and stir in 6 tbsp melted, cooled unsalted butter and 1½ tsp pure vanilla extract. Set aside to cool slightly (to ~100°F), ensuring it’s warm but not hot.
- Whisk Dry Ingredients: In a medium bowl, sift together ¾ cup all-purpose flour, ¼ tsp fine sea salt, and (optional) 1 tbsp cornstarch. Sifting prevents lumps and aerates the flour for smoother integration.
- Combine Wet Base: In a large heatproof bowl, whisk 4 large room-temperature egg yolks with the remaining ¼ cup sugar until pale, thickened, and ribbon-stage (about 2–3 minutes with hand mixer). Gradually drizzle in the warm milk mixture while whisking constantly to create a smooth, glossy custard base.
- Incorporate Dry Mix: Sift the flour mixture over the yolk-milk mixture in two additions. Gently fold with a silicone spatula using cutting-and-turning motions—do not overmix. Batter should be silky and free of lumps, with a pourable but slightly viscous consistency (like heavy cream).
- Aerate the Batter (Crucial Step): In a clean, dry bowl, whip 4 large room-temperature egg whites with a pinch of cream of tartar (or ⅛ tsp lemon juice) until soft peaks form. Gradually add 2 tbsp sugar and continue whipping to stiff, glossy peaks—not dry or crumbly. Using the spatula, fold one-third of the meringue into the batter to lighten it, then gently fold in the remaining meringue in two additions. Stop as soon as no white streaks remain—overfolding collapses air cells critical for the upper cake layer.
- Pour & Smooth: Immediately pour batter into prepared pan. Tap pan firmly 3–4 times on countertop to release large air bubbles and level surface. Smooth top with offset spatula if needed.
- Bake with Precision: Place pan on center oven rack. Bake uncovered for 65–75 minutes. Do NOT open oven door before 55 minutes—sudden temperature drops cause layer collapse. Cake is done when edges are deeply golden, top is puffed and lightly springy to touch, and a toothpick inserted 1 inch from edge comes out clean—but center may feel slightly moist (that’s the custard layer). Internal temperature at center should read 160–165°F (71–74°C) on instant-read thermometer.
- Cool Completely: Remove from oven and let cool in pan on wire rack for at least 2 hours—ideally 3–4 hours or overnight. This slow cooldown allows custard to fully set and layers to stabilize. Refrigerating after 1 hour accelerates setting but may dull top layer’s sheen—optional but recommended for best texture contrast.
- Unmold & Serve: Run thin knife around edges. Invert onto cooling rack, peel off parchment, then reinvert onto serving plate. Slice with a hot, thin-bladed knife wiped between cuts for clean layers. Serve at cool room temperature—or chilled for firmer custard.
Tips
- Room-Temperature Rule: Eggs, milk, and butter must all be at 68–72°F. Cold ingredients disrupt emulsion and impede proper starch gelatinization—leading to blurred or incomplete layering.
- Oven Calibration is Key: Use an independent oven thermometer. Even a 15°F variance affects coagulation timing. Convection ovens require reduction to 305°F and placement on lowest rack with pan on baking stone for thermal mass.
- Mixing Discipline: Undermixing leaves lumps that sink and distort layers; overmixing develops gluten and deflates meringue. Fold until *just* combined—visible specks of flour are preferable to overworked batter.
- Pan Choice Matters: Avoid dark nonstick or glass pans—they promote excessive browning and uneven heating. Ceramic or light-gauge aluminum distributes heat most reliably. Never use a springform pan—leaks ruin custard integrity.
- Altitude Adjustments: Above 3,000 ft: increase flour by 1 tbsp, reduce sugar by 1 tbsp, raise oven temp to 335°F, and extend bake time by 5–10 minutes. Monitor closely after 60 minutes.
- Humidity Awareness: On rainy or humid days, add ½ tsp extra flour and reduce milk by 1 tbsp—excess ambient moisture delays evaporation and weakens layer definition.
- Patience Pays Off: Rushing cooling invites weeping custard and smudged layers. If slicing too soon, run knife under hot water and dry thoroughly before each cut.
- Storage Wisdom: Cover tightly and refrigerate up to 5 days. Custard layer thickens further overnight; top layer may soften slightly—this is normal and enhances melt-in-mouth quality.
Variations and Customizations
Magic Cake is remarkably adaptable—each variation preserves the core layering principle while introducing new dimensions of flavor, texture, and cultural resonance:
- Chocolate Magic Cake: Replace ¼ cup flour with unsweetened cocoa powder (Dutch-process preferred); add 2 oz melted bittersweet chocolate to warm milk mixture. Dust top with cocoa or garnish with chocolate shavings.
- Lemon Verbena Magic Cake: Infuse warm milk with 2 tbsp fresh lemon verbena leaves (steep 10 min, strain); add 2 tbsp lemon zest + 1 tbsp lemon juice to yolk mixture. Finish with candied lemon slices and powdered sugar.
- Matcha Green Tea Magic Cake: Whisk 1½ tsp ceremonial-grade matcha with dry flour; replace 2 tbsp milk with cold brewed green tea. Serve with sweet red bean paste or black sesame crumble.
- Coconut-Calamansi Magic Cake: Substitute coconut milk for half the dairy milk; add 2 tbsp toasted coconut flakes to batter and 1 tbsp calamansi juice to yolk mixture. Top with toasted coconut and lime zest.
- Earl Grey Magic Cake: Steep 2 Earl Grey tea bags in warm milk for 5 minutes, then remove and squeeze; add 1 tsp bergamot oil or finely ground tea leaves to dry mix. Pair with honey-whipped cream.
- Gluten-Free Magic Cake: Use certified GF 1:1 blend (with xanthan gum); add 1 tsp psyllium husk powder to mimic gluten’s binding. Increase bake time by 8–12 minutes and verify internal temp reaches 165°F.
- Vegan Magic Cake (Advanced): Replace eggs with ½ cup aquafaba (whipped to stiff peaks) + 2 flax eggs (2 tbsp ground flax + 6 tbsp water, rested 10 min); use soy milk + 1 tbsp neutral oil instead of butter/milk combo. Requires precise pH balancing (add ¼ tsp apple cider vinegar) and extended cooling.
- Spiced Chai Magic Cake: Simmer milk with 1 cinnamon stick, 4 cardamom pods, 3 cloves, 1 star anise, and 1 tsp grated ginger; strain and proceed. Dust with garam masala and serve with spiced chai syrup.
- Ube Halaya Magic Cake: Fold ⅓ cup ube halaya (purple yam jam) into yolk mixture; tint batter pale lavender with natural ube extract. Top with ube cream cheese frosting swirl.
- Black Sesame Magic Cake: Toast ¼ cup black sesame seeds, grind to fine paste with 1 tbsp neutral oil, and whisk into warm milk. Garnish with black sesame brittle.
Each variation retains the same foundational technique—only the flavor carriers change. Always test one modification at a time to isolate effects on layer integrity.
Health Considerations and Nutritional Value
A standard 8-inch Magic Cake (16 servings) delivers approximately 210–230 calories per slice, with the following macro- and micronutrient profile (per serving, calculated using USDA data):
- Total Fat: 10–11g (including 6g saturated fat from butter and egg yolks)
- Carbohydrates: 26–28g (22g sugars, primarily from added sucrose)
- Protein: 4–5g (from eggs and milk)
- Fiber: Negligible (<0.5g) unless whole-grain flour or added psyllium is used
- Vitamins/Minerals: Good source of Vitamin A (12% DV), Riboflavin (B2, 10% DV), Calcium (8% DV), and Choline (15% DV)—all supporting eye health, energy metabolism, bone integrity, and brain function.
Dietary Adaptations:
- Reduced-Sugar Option: Replace half the granulated sugar with erythritol or allulose (both heat-stable and non-hygroscopic). Note: Swerve may yield slightly drier custard; monk fruit blends work well but require volume adjustment.
- Lactose-Sensitive Version: Use lactose-free whole milk or ultra-filtered milk (e.g., Fairlife). Avoid almond or oat milk—their low protein/fat content prevents proper layering.
- Lower-Fat Adjustment: Substitute half the butter with unsweetened applesauce—but expect softer custard and less defined top crust. Not recommended for first-time bakers.
- Protein-Boosted: Add 1 scoop unflavored whey or collagen peptides to dry ingredients—increases protein to ~7g/slice without altering texture.
- Allergen Notes: Contains eggs, dairy, and gluten. Top 9 allergens are present (milk, eggs, wheat). Tree nut or soy derivatives may appear in vanilla or butter—always check labels.
Mindful Enjoyment: Magic Cake is best appreciated as an occasional indulgence. Its moderate portion size and rich satiety factor (from fat + protein) naturally encourage slower, more intentional eating—a stark contrast to hyper-palatable, ultra-processed desserts. Pairing with herbal tea or a small portion of seasonal fruit enhances nutritional synergy and digestive ease.
Ingredients
- 4 large eggs, separated, room temperature
- ½ cup (100g) granulated sugar, divided
- 1¼ cups (300ml) whole milk
- 6 tablespoons (85g) unsalted butter, melted and cooled
- 1½ teaspoons pure vanilla extract
- ¾ cup (95g) all-purpose flour, sifted
- ¼ teaspoon fine sea salt
- Optional: 1 tablespoon cornstarch (for firmer custard)
- Butter and parchment paper for pan prep
Directions
- Preheat oven to 325°F (163°C). Grease an 8-inch square or round baking pan and line bottom with parchment paper.
- In a small saucepan, heat milk and ¼ cup sugar over medium-low heat until steaming (110–115°F). Remove from heat; stir in melted butter and vanilla. Let cool to ~100°F.
- In a medium bowl, sift together flour, salt, and (if using) cornstarch.
- In a large bowl, whisk egg yolks and remaining ¼ cup sugar until pale and thick (~2–3 min). Gradually whisk in warm milk mixture until smooth.
- Sift dry ingredients over yolk mixture in two batches; fold gently until just combined and lump-free.
- In a clean bowl, whip egg whites with cream of tartar until soft peaks. Gradually add 2 tbsp sugar; whip to stiff, glossy peaks.
- Fold one-third of meringue into batter to lighten, then gently fold in remaining meringue until no streaks remain.
- Pour batter into prepared pan. Tap firmly on counter 3–4 times to release air bubbles.
- Bake 65–75 minutes—do not open oven before 55 minutes—until edges are deep golden and top springs back lightly.
- Cool in pan on wire rack for at least 2 hours (preferably 3–4 hrs or overnight). Refrigerate after 1 hour for optimal layer firmness.
- Run knife around edges, invert, peel parchment, reinvert onto plate. Slice with hot, clean knife.
FAQ
- Why didn’t my cake separate into three layers?
- Most common causes: oven temperature too high or too low; cold ingredients; overmixed batter; underwhipped or overwhipped meringue; opening oven too early; using expired baking powder (which isn’t used here, but confusion occurs); or incorrect pan size. Double-check thermometer accuracy and ingredient temps.
- Can I make Magic Cake ahead of time?
- Absolutely—and it improves! Fully cooled and refrigerated Magic Cake develops richer flavor and firmer custard texture over 12–24 hours. Store covered for up to 5 days. Unfrosted, it freezes well for up to 2 months—wrap tightly in plastic + foil, thaw overnight in fridge.
- My custard layer is watery or weeping. What went wrong?
- Weeping usually results from underbaking (custard didn’t reach 160°F), rapid cooling (causing condensation), excess moisture (humid day or cold milk), or too much sugar relative to starch. Next time, extend bake by 5 minutes, confirm internal temp, and cool gradually.
- Can I double the recipe?
- Not recommended in one pan—it disrupts thermal dynamics needed for layering. Instead, bake two separate batches in identical pans. If scaling up for catering, use commercial convection ovens with precise humidity control and staggered loading.
- Is Magic Cake the same as Japanese Cotton Cheesecake?
- No. While both rely on meringue and gentle baking, Japanese Cotton Cheesecake uses cream cheese, sour cream, and a water bath for ultra-tender height—and does not separate into layers. Magic Cake’s hallmark is spontaneous stratification via density gradients.
- What’s the best way to photograph Magic Cake?
- Shoot under diffused natural light. Use a macro lens to capture cross-section detail. Slice just before shooting, wipe knife between cuts, and dust top lightly with powdered sugar or edible flowers. A slate or marble board enhances contrast.
- Can I add fruit or nuts?
- Fruit purées (like raspberry or mango) can replace part of the milk—but reduce by 1 tbsp to compensate for added water. Nuts should be finely ground and folded in last—whole pieces sink and mar layer lines. Dried fruit must be soaked and patted dry.
- Why does the top layer sometimes crack?
- Gentle cracking is normal and often desirable—it signals proper steam release and caramelization. Excessive cracking suggests oven too hot, batter overmixed, or pan too small. A water bath is unnecessary and discouraged—it dampens top browning and blurs layer definition.
- Can I use plant-based milk?
- Only high-protein, full-fat options like soy or pea milk work reliably. Almond, oat, and coconut milk lack sufficient casein and fat to support layer formation and typically yield a single, dense custard. Always use unsweetened, unflavored versions.
- How do I fix a sunken center?
- A slight depression is typical—the custard settles as it cools. If deeply sunken, likely causes: underbaked center, opening oven too soon, or insufficient meringue volume. Next batch, verify internal temp and avoid drafts near oven.
Summary
Magic Cake is a masterclass in culinary physics—where temperature, emulsion, and density converge to transform one humble batter into three ethereal strata of custard, sponge, and cake. Its charm lies not in complexity, but in the quiet precision of patience, proportion, and presence.
Beyond the awe of its metamorphosis, Magic Cake invites reverence for the everyday miracle of transformation—reminding us that wonder doesn’t require extravagance, just attention, respect for ingredients, and the courage to let science work its silent, delicious magic.