Hot Chocolate Bombs: A Magical Winter Treat That Melts Into Rich, Creamy Delight
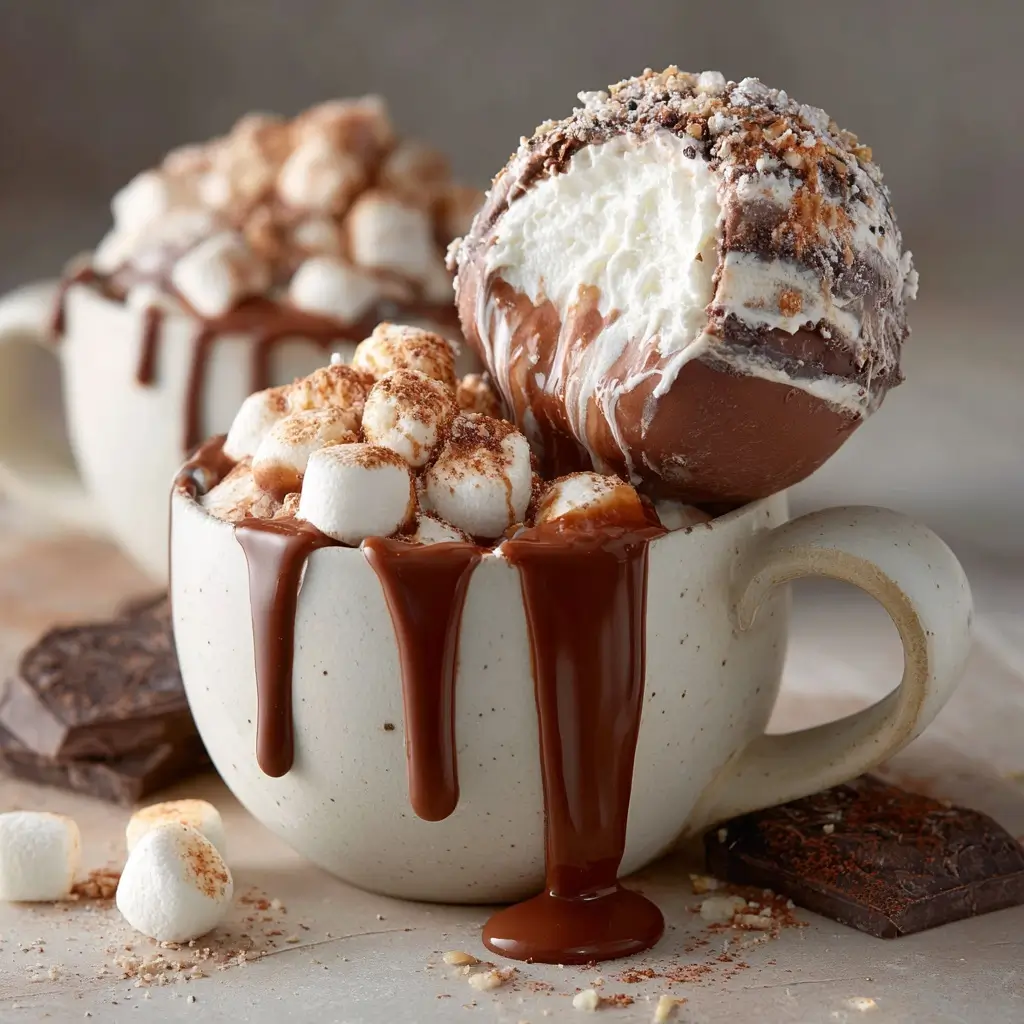
There’s something truly enchanting about hot chocolate bombs. These spherical confections are more than just a beverage—they’re an experience. When you pour warm milk over a perfectly crafted hot chocolate bomb, it slowly cracks open, releasing a cascade of rich cocoa powder, mini marshmallows, and sometimes even surprises like sprinkles or candy pieces. The result? A steaming cup of velvety hot chocolate that warms your soul on the coldest of days. Loved by kids and adults alike, these whimsical treats have taken social media by storm, becoming a staple in winter holiday traditions, gift exchanges, and cozy nights by the fire.
The History of Hot Chocolate Bombs
While hot chocolate itself dates back to ancient Mesoamerican civilizations—particularly the Aztecs, who drank a bitter, spiced cacao beverage—the modern concept of the “hot chocolate bomb” is surprisingly recent. The trend exploded in popularity around 2020, largely thanks to viral videos on platforms like TikTok and Instagram. Crafters and home bakers began sharing mesmerizing clips of the bombs cracking open in warm milk, creating a visual spectacle that captured hearts worldwide.
Although the idea of encapsulating drink mixtures in edible shells isn’t entirely new (think bath bombs or chocolate truffles with liquid centers), the specific combination of tempered chocolate shells, powdered cocoa, and marshmallows designed for dissolution in milk was a creative leap forward. It combined the nostalgia of childhood hot cocoa with the artistry of modern dessert-making. What started as a fun DIY project quickly evolved into a gourmet treat sold in bakeries, coffee shops, and online stores during the holiday season.
Ingredients Breakdown: What Makes a Hot Chocolate Bomb Work?
The magic of a hot chocolate bomb lies in its layered ingredients—each playing a crucial role in both structure and flavor. Here’s a detailed look at what goes into each component:
- Chocolate (Couverture or Candy Melts): The outer shell is typically made from high-quality chocolate or candy coating (such as almond bark or candy melts). Tempered chocolate gives a glossy finish and crisp snap, while candy melts are easier for beginners to work with since they don’t require precise tempering.
- Cocoa Powder and Sugar Mix: Inside the bomb, a blend of premium cocoa powder, granulated sugar, and sometimes instant hot chocolate mix forms the base of your drink. This mixture dissolves in warm milk to create a deep chocolate flavor.
- Mini Marshmallows: These add sweetness and creaminess when melted into the drink. They also contribute to the visual appeal as they expand and float to the top.
- Milk or White Chocolate (for sealing): Used to glue the two hemispheres of the chocolate shell together, ensuring a clean, airtight seal.
- Optional Add-Ins: Flavor extracts (like peppermint or vanilla), crushed candy canes, sprinkles, edible glitter, caramel bits, or even small toys (food-safe) can be added for extra flair.
- Milk (for serving): Whole milk is ideal for richness, but any type—dairy or plant-based—can be used depending on dietary preferences.
Each ingredient must be carefully selected and measured to ensure not only great taste but also structural integrity. Too thin a shell and the bomb may break prematurely; too thick and it won’t dissolve properly.
Step-by-Step Recipe: How to Make Perfect Hot Chocolate Bombs at Home
Creating your own hot chocolate bombs is a delightful and rewarding process. Follow this detailed guide to make professional-quality treats in your kitchen.
Ingredients:
- 12 oz semi-sweet chocolate or candy melts (in red, brown, or white)
- 3 tbsp unsweetened cocoa powder
- 2 tbsp granulated sugar (adjust to taste)
- ¼ cup mini marshmallows
- ½ tsp vanilla extract (optional)
- Spray bottle with cooking oil (for greasing molds)
- Small bowl of warm whole milk (for serving)
- Edible glitter, crushed candy canes, or sprinkles (optional)
Equipment Needed:
- Silicone sphere mold (typically 2.5–3 inches in diameter)
- Microwave-safe bowls
- Spatula
- Piping bag or zip-top bag (optional)
- Small paintbrush (food-safe)
- Baking sheet
- Parchment paper
Directions:
- Prepare the Mold: Lightly spray the inside of each hemisphere of the silicone mold with cooking oil. Use a paper towel to wipe away excess, leaving just a thin sheen to help release the chocolate later.
- Melt the Chocolate: Chop the chocolate or use pre-made candy melts. Place half in a microwave-safe bowl and heat in 20-second intervals, stirring between each, until smooth and fluid. Avoid overheating.
- Coat the Mold: Using a small spatula or food-safe brush, spread a thin, even layer of melted chocolate into each half of the mold. Rotate and tilt to cover the entire surface. Scrape off excess from the rim for a clean edge.
- Chill to Set: Place the mold in the freezer for 8–10 minutes, or until the chocolate is completely firm and makes a clean “snap” sound when touched.
- Repeat for Thickness: Remove from freezer and apply a second coat of chocolate to reinforce the shell. Return to the freezer for another 8–10 minutes. For extra durability, a third layer can be added.
- Remove from Mold: Once fully hardened, gently pop the chocolate hemispheres out of the mold. If they resist, chill a bit longer or lightly press from behind.
- Prepare the Filling: In a small bowl, mix the cocoa powder, sugar, and vanilla extract. Stir in the mini marshmallows and any optional add-ins like crushed peppermint or sprinkles.
- Assemble the Bomb: Place one hemisphere on a parchment-lined tray. Fill it halfway with the cocoa mixture, then add a few more marshmallows on top. Take the second hemisphere and dip its rim into melted chocolate. Carefully place it over the filled half and press gently to seal. Hold for a few seconds to bond.
- Decorate (Optional): Drizzle contrasting colored chocolate over the seam for decoration. Add edible gold dust, snowflake sprinkles, or a dusting of cocoa for a festive touch.
- Let Set: Allow the sealed bomb to rest at room temperature or in the fridge for 5–10 minutes to fully set the seam.
- Serve: Place the completed hot chocolate bomb in a large mug. Slowly pour 6–8 oz of warm (not boiling) milk over it. Watch as it magically cracks open, releasing its contents. Stir well and enjoy!
Tips for Success: Mastering the Art of the Hot Chocolate Bomb
- Use Quality Chocolate: Couverture chocolate (high in cocoa butter) provides the best shine and snap. If using candy melts, choose reputable brands to avoid chalky textures.
- Avoid Moisture: Even a drop of water can cause chocolate to seize. Ensure all utensils and bowls are completely dry.
- Work Quickly: Chocolate sets fast. Have all ingredients and tools ready before starting.
- Don’t Overfill: Too much filling can prevent proper sealing or cause leakage when stored.
- Seal Tightly: A secure seam ensures the bomb stays intact until you’re ready to use it. Re-melted chocolate works best as “glue.”
- Store Properly: Keep finished bombs in an airtight container in a cool, dry place. Avoid refrigeration unless necessary (condensation can dull the shine).
- Warm Milk, Not Boiling: Pouring boiling liquid can scald milk or cause the chocolate to break unevenly. Aim for 150–160°F (65–70°C).
- Double-Wall Technique: For extra strength, especially in humid climates, consider making slightly larger outer spheres and smaller inner ones to create a double-layered shell.
Variations and Customizations: Make It Your Own
One of the greatest joys of making hot chocolate bombs is personalizing them. Here are some creative ideas to inspire your next batch:
- Peppermint Wonderland: Add crushed candy canes and a few drops of peppermint extract. Use red and white chocolate for a festive look.
- White Chocolate Dream: Fill with white hot chocolate powder and pastel marshmallows. Decorate with edible pearls and gold luster.
- Salted Caramel Surprise: Place a soft caramel square in the center before sealing. When the bomb dissolves, the caramel swirls through the drink.
- Spiked for Adults: Add a small sealed packet of bourbon, Baileys, or Kahlúa inside (clearly label if gifting). Or stir in after melting.
- Disney-Themed: Use colored candy melts to match characters—red and black for Mickey Mouse ears, pink for Princess themes. Add tiny edible images.
- Gluten-Free & Vegan: Use dairy-free chocolate, coconut milk powder, and vegan marshmallows. Confirm all ingredients are certified GF/vegan.
- Seasonal Flavors: Pumpkin spice in fall, eggnog mix in winter, strawberry cocoa in spring.
- Build-Your-Own Kit: Package empty shells with separate fillings and marshmallows for a fun DIY gift.
Health Considerations and Nutritional Value
While undeniably delicious, hot chocolate bombs are best enjoyed in moderation due to their high sugar and fat content. Here’s a general nutritional estimate per average bomb (using semi-sweet chocolate, cocoa mix, and marshmallows):
- Calories: 250–350 kcal
- Total Fat: 15–20g (mostly from chocolate)
- Saturated Fat: 9–12g
- Carbohydrates: 30–40g
- Sugars: 25–35g
- Protein: 2–4g
- Caffeine: Small amount (from cocoa, roughly equivalent to 1–2 oz of dark chocolate)
Dietary Notes:
- Not ideal for low-sugar diets – Consider using sugar-free chocolate and sweeteners like erythritol or stevia blends.
- Dairy sensitivity? Opt for dairy-free chocolate and non-dairy milk when serving.
- Allergens: Most contain milk, soy, and possibly nuts (check labels). Always disclose ingredients when gifting.
- Kid-Friendly: Safe for children, but monitor portion size due to sugar content.
To make a slightly healthier version, reduce added sugar in the filling, use dark chocolate (higher in antioxidants), and choose natural mini marshmallows with no artificial dyes.
Frequently Asked Questions (FAQ)
Q: Can I make hot chocolate bombs without a mold?
A: While molds are ideal for uniformity, you can shape shells using measuring spoons or small bowls lined with plastic wrap. However, results may vary in appearance and durability.
Q: How long do hot chocolate bombs last?
A: Properly stored in an airtight container at cool room temperature, they last 2–3 weeks. In humid environments, refrigeration (with moisture control) extends shelf life to 1 month.
Q: Why did my chocolate crack when removing from the mold?
A: This usually happens if the chocolate wasn’t chilled long enough or the mold wasn’t greased properly. Try freezing for a few extra minutes or re-grease the mold.
Q: Can I use regular drinking cocoa instead of pure cocoa powder?
A: Yes, but many pre-made mixes already contain sugar and powdered milk. Adjust additional sugar accordingly to avoid excessive sweetness.
Q: Are hot chocolate bombs safe for shipping?
A: Yes! Pack them in rigid boxes with bubble wrap or foam inserts. Include ice packs in warm weather to prevent melting.
Q: Can I make them in advance for holidays?
A: Absolutely. Prepare and store them 2–4 weeks ahead. Assemble closer to gifting if adding delicate decorations.
Q: What kind of milk works best?
A: Whole milk creates the creamiest texture, but oat, almond, soy, or coconut milk all work well. Heat plant-based milks gently to avoid separation.
Q: Can I add coffee or matcha?
A: Definitely! Mix instant espresso powder or matcha green tea powder into the filling for a mocha or green tea bomb variation.
Summary
Hot chocolate bombs are a whimsical, heartwarming treat that transform a simple cup of cocoa into a magical experience. With a crunchy chocolate shell that bursts open in warm milk, they deliver rich flavor, fluffy marshmallows, and endless customization possibilities.
Perfect for gifting, holiday parties, or cozy nights in, these delightful spheres combine creativity, nostalgia, and decadence in every sip—making them a modern classic in the world of comfort desserts.