
Introduction
Homemade vanilla pudding is a classic, comforting dessert that brings a sense of nostalgia with its smooth, creamy texture and rich vanilla flavor. Unlike store-bought versions, homemade vanilla pudding offers a fresh, indulgent experience with ingredients that are simple and natural. The beauty of making vanilla pudding at home lies not only in the superior taste but also in the control you have over the quality of ingredients. Whether served warm or chilled, this treat is perfect for any occasion, from casual family dinners to special celebrations. The timeless nature of vanilla pudding makes it an enduring favorite in kitchens across the globe, and its versatility allows for countless variations and customizations. Once you try making it from scratch, you’ll never want to go back to the boxed version.
The History of Homemade Vanilla Pudding
The history of vanilla pudding dates back centuries, though it wasn’t always called “pudding.” The origins of puddings, in general, can be traced to early European cuisine, with the term “pudding” initially referring to a type of meat or savory dish. By the 17th and 18th centuries, however, puddings began to evolve into the sweet, custard-like desserts we know today. The classic vanilla pudding, as we recognize it now, became popular in the United States in the late 19th and early 20th centuries, largely due to the rise of home-cooking and the availability of ingredients like vanilla, sugar, and dairy. The introduction of commercially available vanilla extract also made it easier to create the distinct vanilla flavor that has become synonymous with the dessert. Over time, vanilla pudding became a beloved part of the American dessert repertoire, often served as a stand-alone treat, in pies, or as a filling for cakes and pastries.
Ingredients Breakdown
For the Vanilla Pudding Base:
- Whole Milk – The key ingredient for creating a rich, creamy base for the pudding. The fat content in whole milk adds to the smooth texture.
- Egg Yolks – The egg yolks are what thicken the pudding and give it its velvety texture. They also contribute richness to the flavor.
- Granulated Sugar – Provides the sweetness to balance the creaminess of the milk and eggs.
- Vanilla Extract – Essential for the signature flavor of vanilla pudding. Choose high-quality vanilla extract for the best taste.
- Cornstarch – A thickening agent that ensures the pudding sets to the perfect consistency.
- Butter – Adds a silky smooth finish to the pudding, making it even more indulgent.
- Salt – A pinch of salt balances the sweetness and enhances the overall flavor of the pudding.
Optional Garnishes:
- Whipped Cream – Adds a light and airy texture to the rich pudding.
- Fresh Berries – Raspberries, strawberries, or blueberries provide a fresh contrast to the creamy pudding.
- Chocolate Shavings – For chocolate lovers, a sprinkle of grated chocolate complements the vanilla flavor.
- Crumbled Cookies – For a bit of crunch, crushed cookies or graham crackers can be added on top.
Step-by-Step Recipe
1. Prepare the Pudding Mixture
In a medium saucepan, whisk together the sugar, cornstarch, and a pinch of salt. Gradually add in the milk, whisking until smooth and combined.
2. Cook the Mixture
Place the saucepan over medium heat and bring the mixture to a simmer. Stir continuously to prevent the pudding from sticking to the bottom of the pan. Once it begins to bubble, reduce the heat to low and continue to cook for 2-3 minutes, or until it thickens to the consistency of heavy cream.
3. Temper the Egg Yolks
While the pudding mixture is cooking, whisk the egg yolks in a separate bowl. Slowly add a small amount of the hot pudding mixture to the yolks while whisking constantly to temper the eggs. This prevents the eggs from curdling when added to the hot mixture.
4. Combine and Cook Further
Once the egg yolks are tempered, pour the egg mixture back into the saucepan with the rest of the pudding mixture, whisking continuously. Return the saucepan to the heat and cook for another 2-3 minutes until the pudding thickens further.
5. Finish the Pudding
Remove the saucepan from the heat. Stir in the butter and vanilla extract, ensuring they are fully incorporated into the pudding.
6. Strain and Chill
For a perfectly smooth texture, strain the pudding through a fine-mesh sieve into a clean bowl to remove any bits of egg or cornstarch. Allow the pudding to cool slightly, then cover with plastic wrap, pressing the wrap directly onto the surface to prevent a skin from forming. Refrigerate for at least 2-3 hours or until fully chilled.
7. Serve and Enjoy
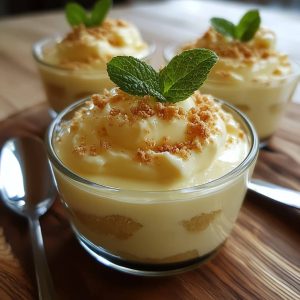
Once chilled, the pudding can be served in individual bowls or ramekins. Top with whipped cream, fresh berries, or a sprinkle of chocolate shavings for added flavor. Enjoy this rich, homemade vanilla pudding as a dessert on its own or as part of a larger dessert spread.
Tips for the Perfect Homemade Vanilla Pudding
- Whisk Constantly – Stir the mixture constantly while cooking to prevent it from burning or sticking to the bottom of the pan.
- Use Fresh Ingredients – The quality of your milk, eggs, and vanilla will directly affect the flavor of your pudding. Opt for fresh, high-quality ingredients for the best taste.
- Adjust Consistency – If your pudding is too thin, cook it for a few extra minutes. If it’s too thick, add a little extra milk to thin it out to your desired consistency.
- Prevent a Skin – To avoid a skin from forming on the surface, make sure the plastic wrap touches the surface of the pudding while it chills.
- Serve Chilled – Vanilla pudding is best served chilled to enhance its smooth texture and flavor.
Variations and Customizations
- Chocolate Vanilla Pudding – Stir in some melted chocolate or cocoa powder after the pudding has thickened for a chocolatey twist.
- Caramel Vanilla Pudding – Add a few spoonfuls of caramel sauce to the mixture or drizzle it over the finished pudding for a sweet contrast.
- Fruit Flavors – Infuse the pudding with fruit flavors by adding pureed strawberries, mango, or raspberries into the base mixture before cooking.
- Spiced Vanilla Pudding – For a warm, comforting twist, add a pinch of cinnamon, nutmeg, or cardamom to the mixture while cooking.
Health Considerations and Nutritional Value
While homemade vanilla pudding is a delicious treat, it is important to note that it is rich in calories and contains sugar and dairy. For those who are looking to reduce the sugar content, you can experiment with using a sugar substitute, though it may affect the texture. Similarly, if you need to make the recipe dairy-free, you can use almond milk or coconut milk, though the consistency may vary slightly. The pudding also contains eggs, which provide a good source of protein. However, due to its rich ingredients, it is best enjoyed in moderation.
FAQ
Can I make homemade vanilla pudding ahead of time?
Yes, homemade vanilla pudding can be made ahead of time and stored in the refrigerator for up to 3 days.
Can I freeze vanilla pudding?
While vanilla pudding can be frozen, its texture may change upon thawing, so it is best enjoyed fresh or refrigerated.
What can I do if my pudding doesn’t thicken?
If your pudding isn’t thickening, it may need a few extra minutes of cooking. Keep stirring on low heat until it reaches the desired consistency.
Can I use a different flavor of extract?
Yes, you can experiment with other extracts such as almond or hazelnut for a unique flavor twist.
Homemade Vanilla Pudding
Ingredients
- 2 tablespoons cornstarch
- 3 cups half and half or you can use whole milk or light cream
- 1 cup white sugar
- 4 egg yolks lightly beaten
- 1 teaspoon vanilla extract
- 1 tablespoon butter
- 1/4 teaspoon salt
Instructions
- In a medium-sized, heavy-duty metal saucepan, combine the sugar and cornstarch. Add the half and half to the pan and place it over medium heat on the stove. Stir gently with a whisk as the mixture heats up, continuing until it thickens and comes to a boil. Once it boils, whisk slowly and let it boil for an additional two minutes before removing the pan from the heat.
- Take one cup of the thickened mixture out of the pan. Slowly pour it into the egg yolks while stirring gently to combine. Once mixed, gradually whisk the egg yolk mixture back into the pan, adding it slowly to avoid curdling.
- Return the pan to the stove over medium heat. Bring the mixture back to a gentle boil, then reduce the heat and continue to cook, whisking slowly for another two minutes.
- Remove the pan from the heat and stir in the butter, salt, and vanilla extract. Pour the pudding into dessert dishes and cover the surface with plastic wrap, ensuring it touches the pudding to prevent a skin from forming as it cools. Allow the pudding to cool on the counter for 45 minutes before refrigerating for up to one day.