Introduction
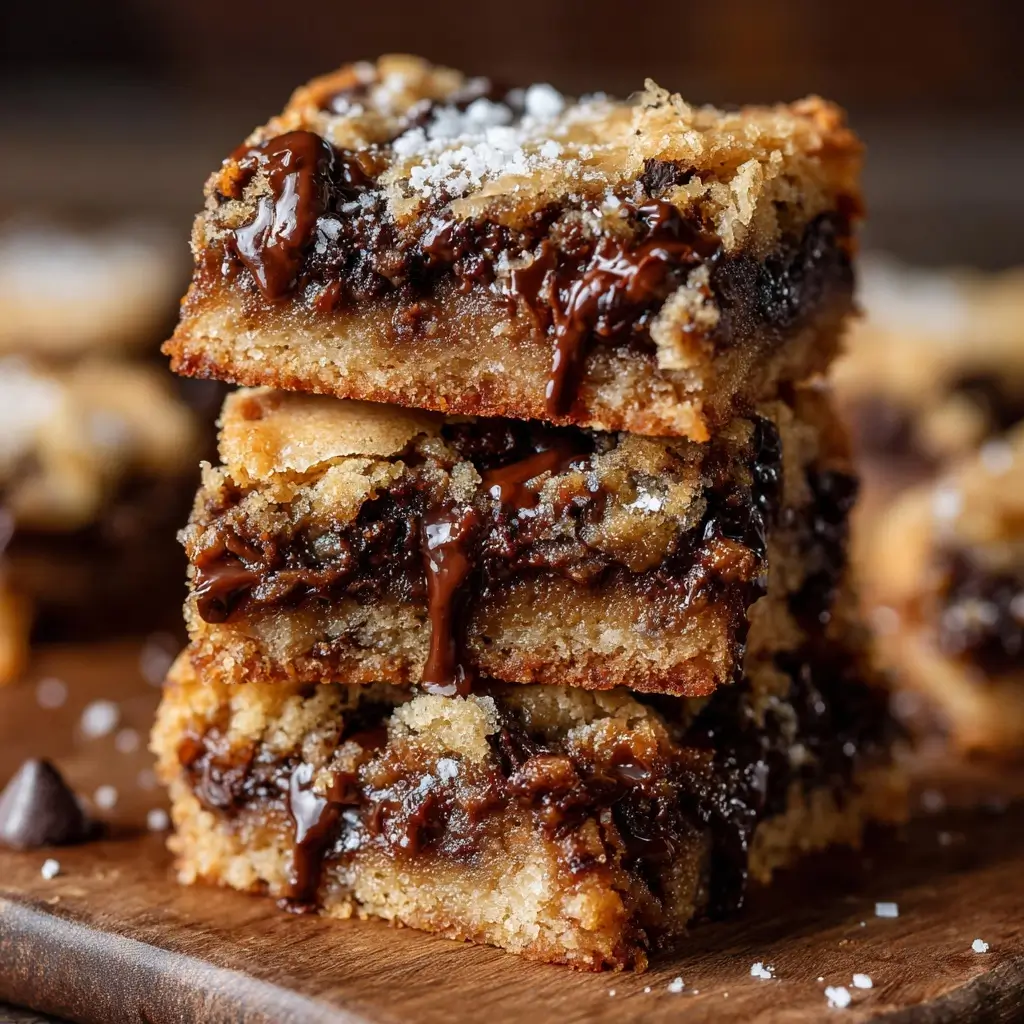
Gooey Cookie Bars are the ultimate indulgence—a rich, dense, and luxuriously soft-baked confection that sits perfectly at the intersection of chewy chocolate chip cookies and fudgy brownies. Unlike traditional drop cookies, these bars deliver consistent thickness, uniform texture, and an irresistible “pull-apart” quality with every bite. Their signature trait? A tender, slightly underbaked center encased by a delicate golden-brown crust—achieved not through overmixing or underbaking alone, but through precise ingredient ratios, controlled oven temperature, and strategic cooling techniques. Whether served warm with vanilla ice cream, packed into lunchboxes, or gifted in festive tins, Gooey Cookie Bars evoke nostalgia while satisfying modern cravings for decadence without complexity. They’re approachable for beginner bakers yet refined enough to impress seasoned dessert enthusiasts—and their versatility makes them endlessly adaptable to seasonal flavors, dietary preferences, and creative twists.
The History
The origins of Gooey Cookie Bars trace back to the mid-20th century American home baking boom, when convenience and crowd-pleasing desserts rose in popularity alongside the proliferation of electric ovens, standardized measuring tools, and branded pantry staples like Nestlé Toll House chocolate chips (introduced in 1939). While classic bar cookies—such as lemon squares and date bars—had existed since the Victorian era, the “gooey” iteration emerged more deliberately in the 1950s–60s, fueled by women’s magazines like Good Housekeeping and Ladies’ Home Journal, which championed one-pan, minimal-mess recipes ideal for potlucks, school bake sales, and family gatherings. Early versions often appeared under names like “Chewy Chocolate Chip Squares,” “Melt-in-Your-Mouth Bars,” or “Fudgy Cookie Cake”—reflecting both texture aspirations and marketing appeal. The term “gooey” itself gained culinary traction in the 1970s, used descriptively in recipe headnotes to signal intentional underdoneness—not a flaw, but a feature. Over time, food scientists and test kitchen professionals refined the technique: reducing leaveners, increasing brown sugar ratios, incorporating melted butter instead of creamed, and adding corn syrup or honey for enhanced moisture retention. Today, Gooey Cookie Bars enjoy viral status on social media platforms, where bakers share ultra-thick, skillet-baked, or layered versions—proving that this humble bar has evolved from midcentury staple to contemporary dessert icon.
Ingredients Breakdown
Every element in Gooey Cookie Bars plays a functional and sensory role—no ingredient is merely filler. Below is a deep-dive analysis of each component and why it matters:
- Unsalted Butter (1 cup, melted and slightly cooled): Melted (not browned) butter promotes denser, chewier texture by eliminating air pockets formed during creaming. Its high fat content coats flour proteins, limiting gluten development—key for tenderness. Using unsalted butter ensures precise sodium control, especially important when pairing with salty chocolate or pretzels.
- Brown Sugar (1 ½ cups, packed, preferably dark): The cornerstone of gooeyness. Molasses-rich dark brown sugar adds moisture, acidity (which tenderizes gluten), and deep caramel notes. Its hygroscopic nature attracts and retains water, preventing drying during storage. Granulated sugar is intentionally minimized (just ¼ cup) to avoid excessive spread and crisp edges.
- Eggs (2 large, room temperature): Provide structure via protein coagulation, emulsify fat and sugar, and contribute to chew through moisture binding. Room temperature eggs incorporate more evenly into warm batter, reducing risk of seizing or graininess.
- Vanilla Extract (2 tsp, pure): Enhances sweetness perception and rounds out chocolate’s bitterness. Alcohol-based extract also aids in even flavor distribution and contributes minimally to moisture retention.
- All-Purpose Flour (2 ¼ cups, spooned & leveled): The structural scaffold. Too much leads to toughness; too little causes collapse. Spooning and leveling prevents compaction—critical for accuracy. Bleached flour is preferred by many professional bakers for its softer protein network, yielding more tender bars.
- Baking Soda (½ tsp): Not baking powder—soda reacts with brown sugar’s acidity to produce carbon dioxide *only once*, creating subtle lift without airy crumb. It also promotes browning (Maillard reaction) and enhances caramelized flavor.
- Sea Salt (1 tsp fine, plus flaky salt for finishing): Balances sweetness, amplifies chocolate’s complexity, and suppresses bitterness. Fine salt disperses evenly; flaky salt added post-bake delivers bursts of salinity that contrast beautifully with chewy sweetness.
- Chocolate Chips or Chunks (2 cups total): High-quality 60–70% semisweet or bittersweet chocolate is ideal. Chips contain stabilizers for shape retention; chopped bars offer superior melt and marbling. Mixing two types (e.g., 1 cup chips + 1 cup chopped dark chocolate) yields varied mouthfeel and visual appeal.
- Optional Add-Ins (½–¾ cup total): Toasted nuts (pecans, walnuts), shredded coconut, dried cherries, or crushed pretzels add textural contrast and flavor dimension—but must be folded in *gently* to avoid overmixing.
Crucially, this formula omits common bar ingredients like oats, coconut, or condensed milk—deliberately avoiding anything that might introduce competing textures or interfere with the singular, unified gooey experience.
Step-by-Step Recipe
- Preheat & Prep (10 minutes): Position oven rack in center position. Preheat oven to 325°F (163°C)—a lower temperature ensures slow, even baking and prevents surface cracking or over-browning before the center sets. Grease a 9×13-inch metal baking pan generously with unsalted butter or non-stick spray, then line bottom and long sides with parchment paper, leaving 2-inch overhangs on two opposite sides for easy lifting. Avoid glass or ceramic pans—they retain heat unevenly and increase risk of burnt edges.
- Melt Butter (3 minutes): In a medium saucepan or microwave-safe bowl, melt butter over low heat or in 20-second bursts, stirring between intervals, until fully liquid and shimmering (do not brown or bubble aggressively). Let cool 5 minutes—warm (not hot) butter prevents eggs from cooking upon contact.
- Combine Wet Ingredients (4 minutes): In a large heatproof bowl, whisk melted butter, brown sugar, granulated sugar, and salt until smooth and glossy (~60 seconds). Whisk in eggs one at a time, fully incorporating each before adding next. Stir in vanilla until homogenous. Batter will be thick and glossy—not runny.
- Dry Ingredients Integration (2 minutes): In a separate bowl, whisk together flour and baking soda. Sift or sprinkle dry mixture over wet batter in two additions. Using a flexible silicone spatula, fold gently with a “cut-and-fold” motion—scraping bottom and sides—just until no dry streaks remain. Do not overmix; a few lumps are acceptable. Overmixing develops gluten → toughness.
- Fold in Chocolate (1 minute): Add chocolate chips/chunks (and any optional add-ins). Fold just until evenly distributed—about 8–10 strokes. Batter will be thick, sticky, and shaggy.
- Pan Transfer & Leveling (2 minutes): Scrape batter into prepared pan. Use an offset spatula or the back of a spoon to spread evenly, pressing gently to fill corners. Smooth top. Sprinkle evenly with flaky sea salt (¼ tsp).
- Bake with Precision (32–36 minutes): Place pan on center rack. Bake until edges are deeply golden and set (they should spring back slightly when lightly pressed), and center appears *just set*—it will still look soft, shiny, and slightly jiggly when gently shaken (like firm Jell-O). A toothpick inserted 1 inch from edge should come out clean; in center, it may have moist crumbs (not wet batter). Rotate pan halfway through for even browning.
- Cool Completely — Non-Negotiable (2+ hours): Remove pan from oven. Place on wire rack. Cool undisturbed for full 2 hours at room temperature. This allows residual heat to finish setting the center, starches to fully gelatinize, and fats to re-solidify—transforming molten batter into cohesive, sliceable, gloriously gooey bars. Cutting too soon = crumbly, greasy, or misshapen pieces.
- Cut & Serve (5 minutes): Using parchment overhangs, lift entire slab onto cutting board. With a sharp chef’s knife wiped clean between cuts, slice into 12–16 bars (2×3 or 2×4 grid). For clean edges, chill slab 20 minutes before cutting—or use a hot knife (dip blade in hot water, dry thoroughly, then cut).
Tips
- Measure Flour Correctly: Never scoop flour directly from the bag—it compacts and adds up to 25% extra. Instead, fluff flour in container, spoon into measuring cup, and level with straight edge. Even 2 tbsp excess flour can yield dry, cakey bars.
- Control Butter Temperature: Butter should be melted and cooled to ~100–110°F (38–43°C)—warm to the touch but not hot. Too hot → scrambled eggs; too cool → hardened butter clumps.
- Use a Timer—and Trust It: Baking time varies by oven calibration, pan color (dark pans bake faster), and altitude. Start checking at 30 minutes—even if recipe says 35. Visual cues trump clock.
- Embrace the “Underbaked” Look: The center should appear soft, glossy, and slightly puffed—not cracked, dry, or matte. If edges are golden but center looks set, it’s likely overbaked. Err on the side of caution.
- Cooling Is Part of Baking: Resist cutting for at least 2 hours. For maximum chew and clean slices, refrigerate cooled bars for 1 hour before cutting—or freeze for 20 minutes. Cold bars hold shape better and intensify chocolate flavor.
- Storage Wisdom: Keep bars airtight at room temperature for up to 4 days (they improve on Day 2!). For longer storage, freeze unfrosted bars layered between parchment in airtight container for up to 3 months. Thaw at room temp 30 minutes before serving.
- Reheating Magic: To revive freshness, microwave individual bar 8–10 seconds or warm in 300°F oven for 4 minutes. Serve with a scoop of cold ice cream—the contrast is transcendent.
- Pan Matters: Heavy-gauge aluminum pans distribute heat best. Avoid nonstick coatings that may degrade at high temps or cause sticking. If using disposable aluminum, double-layer pans for stability.
Variations and Customizations
Gooey Cookie Bars are a master canvas for creativity—each variation maintains the core texture while introducing new dimensions of flavor, nutrition, or occasion-specific flair:
- Double Chocolate Gooey Bars: Replace ¼ cup flour with unsweetened cocoa powder (Dutch-process preferred); add ½ cup mini chocolate chips to batter and ¼ cup chopped white chocolate on top pre-bake.
- Peanut Butter Swirl: After spreading batter, dollop ⅓ cup creamy peanut butter over surface. Drag a knife or skewer through in figure-eights to create marbling—do not over-swirl.
- Oatmeal Raisin Gooey Bars: Reduce flour to 1 ¾ cups; add 1 cup old-fashioned rolled oats (toasted first for nuttiness) and ¾ cup plump golden raisins (soaked 10 min in hot water, drained). Omit chocolate.
- Snickerdoodle Style: Omit chocolate. After batter is in pan, sprinkle top with cinnamon-sugar (2 tbsp sugar + 1½ tsp cinnamon + pinch salt). Optional: add ¼ tsp cream of tartar to dry ingredients for authentic tang.
- Pretzel-Caramel Crunch: Fold in ¾ cup crushed salted pretzels and ½ cup soft caramel bits (like Kraft caramels, chopped small). Sprinkle additional pretzels and flaky salt on top before baking.
- Vegan Gooey Bars: Substitute melted coconut oil (refined, for neutral taste) for butter; use flax eggs (2 tbsp ground flax + 6 tbsp water, rested 5 min); replace brown sugar with coconut sugar or organic brown rice syrup; choose dairy-free chocolate.
- Gluten-Free Gooey Bars: Use 1:1 gluten-free flour blend with xanthan gum (e.g., King Arthur or Bob’s Red Mill). Add ½ tsp xanthan gum if blend doesn’t include it. Increase baking time by 2–4 minutes—GF batters often need more time to set.
- Seasonal Twists: Fall: Add 1 tsp pumpkin pie spice + ¼ cup toasted pepitas. Winter: Stir in ½ cup dried cranberries + orange zest + white chocolate. Spring: Fold in ½ cup fresh blueberries (tossed in 1 tsp flour) + lemon zest. Summer: Top with grilled peach slices and honey drizzle post-bake.
- Skillet Gooey Bars: Bake in a well-seasoned 10-inch cast iron skillet at 325°F for 38–42 minutes. Serve warm from pan with scoops of bourbon-vanilla ice cream and candied pecans.
- Mini Bar Version: Press batter into lined muffin tin cups (lined with paper liners + parchment tabs). Bake 14–17 minutes. Perfect for portion control or party favors.
Health Considerations and Nutritional Value
While Gooey Cookie Bars are undeniably a treat—not a health food—their nutritional profile can be mindfully contextualized and gently optimized:
- Caloric Density: One standard 2×3-inch bar contains ~280–320 calories, primarily from complex carbohydrates (brown sugar, flour), healthy fats (butter, chocolate), and minimal protein (eggs, dairy). This makes them satiating in modest portions—ideal as an occasional dessert or energy-dense snack for athletes or growing children.
- Sugar Content: Approximately 22–26g total sugar per bar, mostly from brown sugar (which contains trace minerals like calcium, potassium, and iron) and chocolate. To reduce added sugar: decrease granulated sugar to 2 tbsp, use 70%+ dark chocolate (lower in sugar), or substitute ¼ cup unsweetened applesauce for 2 tbsp butter (adds moisture, reduces fat).
- Fat Profile: Butter provides saturated fat, but also beneficial short-chain fatty acids (butyrate) linked to gut health. Swapping half the butter for avocado oil or almond butter adds monounsaturated fats. Dark chocolate contributes heart-healthy flavonoids and antioxidants.
- Refined Carbohydrates: All-purpose flour is highly processed. For increased fiber and nutrients: replace up to ½ cup flour with oat flour (blend rolled oats), whole wheat pastry flour, or almond flour (reduce by 2 tbsp per ¼ cup almond flour due to density).
- Sodium Awareness: Contains ~180–220mg sodium per bar—moderate for a dessert. Those on sodium-restricted diets can omit added salt and rely on naturally occurring sodium in butter and chocolate.
- Allergen Notes: Contains dairy, eggs, and gluten. Vegan/GF versions address these—but always verify chocolate labels for shared facility warnings (nuts, soy, dairy).
- Functional Additions: Boost nutrition subtly: stir in 2 tbsp ground flax or chia seeds (adds omega-3s and fiber); fold in ¼ cup chopped walnuts (omega-3s + crunch); or top with fresh berries (vitamin C, anthocyanins).
- Mindful Enjoyment: Research shows that savoring treats slowly—without guilt—supports metabolic health and emotional well-being more than restrictive dieting. Pairing a bar with green tea (antioxidants) or a handful of almonds (protein/fat) slows glucose absorption and increases satisfaction.
Ultimately, Gooey Cookie Bars belong in a balanced, joyful eating pattern—not as daily fare, but as meaningful celebration of craft, connection, and comfort.
Ingredients
- 1 cup (227g) unsalted butter, melted and slightly cooled
- 1 ½ cups (300g) packed dark brown sugar
- ¼ cup (50g) granulated sugar
- 1 tsp fine sea salt (plus ¼ tsp flaky sea salt for finishing)
- 2 large eggs, room temperature
- 2 tsp pure vanilla extract
- 2 ¼ cups (281g) all-purpose flour, spooned and leveled
- ½ tsp baking soda
- 2 cups (340g) semisweet or bittersweet chocolate chips or chopped chocolate (60–70% cacao)
- (Optional) ½–¾ cup add-ins: toasted pecans, pretzel pieces, dried cherries, etc.
Directions
- Preheat oven to 325°F (163°C). Grease a 9×13-inch metal baking pan, then line bottom and two long sides with parchment paper, leaving 2-inch overhangs.
- In a medium saucepan or microwave-safe bowl, melt butter over low heat or in 20-second bursts. Cool 5 minutes.
- In a large bowl, whisk melted butter, brown sugar, granulated sugar, and fine salt until smooth and glossy (~1 minute). Whisk in eggs one at a time, then vanilla, until fully combined.
- In a separate bowl, whisk flour and baking soda. Gradually add to wet mixture in two additions, folding gently with a silicone spatula until just combined—do not overmix.
- Fold in chocolate chips and any optional add-ins until evenly distributed.
- Scrape batter into prepared pan. Spread evenly with offset spatula. Sprinkle top with flaky sea salt.
- Bake 32–36 minutes, rotating pan halfway, until edges are deep golden and set, and center is soft, shiny, and only slightly jiggly when pan is gently shaken.
- Cool completely in pan on wire rack—minimum 2 hours, ideally overnight—for optimal texture and clean slicing.
- Using parchment overhangs, lift slab onto cutting board. Slice into 12–16 bars with sharp knife (wipe blade between cuts). Serve at room temperature.
FAQ
- Why did my bars turn out cakey instead of gooey?
- Likely causes: too much flour (imprecise measuring), overmixing after adding flour (gluten development), baking at too high a temperature, or overbaking. Also check if you used baking powder instead of soda—powder creates excess lift and airiness.
- Can I make these ahead for an event?
- Absolutely! Bars taste even better on Day 2 and 3 as flavors meld and texture matures. Store airtight at room temperature. For events, bake 1–2 days prior and slice day-of for freshest edges.
- My bars sank in the center—is that normal?
- A slight, gentle sink (¼ inch) is typical and desirable—it signals proper moisture retention and chew. Deep sinking or cracking suggests overmixing, too much leavener, or opening oven door too early.
- Can I use a different pan size?
- You can—but adjust accordingly. An 8×8-inch pan yields thicker, richer bars (bake 38–42 minutes). A 10×15-inch jelly roll pan yields thinner, crispier-edged bars (bake 26–30 minutes). Always check doneness visually.
- Why do you recommend dark brown sugar instead of light?
- Dark brown sugar contains nearly double the molasses of light—adding more moisture, acidity (for tenderness), and robust caramel depth essential for true gooeyness.
- Can I freeze the unbaked dough?
- Yes! Press dough into parchment-lined pan, cover tightly, and freeze up to 3 months. Thaw overnight in fridge, then bake as directed—add 3–5 minutes to bake time.
- What’s the best way to prevent sticking to the knife when cutting?
- Wipe knife with hot, damp cloth between every cut—or dip blade in hot water, dry thoroughly, then slice. Chilling bars 30–60 minutes before cutting also dramatically improves clean edges.
- Are these bars suitable for mailing or gifting?
- Yes! Layer bars between parchment in a rigid tin or box. Include a silica gel packet to absorb ambient moisture. They ship well for up to 5 days if packed securely and sent priority.
Summary
Gooey Cookie Bars are a masterclass in controlled indulgence—achieved through melted butter, dark brown sugar dominance, precise low-and-slow baking, and patient cooling to transform simple pantry staples into irresistibly chewy, golden-edged, deeply flavorful dessert bars.
Infinitely customizable, rooted in midcentury baking tradition, and beloved across generations, they prove that the most memorable desserts aren’t always the most complicated—but the ones made with intention, texture awareness, and joyful generosity.