Introduction
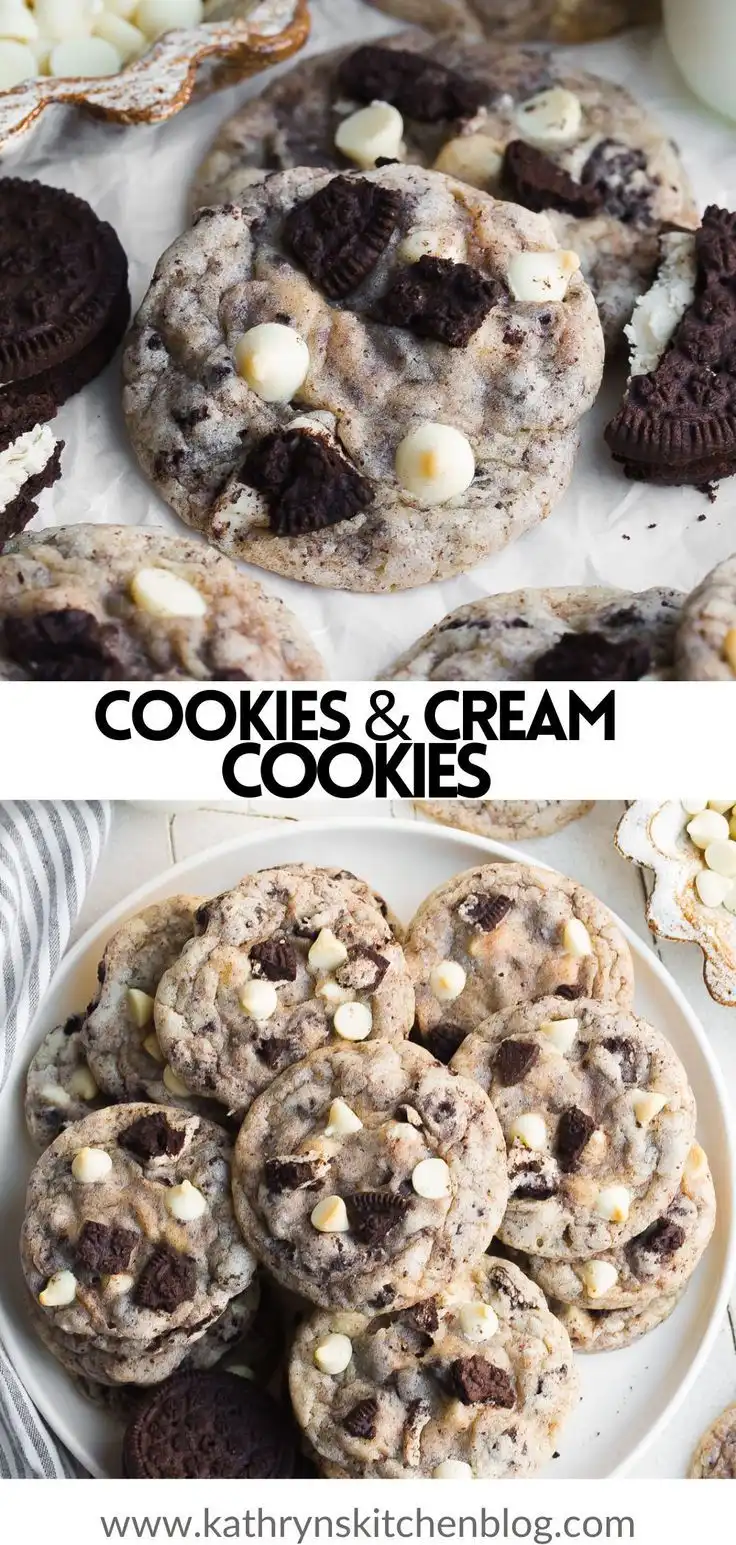
Cookies and Cream Cookies are a beloved American classic—rich, chewy, and irresistibly nostalgic. These cookies capture the essence of everyone’s favorite ice cream flavor in portable, bakeable form: crisp-edged yet soft-centered cookies studded generously with crunchy Oreo® cookie pieces and swirled with creamy white chocolate or vanilla-infused dough. Whether you’re a lifelong fan of the iconic black-and-white sandwich cookie or discovering the magic for the first time, Cookies and Cream Cookies deliver pure, unadulterated joy in every bite. They’re more than just dessert—they’re comfort food reimagined, party-ready treats, lunchbox staples, and the ultimate crowd-pleaser at bake sales, holiday cookie exchanges, and casual get-togethers.
The History
The origin of Cookies and Cream as a flavor traces back to the early 1970s at South Dakota State University, where dairy science students Jerry Shirk and Shirley McCallum reportedly created the first version by crushing Oreo® cookies into vanilla ice cream for a university project. The concept quickly gained traction, and by 1983, Dreyer’s (now part of Froneri) commercially launched Cookies and Cream ice cream—officially cementing its place in American dessert culture. While the ice cream exploded in popularity, it wasn’t until the late 1990s and early 2000s that home bakers began adapting the concept into cookies—first as simple drop cookies with chopped Oreos, then evolving into sophisticated iterations featuring browned butter, stabilized cream cheese bases, and even homemade “Oreo-style” cookie pieces. The rise of food blogs, viral baking videos on YouTube and TikTok, and the mainstream embrace of nostalgic, retro-inspired flavors further propelled Cookies and Cream Cookies into a permanent fixture on bakery menus and pantry shelves nationwide. Today, they stand as a testament to culinary innovation rooted in childhood memory—and proof that sometimes, the best recipes begin with something already beloved.
Ingredients Breakdown
Understanding each ingredient’s role is key to mastering these cookies—not just for flavor, but for texture, structure, spread, and shelf life:
- All-Purpose Flour (2 ¼ cups / 280g): Provides gluten structure and bulk. Sifting ensures even distribution and prevents dense, tough cookies. For enhanced tenderness, some bakers substitute up to ¼ cup with cake flour.
- Baking Soda (1 tsp): A fast-acting leavener that encourages lift and spread during baking. It reacts with acidic components (like brown sugar’s molasses and the cocoa in Oreos) to create carbon dioxide bubbles—resulting in airy, slightly crisp edges and chewy centers.
- Unsalted Butter (1 cup / 227g, softened to 65–68°F): Adds richness, moisture, and flakiness. Softened (not melted) butter creams effectively with sugar to trap air—essential for volume and lightness. European-style butter (higher fat content) yields a more tender, melt-in-your-mouth crumb.
- Granulated Sugar (¾ cup / 150g): Contributes sweetness, aids browning (via caramelization), and creates crispness. Its fine granules dissolve easily and support structure without excessive chew.
- Packed Light Brown Sugar (1 cup / 215g): Adds deep molasses notes, moisture retention (thanks to its hygroscopic nature), and chewiness. Dark brown sugar intensifies flavor but may darken cookies more; light brown offers balanced warmth.
- Large Eggs (2, room temperature): Act as emulsifiers and binders. Room-temperature eggs incorporate more smoothly into the batter, preventing curdling and ensuring uniform texture. The yolks contribute fat and richness; whites add slight structure.
- Pure Vanilla Extract (2 tsp): Enhances all other flavors and adds aromatic complexity. Mexican or Tahitian vanilla offers floral nuance; Madagascar bourbon vanilla delivers classic warmth. Avoid imitation extract—it lacks depth and can taste artificial when baked.
- High-Quality White Chocolate Chips or Chunks (1 cup / 170g): Optional but highly recommended—adds creamy sweetness, glossy sheen, and melty pockets. Use couverture-grade or baking-specific white chocolate (minimum 29% cocoa butter); avoid candy melts or chocolate wafers, which contain palm oil and won’t melt properly.
- Classic Oreo® Cookies (14–16 full cookies, ~200g): The star ingredient. Use original, non-double-stuffed varieties for optimal crunch-to-cream ratio. Freeze for 15 minutes before chopping to prevent smearing. Reserve 2–3 whole cookies for garnish if desired.
- Fine Sea Salt (1 tsp + pinch for finishing): Balances sweetness, heightens flavor perception, and controls yeast activity (though not applicable here, it still modulates overall taste). Flaky Maldon or fleur de sel sprinkled post-bake adds luxurious textural contrast.
- Optional Additions: A tablespoon of cornstarch (for ultra-chewy centers), 1 tbsp instant espresso powder (to deepen chocolate notes without bitterness), or ½ tsp almond extract (for subtle nutty complexity).
Step-by-Step Recipe
- Prep & Chill (30+ minutes): Line two large baking sheets with parchment paper or silicone mats. Place 14–16 Oreo cookies in the freezer for 15 minutes. In a small bowl, whisk together flour, baking soda, and salt. Set aside. Ensure all ingredients (especially eggs and butter) are at proper room temperature.
- Cream Butter & Sugars (3–4 minutes): In the bowl of a stand mixer fitted with the paddle attachment (or using a hand mixer), beat softened butter, granulated sugar, and brown sugar on medium speed until pale, fluffy, and well-aerated—scraping down the bowl twice. Do not rush: this step builds the cookie’s architecture.
- Incorporate Wet Ingredients (1–2 minutes): Add eggs one at a time, beating fully after each addition until emulsified and glossy. Mix in vanilla extract. Batter should be smooth and cohesive—no streaks of egg or separation.
- Combine Dry & Wet (30 seconds): Reduce mixer speed to low. Gradually add the dry ingredients in 2–3 additions, mixing only until no flour streaks remain. Overmixing develops gluten and leads to toughness—stop the moment the dough comes together.
- Fold in Cookie Pieces & Chocolate (1 minute): Remove bowl from mixer. Using a flexible spatula, gently fold in frozen, coarsely chopped Oreos (aim for pea- to dime-sized shards—some larger pieces are welcome!) and white chocolate chips. Rotate and fold—not stir—to preserve texture and prevent overworking.
- Chill Dough (Minimum 2 hours, ideally overnight): Cover bowl tightly with plastic wrap and refrigerate for at least 2 hours—or up to 72 hours. Chilling solidifies the butter, slows spread, enhances flavor development (sugars caramelize more deeply), and improves dough cohesion. Overnight chilling yields superior depth and chew.
- Preheat & Portion (15 minutes before baking): Preheat oven to 350°F (177°C) with racks in upper and lower thirds. Scoop chilled dough using a 2-tbsp cookie scoop (≈45g per portion). Roll into tight balls—this ensures even baking and round shape. Place 3 inches apart on prepared sheets.
- Bake (11–13 minutes): Bake one sheet at a time for optimal airflow. Rotate pan halfway through. Cookies are done when edges are golden brown and set, centers appear *just* puffed and slightly soft (they’ll firm as they cool), and surface cracks begin to form. Underbake slightly for maximum chew; overbake for crispier texture.
- Cool & Finish (15–20 minutes): Let cookies cool on baking sheet for 5 minutes—this sets their structure. Then carefully transfer to wire racks to cool completely. Sprinkle warm cookies with a tiny pinch of flaky sea salt while still slightly tacky for perfect sweet-salty balance.
Tips
- Measure Precisely: Use a kitchen scale for flour—spoon-and-level method is acceptable, but scooping directly from the bag compacts flour and causes dry, dense cookies.
- Freeze Oreos Before Chopping: Warm cookies smear and turn gummy. Frozen Oreos yield clean, sharp shards that stay distinct during baking.
- Don’t Skip the Chill: Warm dough spreads excessively, resulting in thin, greasy, misshapen cookies. Even 30 minutes helps—but 2+ hours transforms texture and flavor.
- Rotate Pans Mid-Bake: Home ovens have hot spots. Rotating ensures even browning and consistent doneness across all cookies.
- Use an Oven Thermometer: Many ovens run hot or cold. An accurate reading prevents underbaking (gooey centers) or overbaking (brittle edges).
- Let Them Rest on the Sheet: That 5-minute rest allows carryover cooking and structural setting—trying to move them too soon causes breakage.
- Store Smart: Keep in an airtight container at room temperature for up to 5 days. For longer freshness, freeze baked cookies (up to 3 months) or unbaked dough balls (up to 3 months)—bake straight from frozen, adding 1–2 minutes.
- Revive Stale Cookies: Place in a 300°F oven for 3–4 minutes or microwave for 5 seconds with a damp paper towel to restore softness.
- Batch Consistency: If baking multiple trays, keep unused dough chilled between batches—even 10 minutes in the fridge makes a difference.
- Know Your Oreos: Generic “cookie creme” versions vary widely in cream filling stability and cookie crunch. Stick with original Nabisco Oreos for reliable performance and authentic flavor.
Variations and Customizations
These cookies are endlessly adaptable—perfect for seasonal twists, dietary preferences, or creative flair:
- Double-Stuffed Upgrade: Swap standard Oreos for Double Stuffed or Mega Stuffed for intensified creaminess—just reduce total cookie weight slightly to maintain dough balance.
- Gluten-Free Version: Substitute 1:1 gluten-free all-purpose flour blend (with xanthan gum included) and certified GF Oreos (like Kinnikinnick or Glutino). Add 1 tbsp psyllium husk powder for improved binding and chew.
- Vegan Adaptation: Use vegan butter (Miyoko’s or Earth Balance), flax eggs (2 tbsp ground flax + 6 tbsp water, rested 10 min), coconut sugar (for brown sugar), and vegan Oreos (available in many regions). Opt for dairy-free white chocolate chips (Enjoy Life or Pascha).
- Protein-Packed: Stir in ¼ cup unflavored whey or plant-based protein powder (reduce flour by 2 tbsp) and add 2 tbsp chia or hemp seeds for extra nutrition and crunch.
- Mini Cookies: Scoop 1-tsp portions for bite-sized treats—bake at 350°F for 7–9 minutes. Ideal for parties, gift tins, or portion control.
- Stuffed Center: Flatten dough balls, place a small square of white chocolate + a tiny Oreo piece in center, then seal and roll. Creates molten, surprise-filled interiors.
- Seasonal Infusions: Add 1 tsp pumpkin spice (fall), ½ tsp peppermint extract + crushed candy cane (holidays), or 1 tbsp freeze-dried strawberry powder (spring/summer).
- Chocolate-Dipped: Once fully cooled, dip half of each cookie in tempered dark, milk, or white chocolate. Sprinkle with crushed Oreos or edible glitter before setting.
- Breakfast Cookies: Reduce sugar by ¼ cup, add ½ cup old-fashioned oats, ¼ cup chopped walnuts, and 1 tbsp ground flaxseed. Pair with Greek yogurt for a balanced morning treat.
- Boozy Twist: Replace 1 tsp vanilla with 1 tbsp high-quality crème de cacao or Kahlúa—enhances depth without overpowering. Reduce other liquids accordingly.
Health Considerations and Nutritional Value
While Cookies and Cream Cookies are undeniably indulgent, mindful preparation and informed choices can align them better with wellness goals—without sacrificing satisfaction. A standard 3-inch cookie (≈45g) made with the base recipe contains approximately:
- Calories: 210–230 kcal
- Total Fat: 11–13g (7–8g saturated, primarily from butter and white chocolate)
- Carbohydrates: 26–29g (18–21g sugars, including natural molasses from brown sugar and added sugars from Oreos and chocolate)
- Protein: 2–3g
- Fiber: <1g (increases significantly with oat, flax, or whole-grain substitutions)
- Sodium: 130–160mg (largely from butter, Oreos, and added salt)
Key Considerations:
- Sugar Awareness: Oreos contribute ~3.3g added sugar per cookie (2 cookies ≈ 6.6g), and white chocolate adds another ~4g per serving. For reduced sugar, consider low-sugar Oreo alternatives (e.g., Oreo Thins with reduced filling) or use dark chocolate chips (70%+) with minimal added sugar.
- Trans Fat & Palm Oil: Standard Oreos contain partially hydrogenated oils (in some international markets) and palm oil. Choose brands with cleaner labels (e.g., Newman’s Own Organic or homemade Oreo-style cookies) when possible.
- Dairy Sensitivity: Butter and white chocolate contain lactose and casein. Lactose-free butter and allergen-friendly white chocolate exist, though flavor profiles differ.
- Glycemic Impact: High glycemic load due to refined sugars and low fiber. Pairing with nuts, Greek yogurt, or a glass of unsweetened almond milk helps slow glucose absorption.
- Mindful Enjoyment: Research shows that savoring desserts slowly—and eating them as part of a balanced diet—supports long-term metabolic health more than rigid restriction. One well-made cookie satisfies more than three low-quality ones.
- Functional Upgrades: Adding cinnamon (anti-inflammatory), chopped almonds (vitamin E, magnesium), or matcha powder (antioxidants) introduces functional benefits without compromising authenticity.
Ingredients
- 2 ¼ cups (280g) all-purpose flour, spooned & leveled
- 1 teaspoon baking soda
- 1 teaspoon fine sea salt
- 1 cup (227g) unsalted butter, softened to 65–68°F
- ¾ cup (150g) granulated sugar
- 1 cup (215g) packed light brown sugar
- 2 large eggs, room temperature
- 2 teaspoons pure vanilla extract
- 1 cup (170g) high-quality white chocolate chips or chunks
- 14–16 original Oreo® cookies (about 200g), frozen for 15 minutes, then coarsely chopped
- Flaky sea salt, for finishing (optional but recommended)
Directions
- Line two large baking sheets with parchment paper or silicone baking mats. Place Oreos in freezer for 15 minutes. In a medium bowl, whisk together flour, baking soda, and salt. Set aside.
- In the bowl of a stand mixer fitted with the paddle attachment, combine softened butter, granulated sugar, and brown sugar. Beat on medium speed for 3–4 minutes, scraping down sides twice, until light, fluffy, and pale in color.
- Add eggs one at a time, beating well after each addition until fully incorporated and glossy. Mix in vanilla extract.
- Reduce mixer speed to low. Gradually add dry ingredients in 2–3 additions, mixing only until no flour streaks remain—do not overmix.
- Using a flexible spatula, gently fold in frozen, chopped Oreos and white chocolate chips until evenly distributed.
- Cover bowl tightly with plastic wrap and refrigerate for at least 2 hours—or preferably, 12–24 hours—for optimal flavor and texture.
- When ready to bake, preheat oven to 350°F (177°C) with racks in upper and lower thirds. Scoop chilled dough using a 2-tablespoon cookie scoop (≈45g each). Roll into tight balls and place 3 inches apart on prepared sheets.
- Bake one sheet at a time for 11–13 minutes, rotating pan halfway through, until edges are golden brown and set, centers are puffed and soft to the touch, and surface shows gentle cracking.
- Allow cookies to cool on baking sheet for 5 minutes, then carefully transfer to wire racks to cool completely. Sprinkle lightly with flaky sea salt while still slightly warm.
- Store in an airtight container at room temperature for up to 5 days—or freeze baked cookies or dough balls for up to 3 months.
FAQ
- Can I use melted butter instead of softened?
- No—melted butter creates flatter, greasier, less structured cookies. Softened butter is essential for proper creaming and air incorporation. If you accidentally melt it, chill until semi-solid (≈30–45 min) before proceeding.
- Why do my cookies spread too much?
- Most commonly due to insufficient chilling, warm baking sheets, incorrect butter temperature, or too much sugar relative to flour. Also check your baking soda—it may be expired (test by mixing ¼ tsp with 2 tsp vinegar; if it doesn’t bubble vigorously, replace it).
- Can I make these without white chocolate?
- Absolutely. Omit it entirely or replace with additional Oreo pieces (up to 1 ¼ cups total) or semi-sweet chocolate chips for contrast. The cookies remain delicious—just less creamy.
- How do I prevent the Oreo pieces from turning green or gray?
- This discoloration occurs when alkaline ingredients (like baking soda) react with the red food dye (Red #40) in Oreo filling. To minimize it: ensure precise measuring of baking soda, avoid overmixing, and consider reducing soda to ¾ tsp (though this may affect spread and rise slightly).
- Can I use store-bought cookie dough and just add Oreos?
- You can—but results will vary widely based on brand. Most pre-made doughs contain stabilizers and lower butter content, leading to inconsistent texture and muted flavor. For best results, start fresh.
- My dough is too sticky to scoop—what should I do?
- Chill it longer (up to 1 hour more). If still sticky, lightly flour your hands or scoop—or add 1 tbsp flour and fold gently. Never add excess flour to the entire batch unless absolutely necessary.
- Can I bake frozen dough balls directly?
- Yes! Place frozen dough balls on parchment-lined sheet and bake at 350°F for 13–15 minutes, adding 1–2 minutes to the original time. No need to thaw.
- Are there egg-free alternatives that work well?
- Yes—try 2 flax eggs (2 tbsp ground flaxseed + 6 tbsp warm water, rested 10 minutes), or ½ cup unsweetened applesauce + 1 tsp baking powder (adds slight tang). Texture will be denser and less chewy but still enjoyable.
- What’s the best way to crush Oreos evenly?
- Place frozen cookies in a heavy-duty zip-top bag and use a rolling pin or meat mallet. Pulse briefly in a food processor—watch closely to avoid dust. Aim for varied sizes: some fine crumbs for flavor infusion, some larger shards for texture.
- Can I make these ahead for a party?
- Definitely. Baked cookies stay fresh up to 5 days in an airtight container. Unbaked dough balls freeze beautifully for 3 months—thaw in fridge overnight or bake from frozen. For peak freshness, bake the morning of your event.
Summary
Cookies and Cream Cookies are a masterclass in nostalgic indulgence—melding the unmistakable crunch of Oreo® cookies and creamy sweetness of white chocolate into thick, chewy, golden-edged delights that satisfy cravings and spark joy with every bite. With careful attention to ingredient quality, precise technique, and thoughtful customization, they transform from simple treats into signature desserts worthy of celebration, gifting, and generations of happy memories.
Whether you stick to the timeless original or explore gluten-free, vegan, or seasonal riffs, these cookies prove that the most beloved flavors endure—not because they’re complicated, but because they’re made with intention, care, and a generous helping of love.