Introduction
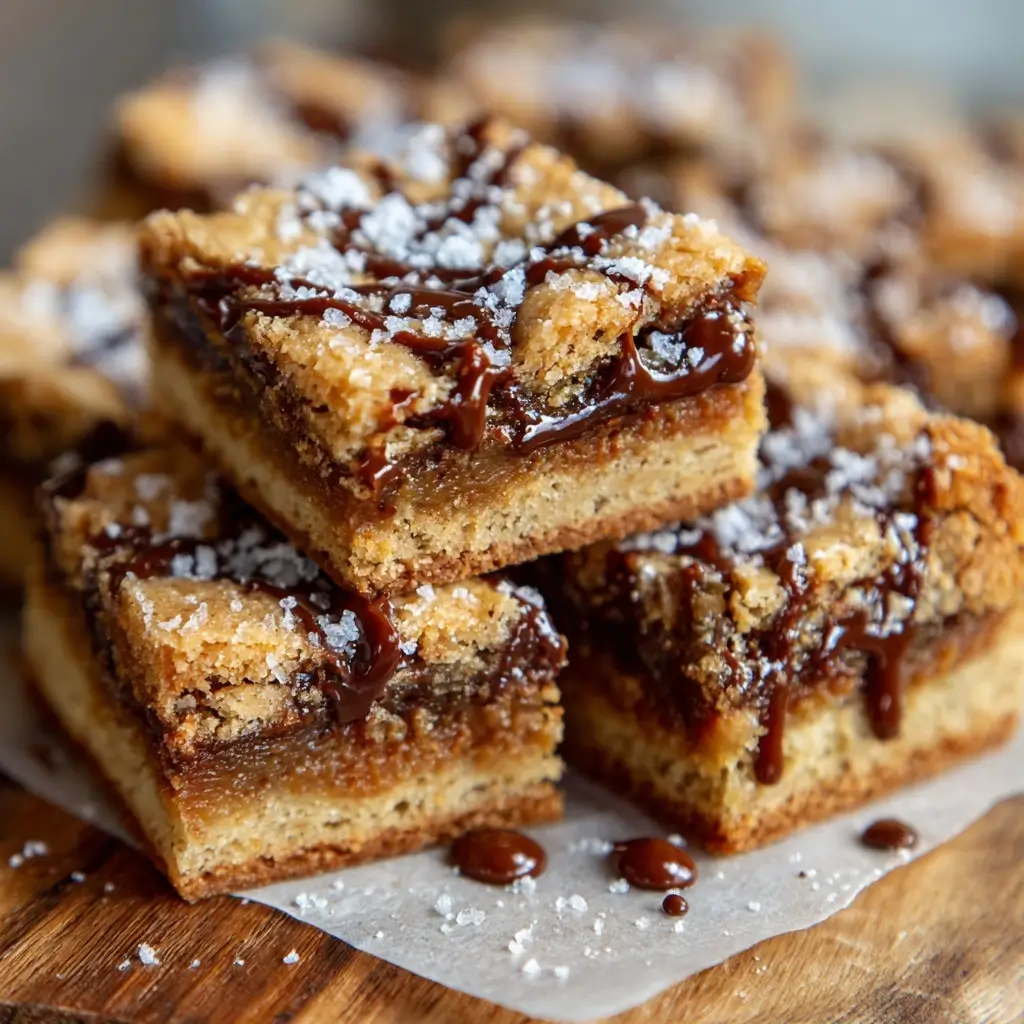
Brown Butter Cookie Bars are the decadent, nutty, deeply aromatic evolution of classic chocolate chip cookies—transformed into a rich, sliceable, no-drop, no-spread bar format that delivers maximum flavor with minimal fuss. Unlike traditional drop cookies that rely on precise chilling and portioning, these bars bake uniformly in a single pan, yielding dense yet tender squares with crisp edges, chewy centers, and an unmistakable toasty complexity from carefully browned butter. They strike the perfect balance between nostalgic comfort and sophisticated baking technique—ideal for holiday platters, bake sales, lunchbox treats, or an indulgent afternoon pick-me-up. Whether you’re a seasoned baker seeking depth and nuance or a home cook craving foolproof, crowd-pleasing dessert magic, Brown Butter Cookie Bars deliver extraordinary taste without demanding professional precision.
The History
The origins of Brown Butter Cookie Bars lie at the intersection of two beloved American traditions: the chocolate chip cookie (invented by Ruth Wakefield in 1938 at the Toll House Inn) and the centuries-old culinary technique of beurre noisette—French for “hazelnut butter”—a method of gently cooking unsalted butter until its milk solids caramelize, releasing rich, nutty, toffee-like aromas. While browning butter has long been used in European sauces, pastries, and savory applications, its integration into American cookie dough didn’t gain widespread traction until the late 20th and early 21st centuries, buoyed by food media’s growing fascination with layered flavor development. Pioneering bakers and bloggers—including Stella Parks of Bravetart and Sarah Kieffer of The Vanilla Bean Blog—championed browned butter as a transformative upgrade for classic recipes, citing its ability to add dimensional warmth, reduce perceived sweetness, and enhance mouthfeel. The bar adaptation followed naturally: eliminating spread, streamlining assembly, and maximizing surface area for caramelization. Today, Brown Butter Cookie Bars appear across gourmet cafés, artisanal bakeries, and viral social feeds—not just as a trend, but as a modern dessert standard rooted in time-honored technique and deeply satisfying nostalgia.
Ingredients Breakdown
Every ingredient in this recipe serves both functional and sensory roles—no element is arbitrary. Below is a meticulous breakdown of why each component matters:
- Unsalted Butter (1 cup / 2 sticks / 227g): Used unsalted for precise sodium control. Browning transforms its composition—water evaporates, milk solids toast, and volatile compounds like diacetyl and furans develop, lending notes of toasted nuts, butterscotch, and warm caramel. This step is non-negotiable for authentic depth; substituting melted or clarified butter will yield flat, one-dimensional results.
- Granulated Sugar (¾ cup / 150g): Provides structure, crispness, and aids in caramelization during baking. Its finer crystals dissolve more readily than coarse sugar, ensuring even texture and optimal spread control in bar form.
- Packed Light Brown Sugar (1 cup / 215g): Adds moisture, chewiness, and molasses-derived acidity that balances richness. The molasses also enhances Maillard reactions, deepening color and complexity. Dark brown sugar may be substituted for intensified toffee notes—but increases moisture, potentially softening the final set.
- Large Eggs (2, room temperature): Act as emulsifiers and leaveners. Room temperature ensures full incorporation with warm browned butter, preventing re-solidification and graininess. Egg yolks contribute fat and richness; whites provide subtle lift and binding.
- Pure Vanilla Extract (2 tsp): Preferably Madagascar bourbon vanilla—its vanillin content harmonizes with brown butter’s nuttiness and rounds out sharp caramel notes. Imitation extract lacks aromatic nuance and can taste artificial under high heat.
- All-Purpose Flour (2¼ cups / 280g, spooned & leveled): The structural backbone. Too much leads to toughness; too little causes collapse. Spooning—not scooping—prevents compaction and over-measurement. For gluten-sensitive bakers, a 1:1 certified gluten-free all-purpose blend (like King Arthur or Bob’s Red Mill) works reliably when paired with xanthan gum already included.
- Baking Soda (½ tsp): A fast-acting alkali that reacts with the natural acids in brown sugar and browned butter, promoting lift and spreading control. It also enhances browning via increased pH—critical for developing those signature golden edges.
- Fine Sea Salt (1 tsp): Not just for seasoning—salt suppresses bitterness, amplifies sweetness perception, and balances fat. Fine grain ensures even dispersion; flaky salt should be reserved for finishing only.
- Semi-Sweet Chocolate Chips or Chunks (1½ cups / 270g): High-quality 52–60% cacao is ideal—rich enough to stand up to brown butter’s intensity, but not so dark as to overwhelm. Chunks (not chips) melt more luxuriously and create irregular, gooey pockets. Mini chips offer uniform distribution; chopped chocolate bars provide textural contrast. Avoid “baking chips” with stabilizers—they resist melting and yield waxy texture.
- Optional Add-Ins: Toasted walnuts or pecans (¾ cup, chopped), flaky sea salt (Maldon or Fleur de Sel, sprinkled pre-bake), espresso powder (1 tsp, enhances chocolate depth), or a swirl of dulce de leche (¼ cup, swirled in before baking).
Step-by-Step Recipe
- Brown the Butter: Place unsalted butter in a light-colored heavy-bottomed saucepan (e.g., stainless steel or enameled cast iron) over medium-low heat. Swirl occasionally—not stir—as it melts, foams, and crackles. Continue cooking 4–7 minutes until foam subsides, liquid turns golden-amber, and milk solids at the bottom turn fragrant, deep tan (not black). Immediately pour into a heatproof bowl to halt cooking. Let cool 15–20 minutes—until warm to the touch but no longer steaming (≈100–110°F). Skim off any pale foam if desired, but retain all toasted bits for maximum flavor.
- Cream Sugars & Browned Butter: In a large stand mixer fitted with paddle attachment (or sturdy hand mixer), combine cooled browned butter, granulated sugar, and brown sugar. Beat on medium speed 3–4 minutes until thick, glossy, and slightly lighter in color—do not under-cream; this builds air and texture. Scrape bowl thoroughly.
- Incorporate Wet Ingredients: Add eggs one at a time, beating 1 minute after each addition until fully absorbed and emulsified. Add vanilla and beat 30 seconds more. Mixture should be smooth, cohesive, and slightly ribbony.
- Whisk Dry Ingredients: In a separate medium bowl, whisk together flour, baking soda, and salt until fully homogenous—no streaks of white or gray. Sift if lumps persist.
- Combine Dry & Wet: Reduce mixer speed to low. Gradually add dry ingredients in three additions, mixing only until no flour remains visible—about 15–20 seconds per addition. Overmixing develops gluten and yields tough bars. Batter will be thick, glossy, and hold soft peaks.
- Fold in Chocolate: Using a silicone spatula, gently fold in chocolate chips/chunks until evenly distributed. For optional nuts, add now.
- Prepare Pan: Line a 9×13-inch metal baking pan with parchment paper, leaving 2-inch overhang on two opposite sides for easy removal. Lightly grease exposed pan edges and parchment base.
- Spread & Smooth: Transfer batter into prepared pan. Use an offset spatula or bench scraper to spread evenly, pressing firmly into corners. Smooth top with damp fingers or spatula for uniform thickness. Optional: Sprinkle top with flaky sea salt.
- Chill (Critical Step): Refrigerate uncovered 60–90 minutes—or freeze 30 minutes—until firm to the touch. Chilling solidifies butter, prevents excessive spread, ensures clean cuts, and intensifies flavor melding.
- Bake: Preheat oven to 350°F (177°C) with rack in center position. Bake chilled bars 28–34 minutes—rotating pan halfway—until edges are deeply golden and crisp, center is puffed and just set (a toothpick inserted 1 inch from edge should have moist crumbs; center should *not* look wet or shiny). Underbaking yields gummy centers; overbaking dries them out. Note: Bars continue to set as they cool.
- Cool Completely: Let pan rest on wire rack 1 hour minimum—preferably 2 hours—until completely cool and firm. Do not cut warm! Premature slicing causes crumbling and loss of structure.
- Cut & Serve: Lift bars out using parchment overhang. Place on cutting board. Use a sharp chef’s knife wiped clean between cuts. For clean edges, dip knife in hot water and dry before each slice. Cut into 12–16 rectangles (or 24 smaller squares).
Tips
- Butter Control is Everything: Never walk away while browning butter—it goes from perfect to burnt in under 30 seconds. Use a timer, watch color *and* smell, and trust your nose: nutty, caramel, toasted almond = ideal. Burnt = discard and restart.
- Cool Butter Strategically: Warm (not hot) browned butter creams best. If it cools too much and begins to solidify, gently rewarm in microwave in 5-second bursts—stirring between—until fluid but not hot.
- Measure Flour Accurately: Use the spoon-and-level method religiously. Scooping packs flour—adding up to 25% extra—and guarantees dense, dry bars. Invest in a kitchen scale for 100% consistency.
- Chill Without Compromise: Skipping or shortening the chill leads to thin, greasy, uneven bars. For make-ahead convenience, chill batter overnight—cover tightly with plastic wrap pressed directly onto surface.
- Oven Calibration Matters: Most home ovens run hot or cold. Use an independent oven thermometer. If bars consistently overbrown on bottom, place pan on a preheated baking stone or double-pan (nest one 9×13 inside another).
- Know Your Pan: Dark nonstick pans absorb more heat—reduce temp by 25°F and check 3–5 minutes early. Light aluminum or stainless steel yields most consistent results.
- Cooling Is Part of Baking: Resisting the urge to cut while warm is the #1 secret to clean slices. Patience rewards you with perfect, bakery-style bars every time.
- Storage Wisdom: Keep bars airtight at room temperature up to 5 days, refrigerated up to 10 days (slightly firmer texture), or frozen up to 3 months (wrap individually in parchment + foil). Thaw at room temp 20 minutes—never microwave.
- Revive Stale Bars: Briefly toast in 325°F oven for 4–5 minutes—restores crisp edges and revives aroma.
- Batch Scaling Notes: This recipe scales reliably to 1× (9×13), ½× (8×8), or 2× (two 9×13 pans). Adjust bake time accordingly: 8×8 needs ~22–27 min; double batch requires same time but rotate pans top-to-bottom halfway.
Variations and Customizations
This foundational recipe is a canvas for creativity—each variation preserves structural integrity while expanding flavor horizons:
- Double Chocolate Brown Butter Bars: Replace ¼ cup flour with unsweetened cocoa powder (Dutch-process preferred); add ½ cup finely chopped dark chocolate (70%) with chips.
- Maple Pecan Brown Butter Bars: Substitute ¼ cup brown sugar with pure maple syrup (reduce granulated sugar to ⅔ cup); fold in 1 cup toasted, chopped pecans and 2 tbsp maple sugar.
- Espresso Crunch Bars: Add 1 tsp instant espresso powder to dry ingredients; use dark chocolate chunks and fold in ½ cup crushed toffee bits (like Heath) in last fold.
- Oatmeal Raisin Reinvented: Replace ¾ cup flour with old-fashioned rolled oats (not quick oats); substitute raisins (soaked 10 min in hot water, drained) for chocolate; add 1 tsp cinnamon and ¼ tsp ground cloves.
- Salted Caramel Swirl: After spreading batter, dollop ⅓ cup thick caramel sauce (like Smucker’s Goober or homemade) over top. Use a knife to gently swirl—not overmix—creating ribbons. Finish with flaky salt.
- White Chocolate & Cranberry: Swap semi-sweet chips for high-quality white chocolate; fold in ¾ cup dried tart cranberries (not sweetened) and ½ tsp orange zest.
- Vegan Adaptation: Use vegan butter (Miyoko’s or Earth Balance) browned carefully (lower smoke point); flax eggs (2 tbsp ground flax + 5 tbsp water, rested 10 min); and vegan chocolate. Increase baking soda to ¾ tsp for lift.
- Gluten-Free Version: Substitute measure-for-measure GF flour blend with xanthan gum included. Add ½ tsp xanthan gum if blend doesn’t contain it. Chill batter 2 hours for optimal set.
- Lemon Blueberry Bars: Omit chocolate; add 2 tbsp lemon zest + 2 tsp lemon juice to wet mix; fold in 1 cup fresh or frozen (unthawed) blueberries tossed in 1 tbsp GF flour.
- Spiced Chai Bars: Add 1½ tsp chai spice blend (cinnamon, cardamom, ginger, clove, black pepper) to dry ingredients; steep 1 tea bag (Tazo Chai or equal) in warm browned butter for 3 minutes before cooling—remove bag before creaming.
Health Considerations and Nutritional Value
While Brown Butter Cookie Bars are inherently indulgent, mindful ingredient choices and portion awareness allow for thoughtful enjoyment within a balanced lifestyle. A standard serving (1 of 16 bars, approx. 2.5×2.5 inches) contains approximately:
- Calories: 220–240 kcal
- Total Fat: 13–15g (8–9g saturated, primarily from butter; 0g trans)
- Carbohydrates: 26–28g (18–20g sugars, naturally occurring from brown sugar and chocolate)
- Protein: 2–3g
- Fiber: 0.5–1g (increases significantly with oat or whole-grain substitutions)
- Sodium: 140–170mg (controllable by reducing added salt or using low-sodium butter)
Key Health Notes:
- Browned Butter Nuance: Contrary to myth, browning butter does not increase harmful compounds when done properly below its smoke point (~350°F). The Maillard reaction creates beneficial antioxidants like tocopherols and enhances bioavailability of fat-soluble vitamins (A, D, E, K).
- Sugar Awareness: Natural molasses in brown sugar provides trace minerals (calcium, potassium, iron), though amounts are minimal. For lower glycemic impact, replace up to half the brown sugar with coconut sugar (similar moisture profile) or date paste (reduce other liquids by 1 tbsp per ¼ cup paste).
- Chocolate Benefits: Semi-sweet chocolate contributes flavonoids linked to cardiovascular support and cognitive function—maximize benefits by choosing chocolate with ≥60% cacao and minimal added emulsifiers.
- Dietary Accommodations: Naturally egg-free versions use mashed banana (1 large, ripe) + 1 tsp vinegar for binding, though texture becomes denser and cake-like. Nut-free options omit nuts and use sunflower seed butter in place of optional nut additions.
- Mindful Indulgence: Pairing a bar with Greek yogurt, berries, or a handful of almonds slows glucose absorption and increases satiety—turning dessert into a more nutritionally rounded experience.
Always consult a registered dietitian or healthcare provider for personalized guidance, especially with conditions like diabetes, celiac disease, or dairy sensitivities.
Ingredients
- 1 cup (2 sticks / 227g) unsalted butter
- ¾ cup (150g) granulated sugar
- 1 cup (215g) packed light brown sugar
- 2 large eggs, room temperature
- 2 teaspoons pure vanilla extract
- 2¼ cups (280g) all-purpose flour, spooned and leveled
- ½ teaspoon baking soda
- 1 teaspoon fine sea salt
- 1½ cups (270g) semi-sweet chocolate chips or chunks
- Flaky sea salt (Maldon or Fleur de Sel), for finishing (optional)
Directions
- Preheat oven to 350°F (177°C). Line a 9×13-inch metal baking pan with parchment paper, leaving 2-inch overhang on two opposite sides. Lightly grease exposed pan edges and parchment base.
- In a light-colored heavy-bottomed saucepan, melt butter over medium-low heat. Swirl occasionally as it melts, foams, crackles, then subsides. Continue cooking until liquid turns golden-amber and milk solids at bottom are deep tan and fragrant (4–7 minutes total). Immediately pour into a heatproof bowl to stop cooking. Cool 15–20 minutes until warm to touch (≈100–110°F).
- In a large stand mixer with paddle attachment, beat cooled browned butter, granulated sugar, and brown sugar on medium speed 3–4 minutes until thick, glossy, and lighter in color. Scrape bowl.
- Add eggs one at a time, beating 1 minute after each until fully incorporated and emulsified. Add vanilla; beat 30 seconds.
- In a separate bowl, whisk together flour, baking soda, and salt until no streaks remain.
- Reduce mixer to low. Gradually add dry ingredients in three additions, mixing only until no flour is visible (15–20 sec per addition). Do not overmix.
- Fold in chocolate chips/chunks with a silicone spatula until evenly distributed.
- Spread batter into prepared pan. Use an offset spatula to press firmly into corners and smooth top. Optional: Sprinkle with flaky sea salt.
- Refrigerate uncovered 60–90 minutes until firm to touch.
- Bake 28–34 minutes—rotating pan halfway—until edges are deeply golden and crisp, center is puffed and just set (toothpick 1″ from edge has moist crumbs; center looks matte, not shiny).
- Cool in pan on wire rack 2 hours minimum—until completely cool and firm.
- Lift bars out using parchment overhang. Cut into 12–16 rectangles with a sharp, clean knife.
FAQ
- Can I use salted butter?
- No—salted butter contains inconsistent salt levels and added preservatives that interfere with browning and flavor clarity. Always use unsalted for control and purity.
- Why did my bars spread too much?
- Most commonly: butter was too warm when creaming, insufficient chilling time, or oven temperature too low. Ensure butter is warm—not hot—chill at least 60 minutes, and verify oven temp with a thermometer.
- Can I make these ahead of time?
- Absolutely. Unbaked batter keeps covered in fridge up to 3 days. Baked bars stay fresh airtight at room temp 5 days, refrigerated 10 days, or frozen 3 months.
- My browned butter smells bitter—is it ruined?
- Yes. Bitter = burnt milk solids. Discard and start over. True brown butter smells sweet, nutty, and toasty—not acrid or smoky.
- Can I use a glass or ceramic pan?
- Not recommended. These materials insulate and bake slower, leading to pale, underbaked centers and overdone edges. Use light-colored metal for even conduction.
- How do I prevent crumbly bars when cutting?
- Ensure full cooling (minimum 2 hours), use a sharp knife, wipe blade clean between cuts, and consider chilling fully baked (but cooled) bars in freezer 15 minutes before slicing.
- Can I add nuts without changing texture?
- Yes—add ¾ cup toasted, chopped nuts (walnuts, pecans, or almonds) in final fold. Toasting maximizes flavor and prevents sogginess.
- Why does the recipe call for both granulated and brown sugar?
- Granulated sugar promotes spread and crispness; brown sugar adds moisture, chew, and acidic complexity that boosts browning. Together, they create ideal bar texture—neither cakey nor brittle.
- Can I make these dairy-free?
- Yes—with caveats. Use high-fat vegan butter (≥80% fat) browned gently (lower smoke point), flax or aquafaba eggs, and dairy-free chocolate. Expect slightly denser, less crisp results.
- What’s the best way to store leftover bars?
- Airtight container at room temperature. For longer storage, layer bars between parchment sheets in freezer bag—freeze up to 3 months. Thaw unwrapped at room temp 20 minutes.
Summary
Brown Butter Cookie Bars elevate the humble chocolate chip cookie into a sophisticated, deeply flavorful, slice-and-serve dessert through the alchemy of perfectly browned butter, precise chilling, and balanced sweeteners—yielding bars with crisp golden edges, chewy-custardy centers, and an unforgettable nutty-caramel aroma.
Infinitely adaptable, nutritionally mindful with smart substitutions, and reliably impressive whether served at a holiday gathering or packed in a child’s lunchbox, these bars prove that exceptional flavor and effortless execution can—and should—go hand in hand.