
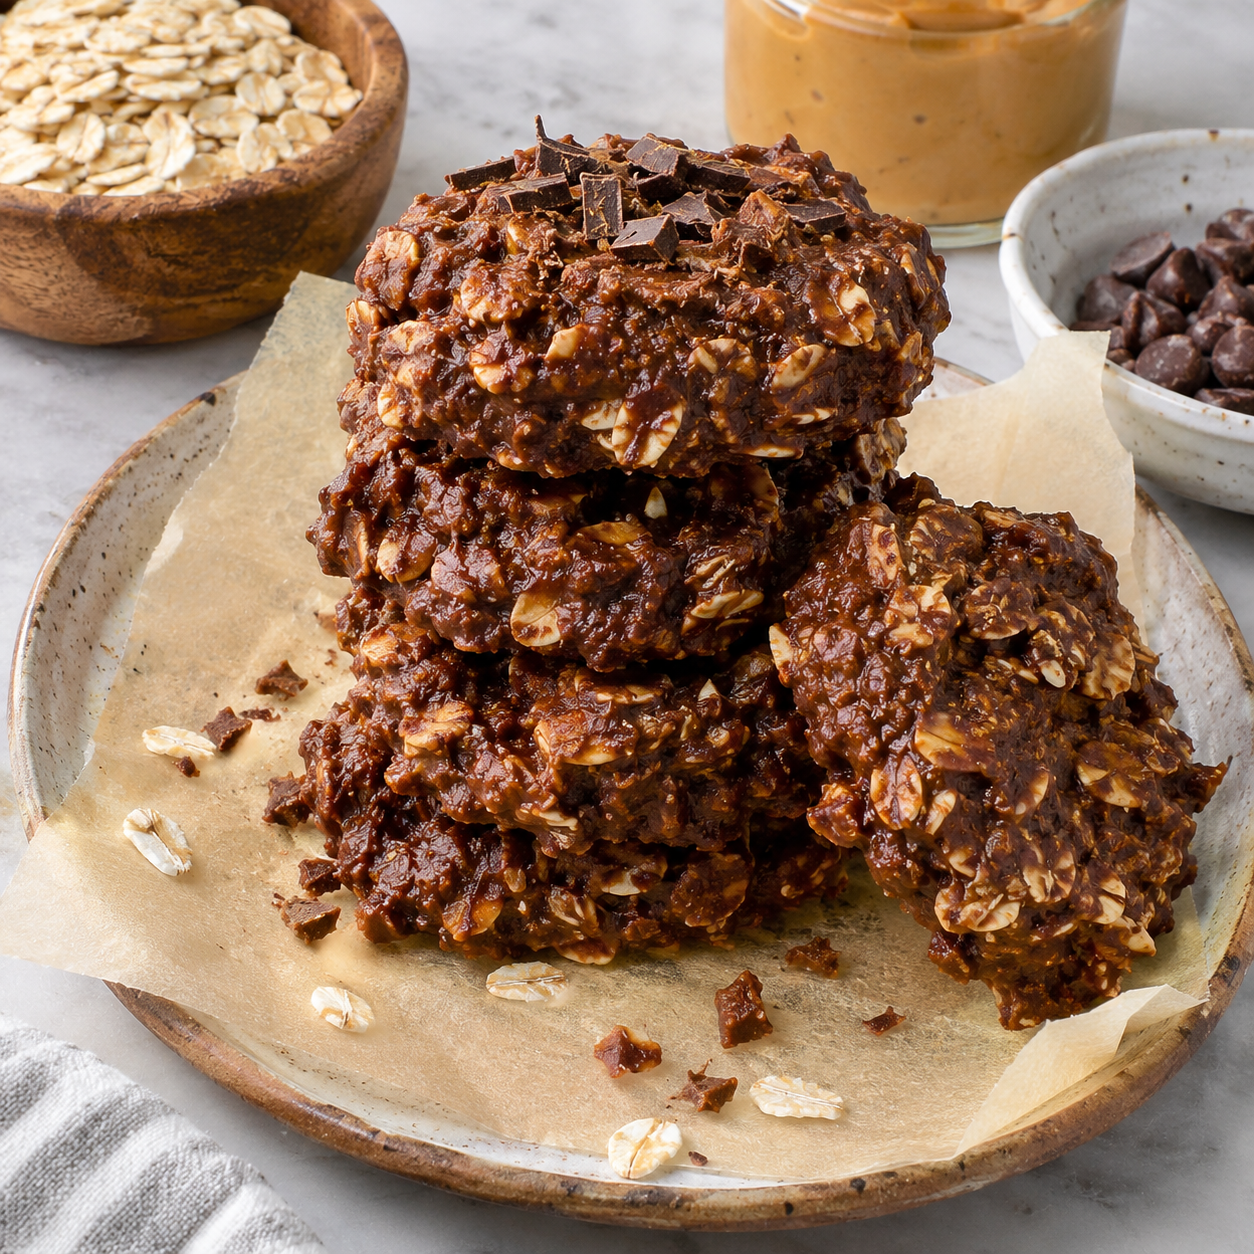
Introduction
In the fast-paced world of modern nutrition and fitness, finding a snack that perfectly balances convenience, taste, and macronutrient profile is often a challenging endeavor. High protein no bake chocolate oat cookies represent the pinnacle of this balance, offering a delightful solution for athletes, busy professionals, and health-conscious individuals alike. These cookies are not merely a treat; they are a functional food designed to support muscle recovery, sustain energy levels throughout the day, and satisfy intense chocolate cravings without the need for an oven or extensive preparation time. Whether you are looking for a post-workout recovery bite, a mid-afternoon office snack, or a wholesome dessert option for the family, this recipe delivers on all fronts. The texture is uniquely chewy yet firm, the flavor is richly chocolatey with hints of nutty warmth, and the nutritional payload is significant enough to make every bite count towards your daily goals. By eliminating the baking process, we preserve the nutritional integrity of heat-sensitive ingredients like certain protein powders and healthy fats, ensuring that you receive the maximum benefit from every component. This guide will walk you through everything you need to know to master this recipe, from the historical context of no-bake treats to the scientific breakdown of ingredients, ensuring you become a true expert in high-protein snacking.
The History
The concept of the oatmeal cookie dates back to the late 19th century, gaining immense popularity during the early 1900s as a staple in American households due to the affordability and longevity of oats. However, the specific evolution of the no-bake cookie is a fascinating journey through economic necessity and culinary innovation. During the Great Depression and World War II eras, sugar and butter were sometimes rationed, and fuel for ovens was conserved, leading homemakers to create candies and cookies that could be set on the stovetop or simply mixed and chilled. These early versions often relied on boiled sugar syrups, cocoa, and oats to create a fudge-like consistency that hardens upon cooling. As the fitness culture boom occurred in the 1980s and 1990s, the demand for higher protein content in snacks grew exponentially. Bodybuilders and athletes began modifying traditional no-bake recipes, substituting refined sugars with natural sweeteners and adding protein supplements to aid in muscle synthesis. The modern iteration of the high protein no bake chocolate oat cookie is the culmination of this century-long evolution, merging the comfort of a classic depression-era treat with the scientific advancements of modern sports nutrition. Today, they stand as a testament to how traditional recipes can be adapted to meet contemporary health standards without sacrificing the nostalgic comfort of a homemade cookie.
Ingredients Breakdown
Understanding the role of each component in this recipe is crucial for mastering the texture and nutritional value of the final product. Below is a detailed analysis of why each ingredient is selected and how it functions within the cookie matrix.
- Rolling Oats (Old Fashioned): Unlike instant oats, old-fashioned rolled oats provide a superior chewy texture and have a lower glycemic index. They are rich in beta-glucan, a soluble fiber that helps regulate blood sugar levels and promotes satiety, keeping you fuller for longer periods.
- Protein Powder (Whey or Plant-Based): This is the cornerstone of the recipe’s high-protein claim. Whey protein isolate offers a complete amino acid profile ideal for muscle repair, while plant-based blends (pea, rice, hemp) cater to vegan dietary restrictions. The powder also acts as a dry binding agent, absorbing moisture to help the cookie hold its shape.
- Natural Peanut Butter or Almond Butter: Nut butters provide healthy monounsaturated fats and additional protein. They act as the primary fat source, contributing to the rich mouthfeel and helping to bind the dry ingredients together without the need for melted butter or oils.
- Unsweetened Cocoa Powder: Selected for its intense chocolate flavor and high antioxidant content, specifically flavonoids. Using unsweetened powder allows us to control the sugar content precisely, avoiding the added sugars found in milk chocolate or semi-sweet chips.
- Liquid Sweetener (Maple Syrup or Honey): These natural sweeteners provide the necessary viscosity to bind the ingredients while offering a lower glycemic impact than refined white sugar. They also contribute hygroscopic properties, meaning they attract moisture, which helps keep the cookies from drying out too quickly.
- Milk (Dairy or Non-Dairy): A small amount of liquid is required to dissolve the protein powder and cocoa, ensuring a smooth consistency. Almond milk or oat milk are excellent low-calorie options that complement the flavor profile without overpowering it.
- Vanilla Extract: While used in small quantities, vanilla enhances the perception of sweetness and rounds out the sharpness of the cocoa powder, creating a more complex and satisfying flavor profile.
- Chia Seeds or Flaxseeds (Optional): Often added for an extra boost of omega-3 fatty acids and fiber, these seeds also act as a binder when they absorb liquid, improving the structural integrity of the cookie.
Step-by-Step Recipe
Creating the perfect high protein no bake chocolate oat cookie requires attention to detail during the mixing and setting phases. Follow this narrative guide to ensure success.
Phase 1: Preparation of Dry Components
Begin by measuring your rolled oats accurately. It is important to use standard measuring cups rather than guessing, as too many oats can make the cookies crumbly, while too few can make them overly sticky. Place the oats in a large mixing bowl. Add your protein powder and unsweetened cocoa powder to the oats. Use a whisk or a fork to break up any clumps in the protein powder or cocoa. This step is vital; if dry clumps remain, you will end up with bitter pockets of cocoa or chalky mouthfeel from the protein powder in the final cookie. Mix these dry ingredients thoroughly until the color is uniform.
Phase 2: Preparation of Wet Components
In a separate microwave-safe bowl or a small saucepan, combine the nut butter, liquid sweetener, milk, and vanilla extract. If your nut butter is stiff or has been stored in the refrigerator, gently warm it for 15 to 20 seconds in the microwave. This makes it easier to stir and ensures it integrates smoothly with the other liquids. Stir the wet ingredients until they are completely emulsified and look like a smooth, glossy sauce. There should be no separation of oil or liquid.
Phase 3: Combining and Mixing
Pour the wet mixture over the dry ingredient bowl. Using a sturdy spatula or a wooden spoon, begin to fold the ingredients together. Start slowly to avoid pushing the dry powder out of the bowl, then increase pressure as the mixture begins to come together. You are looking for a dough-like consistency that is sticky but holds together when pressed. If the mixture seems too dry and crumbly, add a teaspoon of milk at a time. If it is too wet and soupy, add a tablespoon of oats at a time. This adjustment phase is where you customize the texture to your personal preference.
Phase 4: Shaping and Setting
Once the dough is uniform, let it sit for five minutes. This resting period allows the oats and protein powder to absorb the moisture from the wet ingredients, which prevents the cookies from falling apart later. Using a cookie scoop or a tablespoon, portion out the dough onto a baking sheet lined with parchment paper or wax paper. Flatten them slightly with the back of a spoon or your fingers, as they will not spread like baked cookies. Place the tray in the refrigerator. They need to chill for at least 30 minutes to set firmly. For the best texture, allow them to chill for an hour before consuming.
Tips
To elevate your cookie-making experience and ensure consistent results every time, consider the following professional tips and troubleshooting advice.
- Protein Powder Texture: Not all protein powders behave the same way. Whey isolate tends to be thirstier than casein or plant blends. If you switch brands, be prepared to adjust the liquid content slightly.
- Room Temperature Ingredients: Ensure your nut butter and milk are at room temperature before mixing. Cold nut butter can seize up when mixed with cold milk, creating a lumpy dough that is difficult to shape.
- Storage Solutions: These cookies are best stored in an airtight container in the refrigerator. They can last up to two weeks. For longer storage, you can freeze them for up to three months; simply thaw them at room temperature for 10 minutes before eating.
- Preventing Stickiness: If you find the dough is too sticky to handle, lightly wet your hands with water or coat them with a tiny amount of coconut oil before shaping the cookies. This prevents the dough from adhering to your skin.
- Flavor Enhancement: A pinch of sea salt sprinkled on top of the cookies before they set can enhance the chocolate flavor significantly, creating a sweet-and-salty profile that is highly addictive.
- Consistency Check: If you prefer a softer cookie, reduce the chilling time. If you prefer a firmer, crunchier texture, allow them to set overnight in the fridge.
Variations and Customizations
One of the greatest strengths of this recipe is its versatility. You can easily modify the base recipe to accommodate dietary restrictions, flavor preferences, or specific nutritional goals.
- Vegan Adaptation: To make this recipe fully vegan, substitute the whey protein powder with a high-quality pea or brown rice protein blend. Ensure the sweetener is maple syrup or agave instead of honey, and use almond or oat milk instead of dairy milk.
- Keto-Friendly Version: For those on a ketogenic diet, replace the rolled oats with crushed almond flour or macadamia nut flour. Substitute the maple syrup with a liquid stevia or erythritol blend, and ensure the chocolate cocoa powder is unsweetened and low-carb.
- Nut-Free Option: Individuals with nut allergies can replace the peanut butter with sunflower seed butter or soy nut butter. These alternatives provide a similar fat content and binding capability without the allergen risk.
- Flavor Twists: Experiment with different protein powder flavors. Chocolate peanut butter powder can intensify the nutty notes, while vanilla protein powder can create a cookies-and-cream vibe if you add crushed sugar-free cookies. You can also mix in dark chocolate chips, dried cranberries, or shredded coconut for added texture.
- Superfood Boost: Incorporate functional ingredients such as maca powder for energy, collagen peptides for joint health, or spirulina for an immune boost. These can be added to the dry mix without altering the flavor profile significantly.
- Gluten-Free Assurance: While oats are naturally gluten-free, they are often processed in facilities with wheat. To ensure these cookies are safe for Celiac disease sufferers, purchase oats that are specifically certified gluten-free.
Health Considerations and Nutritional Value
When incorporating high protein no bake chocolate oat cookies into your diet, it is important to understand their nutritional impact. These cookies are designed to be nutrient-dense rather than calorie-dense, though portion control is still advised.
Macronutrient Profile: Typically, one cookie provides a substantial amount of protein, ranging from 10 to 15 grams depending on the scoop size and protein powder used. The carbohydrate content is primarily complex carbs from the oats, which provide sustained energy release rather than a sugar spike. The fat content comes from the nut butter, offering heart-healthy monounsaturated fats.
Micronutrients: Oats contribute manganese, phosphorus, magnesium, and iron. Cocoa powder is rich in iron, magnesium, and antioxidants. Nut butters add Vitamin E and potassium. Together, these ingredients support metabolic health, bone density, and cardiovascular function.
Blood Sugar Management: Because this recipe avoids refined sugars and utilizes fiber-rich oats, it has a lower glycemic load than traditional cookies. This makes it a suitable option for individuals managing insulin resistance or type 2 diabetes, provided the sweetener is chosen carefully.
Digestive Health: The high fiber content from the oats and potential addition of chia seeds supports healthy digestion and regularity. However, increasing fiber intake suddenly can cause bloating, so it is recommended to introduce these cookies gradually into your diet.
Caloric Density: While healthy, nut butters and protein powders are calorie-dense. It is important to track the portion sizes if you are in a caloric deficit for weight loss. One to two cookies per day is generally recommended as a snack rather than a meal replacement.
Ingredients
- 2 cups Old Fashioned Rolled Oats (certified gluten-free if needed)
- 1 scoop (approx. 30g) High Quality Protein Powder (Chocolate or Vanilla)
- 1/2 cup Unsweetened Cocoa Powder
- 1/2 cup Natural Creamy Peanut Butter (or Almond Butter)
- 1/3 cup Pure Maple Syrup or Honey
- 1/4 cup Unsweetened Almond Milk (or Dairy Milk)
- 1 teaspoon Pure Vanilla Extract
- 1/4 teaspoon Sea Salt
- 2 tablespoons Chia Seeds (optional, for extra binding and nutrition)
- 1/4 cup Dark Chocolate Chips (optional, for mixing or topping)
Directions
- Prepare a baking sheet or large plate by lining it with parchment paper or wax paper and set it aside.
- In a large mixing bowl, combine the rolled oats, protein powder, cocoa powder, chia seeds, and sea salt. Whisk vigorously to remove any clumps and ensure even distribution.
- In a separate medium bowl, mix together the peanut butter, maple syrup, almond milk, and vanilla extract. If the peanut butter is too stiff, microwave for 15 seconds to soften.
- Pour the wet mixture into the dry mixture. Stir with a spatula until fully combined and a thick dough forms.
- Let the dough rest for 5 minutes to allow the oats to absorb the liquid.
- Scoop out tablespoon-sized portions of dough and roll them into balls. Place them on the prepared baking sheet.
- Flatten each cookie slightly with the back of a spoon or your fingers. If adding chocolate chips, press them into the tops now.
- Place the tray in the refrigerator for at least 30 minutes to allow the cookies to set firmly.
- Remove from the fridge and transfer to an airtight container for storage.
- Enjoy cold or at room temperature as desired.
FAQ
Can I use quick oats instead of old-fashioned oats?
Yes, you can use quick oats, but the texture will be softer and less chewy. Old-fashioned oats are recommended for the best structural integrity.
Why are my cookies crumbly?
This usually happens if there is too much dry ingredient or not enough liquid binder. Try adding a teaspoon of milk or nut butter at a time until the dough holds together.
Can I bake these cookies?
Technically yes, but it defeats the purpose of the recipe. Baking may dry out the protein powder and alter the texture. They are designed to be eaten no-bake.
How do I make these dairy-free?
Simply use a plant-based protein powder, non-dairy milk, and ensure your chocolate chips are dairy-free. The rest of the recipe is naturally dairy-free.
Can I substitute the peanut butter?
Absolutely. Almond butter, cashew butter, or sunflower seed butter work perfectly as 1:1 substitutes.
Do I need to store these in the fridge?<>
Yes, because there are no preservatives and they contain nut butter, refrigeration prevents the oils from going rancid and keeps them firm.
What is the shelf life?
They stay fresh in the refrigerator for up to 2 weeks and in the freezer for up to 3 months.
These high protein no bake chocolate oat cookies offer a perfect blend of taste and nutrition for any health-focused diet.
Enjoy a guilt-free treat that supports your fitness goals without requiring any oven time.