Introduction
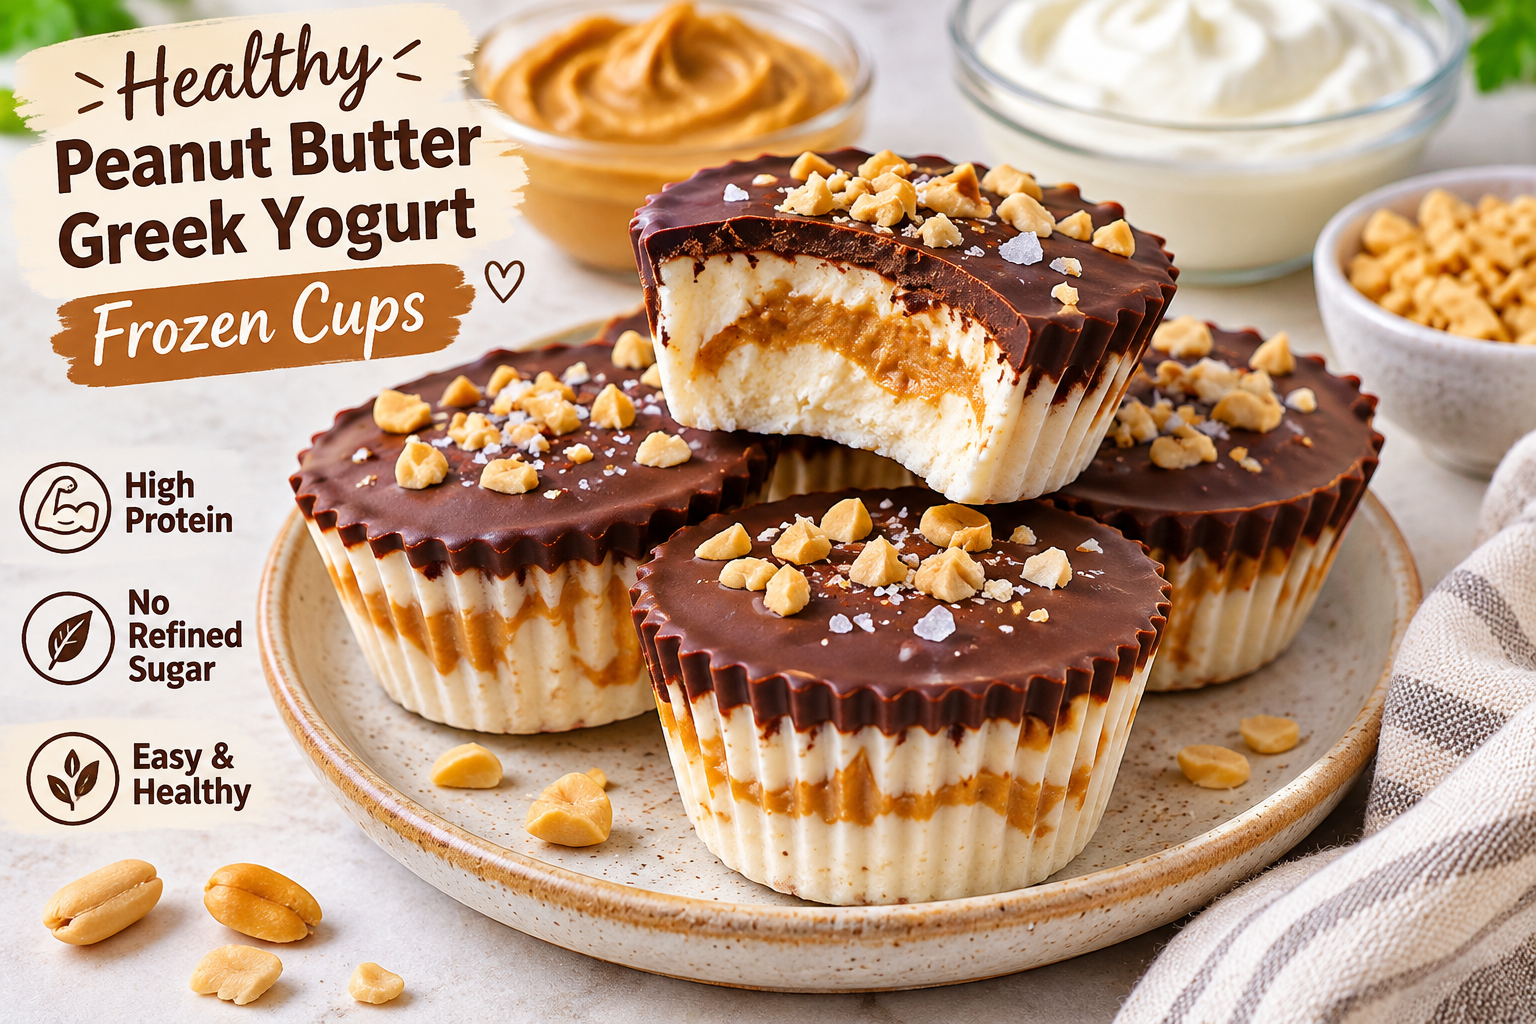
Welcome to the ultimate guide on creating Healthy Peanut Butter Greek Yogurt Frozen Cups, a dessert innovation that perfectly marries the nostalgic comfort of classic peanut butter cups with the modern nutritional demands of a health-conscious lifestyle. In a world where sugary treats often dominate the confectionery landscape, finding a snack that satisfies your sweet tooth without compromising your wellness goals can feel like an impossible task. These frozen cups are designed to bridge that gap, offering a rich, creamy texture and a robust peanut butter flavor profile while delivering a significant punch of protein and probiotics. Whether you are an athlete looking for a post-workout recovery snack, a parent seeking a wholesome treat for children, or simply someone who loves dessert but wants to avoid the sugar crash, this recipe is tailored for you. The combination of thick Greek yogurt and natural peanut butter creates a consistency that mimics ice cream or cheesecake when frozen, providing a luxurious mouthfeel that belies its simple, clean ingredient list. Throughout this comprehensive guide, we will explore not just how to make these cups, but the science behind why they work, the history of the flavors involved, and how you can customize them to fit any dietary requirement. Prepare to transform your freezer into a hub of delicious, guilt-free indulgence.
The History
To truly appreciate the Healthy Peanut Butter Greek Yogurt Frozen Cup, one must understand the culinary lineage from which it descends. The concept of the peanut butter cup dates back to the early 20th century, with the most famous iteration, the Reese’s Peanut Butter Cup, being invented by H.B. Reese in 1928. Reese, a former shipping inspector for Milton Hershey, experimented with various combinations of candies before settling on the marriage of chocolate and peanut butter, a pairing that would become an American icon. However, as the decades progressed, the nutritional profile of these treats came under scrutiny due to high sugar content and processed ingredients. Simultaneously, the history of frozen yogurt traces back to the 1970s, emerging as a softer, tangier alternative to ice cream. By the 1980s and 1990s, frozen yogurt shops had become cultural hubs, promising a lighter dessert option. The fusion of these two histories—the bold flavor of the peanut butter cup and the probiotic benefits of frozen yogurt—represents the modern evolution of dessert. It reflects a societal shift towards functional foods, where enjoyment and nutrition are not mutually exclusive. This recipe honors the legacy of H.B. Reese’s innovation while updating it for the 21st-century consumer who prioritizes macro-nutrients, clean labels, and whole food ingredients over processed sweets.
Ingredients Breakdown
Understanding the role of each component in this recipe is crucial for achieving the perfect texture and flavor balance. We do not simply throw ingredients together; each element serves a specific chemical and culinary purpose.
Greek Yogurt
The foundation of this recipe is plain, non-fat or low-fat Greek yogurt. Unlike regular yogurt, Greek yogurt is strained to remove whey, resulting in a thicker consistency and higher protein content. This thickness is vital because it prevents the formation of large ice crystals during the freezing process, ensuring a creamy rather than icy texture. The tanginess of the yogurt also cuts through the richness of the peanut butter, preventing the flavor from becoming too cloying or heavy.
Natural Peanut Butter
Choosing the right peanut butter is paramount. We recommend using natural peanut butter that contains only peanuts and perhaps a pinch of salt. Avoid varieties with added hydrogenated oils, palm oil, or high fructose corn syrup. The natural oils in real peanut butter help emulsify the yogurt, creating a smooth blend. The fat content in the peanut butter also contributes to the satiety factor, making these cups a satisfying snack that keeps hunger at bay.
Sweetener (Honey or Maple Syrup)
While peanut butter and yogurt have natural flavors, a touch of sweetness is needed to mimic the candy experience. Raw honey or pure maple syrup is preferred over refined white sugar. These natural sweeteners offer a lower glycemic index and contain trace minerals and antioxidants. They also remain slightly softer when frozen compared to granulated sugar, which helps maintain the scoopability of the cups.
Vanilla Extract
High-quality pure vanilla extract acts as a flavor enhancer. It rounds out the sharp edges of the yogurt tang and amplifies the nutty notes of the peanut butter. It is a subtle background note that ties the primary flavors together into a cohesive profile.
Sea Salt
A pinch of sea salt is not optional; it is essential. Salt suppresses bitterness and enhances sweetness, making the peanut butter flavor pop. In a low-sugar recipe, salt plays a critical role in ensuring the treat tastes indulgent rather than bland.
Step-by-Step Recipe
Creating these frozen cups is a process that requires patience and attention to detail to ensure the best possible outcome. Follow this narrative guide to walk through the creation process with confidence.
Phase One: Preparation
Begin by gathering all your equipment. You will need a medium-sized mixing bowl, a whisk or a hand mixer, a set of silicone muffin molds or a standard muffin tin lined with paper liners, and a spatula. It is important that your Greek yogurt is cold straight from the refrigerator, as this helps maintain the emulsion when mixing with the peanut butter. If your peanut butter has separated, stir it thoroughly in its jar before measuring to ensure consistent fat distribution.
Phase Two: The Mixing Process
Scoop the Greek yogurt into your mixing bowl. Add the natural peanut butter, your chosen sweetener, vanilla extract, and sea salt. Using your whisk or mixer, blend these ingredients on medium speed. You are looking for a homogenous mixture where no streaks of white yogurt or brown peanut butter remain. This usually takes about two to three minutes of vigorous mixing. The mixture should appear smooth, glossy, and slightly aerated. Over-mixing is generally not a concern here, as the goal is to incorporate air which helps lighten the texture upon freezing.
Phase Three: Molding
Take your silicone molds or lined muffin tin. Using a spoon or a small ice cream scoop, distribute the mixture evenly among the cups. Fill them about three-quarters of the way to the top to allow for slight expansion during freezing, although yogurt does not expand as much as water. If you wish to add a swirl effect, you can drop small dollops of extra peanut butter on top and use a toothpick to swirl them into the yogurt base before freezing.
Phase Four: The Freeze
Place the filled trays carefully into the freezer. Ensure they are placed on a flat surface where they will not be jostled. They need to freeze for a minimum of four hours, but overnight is recommended for the best structural integrity. Rushing this process can lead to cups that are too soft to unmold cleanly.
Phase Five: Unmolding and Storage
Once fully frozen, remove the tray from the freezer. If using silicone molds, simply push from the bottom to pop the cups out. If using paper liners in a metal tin, lift them out by the edges. Transfer the frozen cups into an airtight freezer-safe container or a heavy-duty freezer bag. They are now ready to enjoy or store for future consumption.
Tips
To elevate your experience and ensure success every time you make this recipe, consider the following professional tips and tricks.
- Temperature Control: If you find the mixture is too runny before freezing, place the bowl in the refrigerator for 20 minutes before molding. This helps thicken the yogurt slightly.
- Preventing Freezer Burn: Always use an airtight container for storage. If air reaches the surface of the frozen cups, they can develop freezer burn, which alters the texture and flavor negatively.
- Softening Time: These cups are best enjoyed after sitting at room temperature for 5 to 10 minutes. This slight thawing period allows the flavors to become more pronounced and the texture to become creamier.
- Liners vs. Silicone: Silicone molds are reusable and eco-friendly, making them ideal for frequent batches. However, paper liners are excellent for portion control and easy sharing at parties.
- Consistency Check: If your peanut butter is very stiff, you can microwave it for 10 seconds before mixing to make it easier to blend with the yogurt.
- Labeling: Always label your storage container with the date. While they last a long time, tracking freshness ensures you eat them at peak quality.
Variations and Customizations
One of the greatest strengths of this recipe is its versatility. You can easily modify the base recipe to accommodate different dietary needs or flavor preferences without sacrificing the core structure of the treat.
Vegan Adaptation
To make this recipe entirely plant-based, substitute the Greek yogurt with a thick, unsweetened coconut milk yogurt or a high-protein almond milk yogurt. Ensure the peanut butter is vegan-friendly (most are), and use maple syrup instead of honey as the sweetener.
Chocolate Coating
For those who miss the chocolate shell of a traditional peanut butter cup, you can dip the frozen yogurt cups into melted dark chocolate. Allow the chocolate to harden in the freezer for an additional 10 minutes before serving. This adds a layer of antioxidants and rich flavor.
Flavor Swirls
Consider adding fruit purees such as strawberry or banana into the mix for a fruity twist. Alternatively, a swirl of sugar-free chocolate syrup can create a marble effect that looks visually stunning and adds a decadent touch.
Nut-Free Option
If you have a nut allergy, substitute the peanut butter with sunflower seed butter or soy nut butter. The texture and protein content remain similar, ensuring the structural integrity of the cup is maintained.
Protein Boost
For athletes or those seeking higher protein intake, you can mix in a scoop of unflavored or vanilla protein powder. You may need to add a splash of almond milk to compensate for the dryness the powder introduces.
Health Considerations and Nutritional Value
Understanding the nutritional impact of this snack is key to incorporating it into a balanced diet. These cups are designed to be nutrient-dense rather than calorie-dense.
Protein Power
Greek yogurt is renowned for its high protein content, which is essential for muscle repair and maintenance. Combined with the protein in peanuts, each cup offers a substantial amount of this macronutrient, helping to stabilize blood sugar levels and reduce cravings later in the day.
Healthy Fats
Peanuts are a source of monounsaturated fats, which are considered heart-healthy. These fats aid in the absorption of fat-soluble vitamins and provide long-lasting energy. Unlike the trans fats found in many commercial candies, the fats here are natural and beneficial.
Probiotics
Depending on the yogurt brand used, these cups may contain live active cultures. While freezing can dormantize some cultures, many survive the process and can contribute to gut health once consumed, aiding in digestion and immune function.
Sugar Management
By controlling the sweetener, you drastically reduce the sugar load compared to store-bought frozen treats. Using honey or maple syrup provides sweetness without the refined sugar spike, making this a lower glycemic option suitable for those monitoring their insulin response.
Calcium and Micronutrients
Yogurt is a rich source of calcium, vital for bone health. Peanuts contribute magnesium, potassium, and Vitamin E. Together, they create a micronutrient profile that supports overall bodily function beyond just satisfying a craving.
Ingredients
Here is the concise list of items you will need to gather before beginning the preparation process. Ensure all measurements are accurate for the best consistency.
- 2 cups of plain Greek yogurt (non-fat or 2% recommended)
- 1/2 cup of natural creamy peanut butter (unsweetened)
- 1/4 cup of raw honey or pure maple syrup
- 1 teaspoon of pure vanilla extract
- 1/8 teaspoon of fine sea salt
- Optional: 1 tablespoon of cocoa powder for a chocolate swirl
- Optional: Dark chocolate chips for coating
Directions
Follow these numbered steps to execute the recipe efficiently and safely.
- Prepare your workspace by clearing a flat surface in your kitchen and ensuring your freezer has space for the molds.
- Line a standard muffin tin with paper liners or prepare your silicone molds by placing them on a baking sheet for stability.
- In a medium mixing bowl, combine the Greek yogurt, peanut butter, honey, vanilla extract, and sea salt.
- Whisk the mixture vigorously until it is completely smooth and uniform in color, ensuring no lumps of peanut butter remain.
- Spoon the mixture evenly into the prepared molds, filling each cup about 3/4 full.
- If desired, use a toothpick to swirl a small amount of extra peanut butter or cocoa powder into the top of each cup for decoration.
- Place the tray in the freezer and allow it to freeze undisturbed for at least 4 hours, preferably overnight.
- Remove from the freezer and let sit at room temperature for 5 minutes before unmolding to prevent cracking.
- Pop the cups out of the molds and transfer them to an airtight container for long-term storage.
- Serve chilled and enjoy your healthy creation.
FAQ
Here are answers to the most commonly asked questions regarding Healthy Peanut Butter Greek Yogurt Frozen Cups.
Can I use regular yogurt instead of Greek yogurt?
While you can use regular yogurt, the result will be much icier and less creamy. Regular yogurt has a higher water content, which forms large ice crystals when frozen. If you must use regular yogurt, consider straining it through a cheesecloth for a few hours to thicken it before mixing.
How long do these cups last in the freezer?
When stored in an airtight container, these cups can last up to 3 months in the freezer. However, for the best flavor and texture, it is recommended to consume them within 4 to 6 weeks.
Can I make these without a freezer?
No, the freezing process is essential to achieve the “frozen cup” texture. Without a freezer, the mixture will remain liquid or semi-liquid. However, you can refrigerate the mixture for a thick pudding-like treat if freezing is not an option.
Are these suitable for children?
Yes, these are an excellent snack for children as they provide protein and calcium without the excessive sugar of traditional candy. Just ensure there are no nut allergies in the household before serving.
Why did my cups crack when I took them out?
Cracking usually occurs due to temperature shock. Letting the cups sit at room temperature for 5 to 10 minutes before unmolding allows them to soften slightly, reducing the risk of structural failure.
Can I add fruit to the mixture?
Yes, mashed bananas or berry purees work well. However, be aware that adding fresh fruit with high water content may increase iciness. Using freeze-dried fruit powder is a better alternative for maintaining texture.
Summary (in two lines)
These Healthy Peanut Butter Greek Yogurt Frozen Cups offer a protein-rich, probiotic-filled alternative to traditional sweets without sacrificing flavor.
Perfect for meal prep, they combine creamy Greek yogurt and natural peanut butter into a guilt-free treat that supports your wellness goals.