Introduction
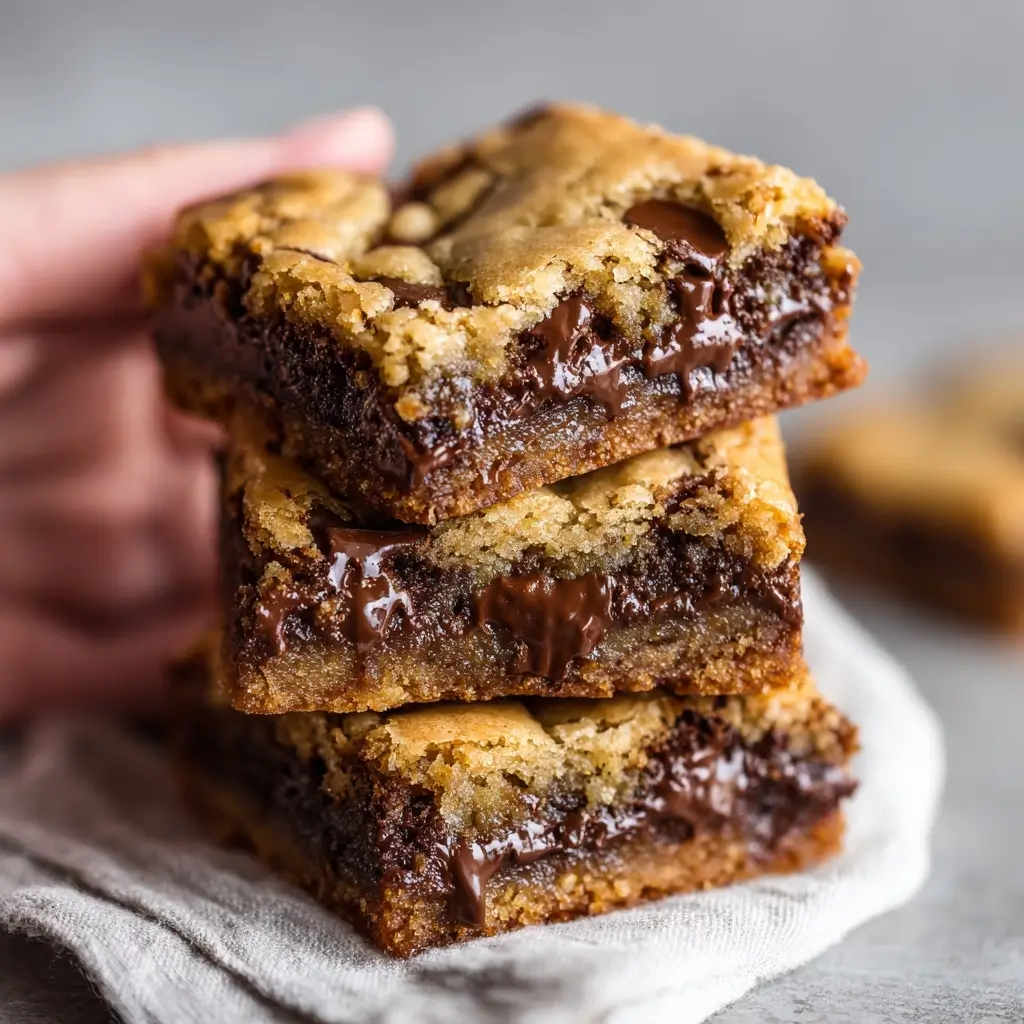
Chewy Chocolate Chip Cookie Bars are the ultimate hybrid dessert—combining the nostalgic comfort of classic chocolate chip cookies with the effortless elegance and portion-controlled convenience of a bar. Unlike crisp or cakey versions, these bars prioritize a dense, tender crumb with a gloriously soft, slightly underbaked center, caramelized golden-brown edges, and generous pockets of melty, gooey chocolate that ooze with every bite. They’re endlessly adaptable, bakery-worthy yet humble enough for weeknight baking, and beloved across generations for their rich, buttery sweetness and satisfying chew. Whether served warm with a scoop of vanilla ice cream, packed into lunchboxes, or gifted in festive tins, Chewy Chocolate Chip Cookie Bars deliver consistent joy—no cookie scoop required, no uneven baking feared.
The History
The evolution of the chocolate chip cookie bar traces back to the iconic invention of the chocolate chip cookie itself in 1938 by Ruth Wakefield at the Toll House Inn in Whitman, Massachusetts. Legend has it that Wakefield substituted broken Nestlé semi-sweet chocolate bars for baker’s chocolate in her butter drop dough, expecting the pieces to melt evenly—only to discover they held their shape, creating the first “chocolate chip” cookie. As home bakers sought faster, more uniform results in the mid-20th century—especially during postwar rationing and the rise of suburban domesticity—baking cookies in sheet pans became increasingly popular. The “bar cookie” format emerged as a clever adaptation: eliminating individual scooping, reducing bake time variability, maximizing yield, and simplifying cleanup. By the 1950s and ’60s, community cookbooks, Betty Crocker publications, and magazine inserts (like those in Good Housekeeping and Ladies’ Home Journal) featured variations labeled “Chocolate Chip Squares,” “Oven-Baked Cookie Bars,” and “Sheet Pan Cookies”—all emphasizing chewiness through brown sugar dominance, minimal leavening, and intentional underbaking. The modern resurgence of the chewy bar began in the 2010s, fueled by food bloggers championing “soft-baked,” “no-chill,” and “restaurant-style” textures—often using techniques like melted butter, corn syrup, or bread flour to enhance moisture retention and structural integrity. Today, Chewy Chocolate Chip Cookie Bars stand not just as a recipe—but as a cultural touchstone representing simplicity, generosity, and the quiet magic of perfectly balanced texture.
Ingredients Breakdown
Every exceptional chewy bar begins with intentionality—not just measurements, but purpose. Here’s why each ingredient matters:
- Unsalted Butter (1 cup / 2 sticks / 227g): Melted (not hot) to hydrate the flour fully and create a dense, cohesive structure. Unsalted allows precise control over sodium levels; salt enhances sweetness and balances fat. Browned butter adds nuttiness but reduces chew—reserve for advanced variations.
- Brown Sugar (1 cup packed / 220g): The cornerstone of chew. Dark brown sugar (molasses-rich) is preferred over light for deeper flavor, acidity, and hygroscopic properties—it attracts and retains moisture long after baking. Its acidity also activates baking soda subtly for tenderness.
- Granulated Sugar (½ cup / 100g): Provides structure, crispness at the edges, and caramelization. Too little yields cakey bars; too much risks excessive spread and dryness. A 2:1 brown-to-white ratio is ideal for chew-forward results.
- Large Eggs (2, room temperature): Act as emulsifiers and binders. Room temperature ensures even incorporation and prevents re-solidification of melted butter. The yolks add richness and moisture; whites offer subtle lift without drying.
- Pure Vanilla Extract (2 tsp): Not imitation—real Madagascar or Tahitian extract delivers floral, creamy, and woody top notes that elevate the entire profile. Added after cooling the butter mixture to preserve volatile aromatics.
- All-Purpose Flour (2¼ cups / 280g): Spooned and leveled—not scooped—to prevent compaction and excess gluten development. For enhanced chew, substitute up to ¼ cup with bread flour (higher protein = stronger gluten network) or add 1 tbsp cornstarch (softens texture without weakening structure).
- Baking Soda (½ tsp): A small, precise amount reacts with brown sugar’s acidity to gently lift the batter while keeping the crumb tight and moist. Baking powder is avoided—it creates airiness, undermining chew.
- Fine Sea Salt (1 tsp): Critical for flavor balance. Enhances sweetness, suppresses bitterness in chocolate, and strengthens gluten. Kosher salt dissolves less uniformly; fine sea salt integrates seamlessly.
- Semi-Sweet Chocolate Chips (2 cups / 340g): High-quality chips with 52–60% cocoa solids ensure meltability and depth. Mini chips distribute more evenly; standard chips create dramatic melty pools. Avoid “baking chips” with stabilizers—they resist melting and dull flavor. Chopped chocolate bars (e.g., Ghirardelli, Valrhona) are superior for artisanal results.
- (Optional but Recommended) Corn Syrup (1 tbsp): A secret weapon for professional-level chew. Its glucose content inhibits sugar crystallization, locks in moisture, and extends shelf life without adding noticeable sweetness or stickiness.
- (Optional) Flaky Sea Salt (Maldon or Jacobsen, for finishing): A delicate sprinkle post-bake intensifies contrast—sweet, salty, rich, textural—and elevates visual appeal.
Step-by-Step Recipe
- Preheat & Prep: Position oven rack to center position. Preheat oven to 350°F (177°C). Line a 9×13-inch metal baking pan (aluminum recommended for even heating) with parchment paper, leaving 2-inch overhang on two opposite sides for easy lifting. Lightly grease exposed pan edges and parchment.
- Melt Butter: In a medium heavy-bottomed saucepan or heatproof bowl, melt butter over low heat or in microwave (30-sec intervals, stirring between) until fully liquid and shimmering—do not brown or boil. Let cool 3–5 minutes until warm to the touch (about 110°F/43°C).
- Cream Sugars & Butter: In a large heatproof mixing bowl, whisk together cooled melted butter, brown sugar, and granulated sugar vigorously for 1 full minute until thick, glossy, and no sandy granules remain. This step dissolves sugar crystals and begins emulsification.
- Incorporate Wet Ingredients: Add eggs one at a time, whisking thoroughly after each (about 20 seconds per egg) until fully absorbed and batter appears smooth and slightly ribbony. Whisk in vanilla extract and corn syrup (if using) until homogenous.
- Dry Ingredients: In a separate medium bowl, whisk together flour, baking soda, and salt until fully aerated and lump-free. Sift once for insurance against clumps.
- Fold Dry into Wet: Using a flexible silicone spatula, gently fold dry ingredients into wet mixture in three additions. Mix only until *just* combined—no streaks of flour visible. Do not overmix; a few dry patches are acceptable and will hydrate during folding. Overmixing develops gluten, leading to toughness.
- Add Chocolate: Fold in chocolate chips (and any mix-ins, if using) until evenly distributed. Batter will be thick, sticky, and shaggy—not pourable.
- Transfer & Spread: Scrape batter into prepared pan. Use an offset spatula or the back of a greased spoon to spread evenly, pressing gently to eliminate air pockets and ensure uniform thickness. Smooth surface with lightly damp fingers for a professional finish.
- Bake with Precision: Bake for 25–29 minutes. Begin checking at 24 minutes. Bars are done when edges are deeply golden brown and set, top is puffed and matte (not shiny), and center jiggles *slightly* when gently shaken—but no raw batter should ripple. A toothpick inserted 1 inch from edge should come out with moist crumbs; center insertion should show *damp*, not wet, batter. Underbaking is intentional and essential for chew.
- Cool Completely in Pan: Remove pan from oven and place on a wire rack. Cool for *at least 2 hours* at room temperature—do not rush this. Cooling allows residual heat to finish cooking the center gently while starches retrograde and sugars recrystallize for optimal texture. Cutting too soon causes crumbling and loss of chew.
- Chill for Clean Cuts (Optional but Recommended): For razor-sharp squares, refrigerate cooled bars for 1–2 hours before cutting. Cold firmness prevents smearing and improves structural integrity.
- Finish & Serve: Use parchment overhang to lift entire slab onto cutting board. Trim uneven edges (a baker’s treat!). Cut into 12–16 even rectangles (or use a pizza cutter for speed). Sprinkle with flaky salt immediately after cutting. Store properly (see Tips) and enjoy within 5 days for peak chew.
Tips
- Butter Temperature is Non-Negotiable: Butter must be melted *and cooled*. Hot butter cooks eggs; cold butter solidifies and creates lumps. Use an instant-read thermometer for consistency—ideal range: 105–115°F (40–46°C).
- Weigh Your Ingredients: Volume measurements for flour vary wildly (+/- 20g per cup). A kitchen scale ensures repeatability and chew reliability.
- Don’t Skip the Parchment: Aluminum pans conduct heat rapidly—parchment prevents scorching, sticking, and uneven browning. Foil tears easily; wax paper melts.
- Underbake Strategically: The center should look *just shy* of set. It firms dramatically during cooling. If edges are dark but center looks wet, bake 1 extra minute—then stop. Carryover heat does the rest.
- Cooling Time is Baking Time: That 2-hour cool isn’t passive—it’s where texture transforms. Rushing = gummy centers or crumbly edges.
- Room-Temperature Eggs Prevent Seizing: Cold eggs can cause the warm butter-sugar mixture to seize into grainy clumps. Let eggs sit out 30 minutes pre-bake.
- Use Metal, Not Glass or Ceramic: Glass retains heat longer, increasing risk of overbaked edges and dry centers. Metal provides responsive, even conduction.
- Rotate Pan Mid-Bake (If Your Oven Has Hot Spots): At 15 minutes, give pan a half-turn for uniform browning—especially important in older ovens.
- Store Smart for Maximum Chew: Keep bars airtight at room temperature (not refrigerated—cold dries them out) with a slice of plain white bread tucked inside the container. The bread’s moisture migrates, keeping bars soft for 4–5 days.
- Reheat for Fresh-Baked Magic: Microwave individual bars for 8–10 seconds or warm in a 300°F oven for 3–4 minutes. Melts chocolate, softens crumb, releases aroma.
Variations and Customizations
These chewy bars are a canvas—endlessly customizable without sacrificing texture:
- Classic Upgrade – Dark Chocolate & Sea Salt: Swap semi-sweet chips for 70% dark chocolate chunks and finish with flaky salt + espresso powder (1 tsp) in dry ingredients for depth.
- Nutty Chew – Brown Butter Walnut: Brown ½ cup butter separately, cool, then use in place of ½ cup regular melted butter. Fold in 1 cup toasted walnuts with chocolate.
- Soft-Baked Oatmeal Twist: Replace ¾ cup flour with old-fashioned rolled oats (not quick oats). Adds heartiness, fiber, and a tender-chewy duality.
- Double Chocolate Intensity: Add ¼ cup unsweetened cocoa powder (Dutch-process preferred) to dry ingredients + ½ cup white chocolate chips for sweet contrast.
- Snickerdoodle Style: Omit chocolate. Add 1½ tsp ground cinnamon + 2 tbsp turbinado sugar to batter; roll top in cinnamon-sugar before baking.
- Gluten-Free Chew: Substitute 1:1 gluten-free all-purpose flour blend (with xanthan gum) + 1 tbsp psyllium husk powder (binds moisture). Increase brown sugar to 1¼ cups.
- Vegan Chewy Bars: Use vegan butter (Miyoko’s or Earth Balance), flax eggs (2 tbsp ground flax + 5 tbsp water, rested 10 min), coconut sugar (for molasses-like chew), and dairy-free chocolate.
- Stout-Infused Depth: Replace 2 tbsp of the melted butter with room-temp stout beer (Guinness works beautifully). Adds roasted malt notes and subtle tang that amplifies chocolate.
- Maple Pecan Swirl: After spreading batter, drizzle ¼ cup pure maple syrup + ¼ cup chopped toasted pecans over top and swirl gently with a knife.
- Cookie Dough Bar Hybrid: Press ½ cup edible cookie dough (egg-free, heat-treated flour) into center layer before baking for a molten core.
Health Considerations and Nutritional Value
While Chewy Chocolate Chip Cookie Bars are undeniably indulgent, mindful adaptations can align them with balanced eating patterns—without compromising chew:
- Calorie Context: A standard 2×2-inch bar (1/12th of recipe) contains ~280–320 calories—comparable to a gourmet cupcake or slice of banana bread. Portion awareness is key; cutting into 16 bars reduces per-serving calories to ~210–240.
- Sugar Transparency: Total sugar per bar: ~22–26g (mostly added). Brown sugar contributes beneficial molasses-derived minerals (calcium, potassium, iron), though in trace amounts. Consider reducing granulated sugar by 1–2 tbsp if sweetness sensitivity is high—brown sugar alone sustains chew.
- Healthy Fat Profile: Butter provides saturated fat, but also butyrate (anti-inflammatory) and fat-soluble vitamins (A, D, E, K2). For unsaturated emphasis, replace up to ¼ cup butter with avocado oil or light olive oil (adds mild fruitiness, maintains chew).
- Fiber Boosters: Add 2–3 tbsp ground flaxseed, chia seeds, or oat bran to dry ingredients—increases fiber by 2–3g per bar without altering texture.
- Protein Enhancement: Stir in 2–3 tbsp unflavored collagen peptides or whey protein isolate (ensure heat-stable)—adds 5–8g protein per bar with zero grit or aftertaste.
- Glycemic Impact: The combination of fat, fiber (from chocolate, nuts, optional oats), and minimal leavening slows glucose absorption versus cakey or crisp cookies. Pairing with Greek yogurt or a handful of almonds further stabilizes blood sugar.
- Allergen Notes: Naturally nut-free (unless added); easily made dairy-free, egg-free, or gluten-free using tested substitutions (see Variations). Always verify chocolate chip labels for soy, dairy, or shared-equipment warnings.
- Mindful Enjoyment: Research shows savoring a single, high-quality treat mindfully satisfies cravings more effectively than multiple lower-quality portions—supporting intuitive eating principles.
Ingredients
- 1 cup (227g / 2 sticks) unsalted butter, melted and cooled to 110°F (43°C)
- 1 cup (220g) packed dark brown sugar
- ½ cup (100g) granulated sugar
- 2 large eggs, room temperature
- 2 teaspoons pure vanilla extract
- 1 tablespoon light corn syrup (optional, but highly recommended for chew)
- 2¼ cups (280g) all-purpose flour, spooned and leveled
- ½ teaspoon baking soda
- 1 teaspoon fine sea salt
- 2 cups (340g) semi-sweet chocolate chips (or high-quality chopped chocolate)
- Flaky sea salt (Maldon or Jacobsen), for finishing
Directions
- Preheat oven to 350°F (177°C). Line a 9×13-inch metal baking pan with parchment paper, leaving 2-inch overhang on two opposite sides. Lightly grease exposed edges.
- In a heatproof bowl, whisk melted, cooled butter, brown sugar, and granulated sugar for 1 minute until glossy and smooth.
- Add eggs one at a time, whisking 20 seconds after each. Whisk in vanilla and corn syrup until fully combined.
- In another bowl, whisk together flour, baking soda, and salt. Sift once.
- Fold dry ingredients into wet mixture in three parts using a silicone spatula, mixing only until no dry streaks remain. Do not overmix.
- Fold in chocolate chips until evenly distributed.
- Scrape batter into prepared pan. Spread evenly with an offset spatula; smooth top with damp fingers.
- Bake 25–29 minutes, until edges are deep golden and set, top is matte and puffed, and center jiggles slightly. A toothpick in the center should show damp crumbs—not wet batter.
- Cool in pan on a wire rack for at least 2 hours. For cleanest cuts, refrigerate 1–2 hours.
- Lift slab using parchment. Trim edges. Cut into 12–16 rectangles. Sprinkle with flaky salt. Store airtight at room temperature.
FAQ
- Why are my bars cakey instead of chewy?
- Most commonly: too much leavening (extra baking soda), overmixing (develops gluten), using cold eggs, or overbaking. Ensure precise measurements, gentle folding, and pull bars from oven while center still looks slightly underdone.
- Can I make these ahead and freeze?
- Absolutely. Cool completely, wrap tightly in plastic wrap + foil, and freeze up to 3 months. Thaw overnight at room temperature or microwave frozen bar 12–15 seconds. Texture remains remarkably intact.
- My bars spread too much and stuck to the pan—what went wrong?
- Likely causes: butter too hot when mixed, insufficient flour (scooped vs. spooned), pan not lined properly, or oven temperature inaccurate. Use an oven thermometer and always line with parchment.
- Can I use oil instead of butter?
- Yes—with caveats. Use ¾ cup neutral oil (avocado, grapeseed) + 2 tbsp softened butter for flavor. Oil yields ultra-tender bars but less richness and browning. Chew remains excellent due to brown sugar and corn syrup.
- How do I get that signature “crinkled top”?
- That comes from rapid steam release and sugar crystallization. Ensure your oven is fully preheated, avoid opening the door early, and let bars cool *in the pan*—the slow steam escape creates delicate fissures.
- Are these safe for kids with school allergies?
- Yes—with modifications. Use sunflower seed butter instead of butter, flax eggs, dairy-free chocolate, and certified gluten-free flour. Always check all labels for top-8 allergen statements.
- What’s the best way to reheat day-old bars?
- For maximum chew revival: Place on a microwave-safe plate and heat on medium power for 8–10 seconds. Or bake at 300°F for 3–4 minutes on parchment. Avoid high heat—it dries them out.
- Can I double the recipe in one pan?
- No—baking time and heat penetration become unpredictable. Double the recipe and bake in two separate 9×13 pans for consistent results.
- Why did my bars sink in the center after cooling?
- This signals underbaking or excessive leavening. The center wasn’t structurally stable enough to hold its shape as it cooled. Next time, bake 1–2 minutes longer—or verify your baking soda is fresh (test in vinegar: should bubble vigorously).
- Can I add mix-ins like dried fruit or candy?
- Yes—but adjust moisture. Dried cherries or cranberries (soaked 10 min in warm water, drained) add chew and tartness. Avoid overly moist or sugary candies (e.g., jelly beans) which bleed and destabilize texture.
Summary
Chewy Chocolate Chip Cookie Bars are a masterclass in texture-driven baking—achieved through melted butter, brown sugar dominance, precise underbaking, and unhurried cooling. They deliver nostalgic comfort with elegant simplicity, endless customization, and surprising adaptability for dietary needs.
Whether you’re a novice seeking foolproof success or a seasoned baker chasing that elusive, melt-in-your-mouth chew, this recipe is your definitive, science-backed, soul-satisfying answer—baked once, remembered forever.