Introduction
Red Velvet Cupcakes are a beloved classic in the world of American desserts, combining the elegance of a fine pastry with the cozy comfort of homemade baking. With their striking crimson hue, creamy texture, and subtly tangy flavor, these cupcakes have captured hearts at birthday parties, weddings, holidays, and afternoon tea gatherings alike. More than just their vibrant color, Red Velvet Cupcakes offer a delicate balance between chocolate and vanilla notes, elevated by a luscious cream cheese frosting that complements the soft crumb perfectly. Whether you’re a seasoned baker or trying your hand at cupcakes for the first time, this guide will walk you through every aspect of creating flawless Red Velvet Cupcakes — from their intriguing origins to detailed instructions, expert tips, variations, and nutritional insights.
The History
The origins of Red Velvet Cake—and by extension, Red Velvet Cupcakes—can be traced back to the early 20th century, with roots in Southern U.S. cuisine. The name “velvet” originally referred to the fine, smooth crumb structure of the cake, achieved through the use of buttermilk, vinegar, and careful sifting of ingredients. The red color was initially a natural result of a reaction between cocoa powder and acidic ingredients like buttermilk and vinegar, which enhanced the reddish undertones in non-alkalized (natural) cocoa. However, the deep red shade we associate with modern Red Velvet wasn’t always so vivid. It wasn’t until the early 1900s, particularly during the 1920s and 1930s, that food coloring began to be used more deliberately to enhance the cake’s appearance. The Adams Extract Company is often credited with popularizing the recipe through promotional campaigns that included the now-iconic red food dye. Over time, the dessert gained fame through its association with upscale New York hotels like the Waldorf-Astoria, although historians debate whether this story is more myth than fact. Regardless, Red Velvet became a staple in Southern baking and surged in popularity across the United States in the late 20th and early 21st centuries, especially after being featured in films, TV shows, and gourmet bakeries. Today, Red Velvet Cupcakes are celebrated not only for their visual appeal but also as a symbol of indulgence and tradition.
Ingredients Breakdown
Understanding each ingredient in Red Velvet Cupcakes is essential for achieving the perfect texture, flavor, and color. Here’s a detailed breakdown:
- All-Purpose Flour: Provides the structural base of the cupcakes. Sifted to ensure a light and airy crumb.
- Cocoa Powder (Unsweetened, Natural): Adds a subtle chocolate flavor without overpowering the vanilla notes. Natural cocoa (not Dutch-processed) reacts with acid to enhance color and rise.
- Baking Soda: Reacts with the acidic components (buttermilk and vinegar) to help the cupcakes rise and achieve fluffiness.
- Salt: Enhances overall flavor and balances sweetness.
- Granulated Sugar: Sweetens the batter and contributes to tenderness and browning.
- Butter (Unsalted): Adds richness and moisture. Room temperature ensures even mixing and proper aeration.
- Eggs (Large, Room Temperature): Provide structure, leavening, and emulsification. They help bind ingredients and create a stable batter.
- Buttermilk: A key acidic ingredient that activates baking soda and tenderizes gluten, resulting in a soft, moist texture. Also enhances the slight tang characteristic of Red Velvet.
- Distilled White Vinegar: Further increases acidity, improving rise and contributing to the signature velvety texture.
- Vanilla Extract: Adds depth of flavor and complements both the cocoa and cream cheese frosting.
- Red Food Coloring (Liquid or Gel): Gives the cupcakes their iconic vibrant red color. Gel coloring is more concentrated and provides richer color with less liquid.
- Water or Milk: Adjusts batter consistency to prevent dryness while maintaining structure.
For the Cream Cheese Frosting:
- Cream Cheese (Full-Fat, Block Style): Offers tanginess and body. Must be room temperature for smooth blending.
- Butter (Unsalted, Room Temperature): Adds richness and helps stabilize the frosting.
- Powdered Sugar (Confectioners’ Sugar): Sweetens and thickens the frosting. Sifted to avoid lumps.
- Vanilla Extract: Enhances flavor and balances the tang of cream cheese.
- Salt (Pinch): Brings all flavors together and reduces cloying sweetness.
Step-by-Step Recipe
Ingredients
Makes 24 standard cupcakes
- 2 ½ cups (315g) all-purpose flour
- 2 tablespoons (10g) unsweetened natural cocoa powder
- 1 teaspoon baking soda
- ½ teaspoon salt
- 1 ½ cups (300g) granulated sugar
- 1 cup (230g) unsalted butter, softened
- 2 large eggs, room temperature
- 1 cup (240ml) buttermilk, room temperature
- 1 tablespoon distilled white vinegar
- 2 teaspoons pure vanilla extract
- 2–3 tablespoons red gel food coloring (or more for deeper red)
- ½ cup (120ml) cold water
Cream Cheese Frosting:
- 16 oz (450g) full-fat cream cheese, softened
- ½ cup (115g) unsalted butter, softened
- 4 cups (480g) powdered sugar, sifted
- 2 teaspoons vanilla extract
- Pinch of salt
Directions
- Preheat and Prepare: Preheat oven to 350°F (175°C). Line two 12-cup muffin tins with cupcake liners.
- Combine Dry Ingredients: In a medium bowl, whisk together flour, cocoa powder, baking soda, salt, and sugar. Set aside.
- Cream Butter and Eggs: In a large mixing bowl, beat softened butter on medium speed until creamy (about 1 minute). Add eggs one at a time, beating well after each addition. Mix in vanilla extract.
- Add Dry Ingredients Alternately with Liquids: Gradually add the dry mixture to the butter mixture in three parts, alternating with buttermilk in two parts, starting and ending with dry ingredients. Mix on low speed just until combined after each addition.
- Activate Leavening: In a small bowl, combine vinegar and red food coloring. Stir into the batter along with the water. Mix on low for about 30 seconds until evenly colored and smooth. Do not overmix.
- Fill Liners: Divide batter evenly among the cupcake liners, filling each about ⅔ full to allow for rising.
- Bake: Bake for 18–22 minutes, or until a toothpick inserted into the center comes out clean. Rotate pans halfway through baking for even cooking.
- Cool: Allow cupcakes to cool in the pan for 5 minutes, then transfer to a wire rack to cool completely before frosting.
- Make Frosting: In a large bowl, beat cream cheese and butter together on medium speed until smooth and creamy (about 2 minutes). Gradually add sifted powdered sugar, one cup at a time, mixing on low. Add vanilla and salt. Increase speed to medium and beat for 2–3 minutes until fluffy and light.
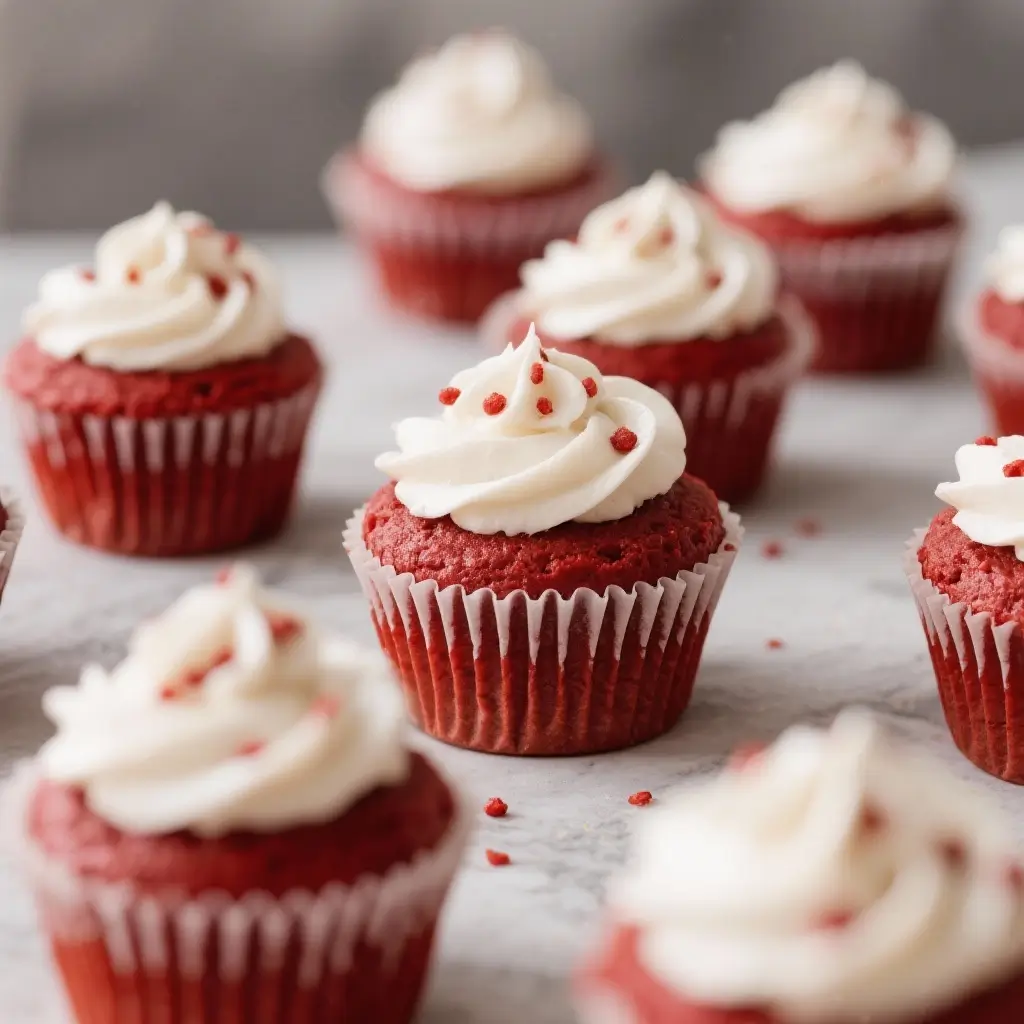
- Frost Cupcakes: Once cupcakes are completely cool, pipe or spread frosting generously onto each cupcake using a piping bag fitted with a star tip or offset spatula.
- Decorate (Optional): Garnish with red sprinkles, chocolate shavings, or edible gold dust for special occasions.
- Chill Before Serving: For best texture and cleaner cuts, refrigerate frosted cupcakes for 15–20 minutes before serving.
Tips
- Room Temperature Ingredients: Ensure butter, eggs, and buttermilk are at room temperature to create a smooth, emulsified batter and prevent curdling.
- Sift Dry Ingredients: Sifting flour and cocoa prevents lumps and aerates the mix for a lighter texture.
- Gel vs. Liquid Food Coloring: Use gel food coloring for a vibrant red without altering the batter’s consistency. Liquid coloring may require larger quantities, which can affect texture.
- Don’t Overmix: Overmixing develops gluten, leading to dense cupcakes. Mix only until ingredients are incorporated.
- Use Natural Cocoa: Avoid Dutch-processed cocoa, as it is alkalized and won’t react properly with the vinegar and buttermilk needed for the chemical reaction that gives Red Velvet its unique properties.
- Check Oven Temperature: Use an oven thermometer to ensure accurate baking temperature. Too hot = domed tops; too cool = sunken centers.
- Fill Liners Properly: Overfilling causes uneven baking and overflow. Stick to ⅔ full.
- Cool Completely: Never frost warm cupcakes—they’ll melt the frosting and become soggy.
- Stabilize Frosting: For piping intricate designs, chill the frosting for 15–20 minutes before use to firm it up slightly.
- Storage Tip: Store unfrosted cupcakes at room temperature for up to 2 days or freeze for up to 3 months. Frosted cupcakes should be refrigerated and consumed within 5 days.
Variations and Customizations
While traditional Red Velvet Cupcakes are timeless, there are countless ways to personalize them for different tastes and occasions:
- Gluten-Free Version: Substitute all-purpose flour with a high-quality gluten-free flour blend containing xanthan gum for structure.
- Dairy-Free/Vegan Option: Use plant-based butter, dairy-free yogurt or almond milk buttermilk (almond milk + lemon juice), vegan cream cheese, and flax eggs. Opt for beet juice or pomegranate concentrate instead of artificial dyes for a natural red tint.
- Mini Red Velvet Cupcakes: Use a mini muffin tin and reduce baking time to 10–13 minutes for bite-sized treats.
- Stuffed Cupcakes: Fill the center with cream cheese swirl, raspberry jam, white chocolate chunks, or caramel before baking.
- Flavor Twists: Add orange zest, cinnamon, or espresso powder to the batter for a unique twist on the classic flavor profile.
- Frosting Variations: Swap cream cheese frosting for Swiss meringue buttercream, whipped ganache, or mascarpone frosting. Add a hint of lemon zest or crushed pecans for extra flair.
- Holiday Themes: Use green food coloring for Christmas, pastels for Easter, or black for Halloween. Top with themed sprinkles or edible glitter.
- Nutty Crunch: Fold chopped walnuts or pecans into the batter or sprinkle on top of frosting for added texture.
- Alcohol Infusion: Add a splash of bourbon, Kahlua, or Chambord to the batter or frosting for an adult-friendly version.
- Layered Look: Create a red velvet and vanilla swirled batter for a marbled effect.
Health Considerations and Nutritional Value
While undeniably delicious, Red Velvet Cupcakes are considered a treat due to their sugar, fat, and calorie content. Here’s a general nutritional estimate per cupcake (including frosting):
- Calories: ~320–380 kcal
- Total Fat: 18–22g (Saturated Fat: 10–12g)
- Carbohydrates: 40–45g (Sugars: 30–35g)
- Protein: 3–4g
- Sodium: 200–250mg
Health Notes:
- High in added sugars and saturated fats, primarily from butter, cream cheese, and refined sugar.
- Lacks significant fiber, vitamins, or minerals unless modified.
- Can be adapted for dietary needs: reduced-sugar versions using erythritol or monk fruit, lower-fat substitutions (applesauce for part of butter), and whole grain flour blends increase nutritional value.
- Portion control is key—enjoying one cupcake occasionally fits into a balanced diet.
- Consider offering smaller mini cupcakes to reduce calorie intake per serving.
- For those with lactose intolerance or dairy allergies, dairy-free alternatives are increasingly effective and flavorful.
FAQ
Why is my red velvet cupcake not red enough?
The intensity of color depends on the type and amount of food coloring. Natural cocoa gives a rusty red, but for a bold crimson, use high-quality red gel food coloring—start with 2 tablespoons and adjust as needed.
Can I make red velvet cupcakes without food coloring?
Yes, but they won’t be bright red. Using beets, beet juice, or pomegranate concentrate can yield a natural pinkish-red hue, though flavor and texture may vary slightly.
Why did my cupcakes sink in the middle?
Possible causes include underbaking, opening the oven too early, overmixing the batter, or using expired leavening agents. Always check freshness of baking soda and ensure proper oven preheating.
Can I freeze red velvet cupcakes?
Absolutely. Freeze unfrosted cupcakes in an airtight container for up to 3 months. Thaw at room temperature and frost when ready. Frosted cupcakes can be frozen but may develop condensation—wrap individually for best results.
Can I use Dutch-process cocoa?
Not recommended. Dutch-processed cocoa is neutral in pH and won’t react with the vinegar and buttermilk, which affects both rise and color development.
How long do red velvet cupcakes last?
At room temperature (unfrosted): 2 days. Refrigerated (frosted): 5 days. Frozen: up to 3 months.
Why use vinegar in red velvet cupcakes?
Vinegar reacts with baking soda and buttermilk to create carbon dioxide, helping the cupcakes rise. It also enhances the “velvet” texture and brings out cocoa flavors.
Can I make the batter ahead of time?
Best to bake immediately. If necessary, refrigerate batter for up to 1 hour, but prolonged storage may affect rise and texture.
Summary
Red Velvet Cupcakes are a harmonious blend of rich cocoa, tangy buttermilk, and vibrant color, crowned with luxuriously smooth cream cheese frosting. With their storied past and irresistible taste, they remain a timeless favorite for bakers and dessert lovers around the world.