
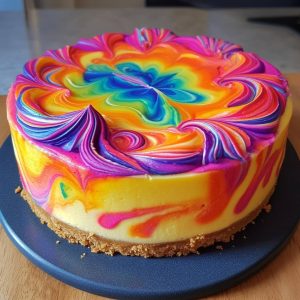
Tie-Dye Cheesecake is a vibrant, eye-catching dessert that blends the creamy richness of traditional cheesecake with a swirl of psychedelic colors reminiscent of 1960s and 70s counterculture. Visually striking and irresistibly fun, this dessert is as much a feast for the eyes as it is for the taste buds. Its unique design makes it perfect for parties, birthdays, pride events, or any occasion where a splash of color and creativity is welcome. The bold, swirling colors are created by dividing the cheesecake batter into portions and tinting each one with a different gel food coloring before artfully layering or swirling them together in the pan. Despite its stunning appearance, Tie-Dye Cheesecake follows a simple preparation method similar to standard cheesecakes and does not require advanced baking skills, making it accessible to home bakers who want to impress with a dazzling centerpiece.
The history of Tie-Dye Cheesecake is relatively modern, arising as a colorful twist on classic cheesecake in response to social media’s visual culture. Cheesecake itself dates back thousands of years, with early versions served to athletes in ancient Greece and later adopted and refined in different forms across Europe. The New York-style cheesecake, rich and dense, became the most iconic version in the United States during the 20th century. As baking trends shifted in the 21st century toward more personalized and photogenic desserts, bakers began experimenting with color, patterns, and creative presentations. Tie-dye cakes became popular for their eye-popping, nostalgic appearance, often associated with peace movements and creative freedom. The cheesecake version soon followed, combining the bold visuals of tie-dye with the smooth, indulgent texture of a classic cheesecake. Platforms like Instagram and Pinterest fueled the popularity of this dessert, encouraging bakers to play with vibrant colors and post their creations online, turning Tie-Dye Cheesecake into a modern baking phenomenon that continues to delight and inspire.
Ingredients Breakdown
The base ingredients for Tie-Dye Cheesecake are similar to those of any traditional cheesecake, but with the addition of food coloring for that signature look. The crust is usually made from graham cracker crumbs, sugar, and melted butter, creating a crunchy contrast to the creamy filling. For the cheesecake batter, you’ll need cream cheese (usually full-fat for the best texture), granulated sugar, eggs, sour cream or heavy cream, and vanilla extract. Some recipes may also include a bit of flour or cornstarch to stabilize the filling. The vivid tie-dye effect comes from dividing the finished batter into several bowls and adding gel-based food coloring to each portion—gel colors are preferred over liquid because they produce brighter, more saturated hues without thinning the batter. The number of colors is entirely up to you, though rainbow palettes using red, orange, yellow, green, blue, and purple are most popular. Edible glitter or colorful sprinkles can be added on top before or after baking for extra flair.
Step-by-Step Recipe
- Prepare the Crust: Preheat your oven to 325°F (163°C). In a mixing bowl, combine 1 ½ cups of graham cracker crumbs, ¼ cup of granulated sugar, and 6 tablespoons of melted butter. Mix until the crumbs are evenly moistened, then press the mixture firmly into the bottom of a springform pan. Bake the crust for 8–10 minutes, then let it cool completely.
- Make the Cheesecake Batter: In a large bowl, beat 4 packages (8 oz each) of softened cream cheese until smooth. Add 1 cup of granulated sugar and beat until well combined. Mix in 1 teaspoon of vanilla extract and 1 cup of sour cream. Add 4 large eggs, one at a time, beating on low speed just until incorporated. Do not overmix, as this can introduce air and cause cracks.
- Color the Batter: Divide the batter evenly into as many bowls as you want colors—typically 4 to 6. Tint each bowl with a different gel food coloring, stirring until the color is uniform.
- Layer the Batter: Starting with one color, spoon batter into the center of the cooled crust. Continue layering each color in the center, one after another, allowing them to spread outward naturally. You can leave it as concentric rings or use a skewer or toothpick to create swirls and tie-dye patterns by dragging it through the batter gently.
- Bake: Place the springform pan in a larger roasting pan and fill the outer pan with hot water halfway up the sides of the cheesecake pan to create a water bath. Bake at 325°F (163°C) for 55–65 minutes, or until the edges are set and the center is slightly jiggly. Turn off the oven, crack the door open, and let the cheesecake sit for 1 hour. Remove and cool to room temperature, then refrigerate for at least 4 hours or overnight.
- Serve: Once fully chilled and set, release the cheesecake from the springform pan. Optionally, top with whipped cream, sprinkles, or edible glitter before serving.
Tips for the Perfect Tie-Dye Cheesecake
Use room-temperature ingredients to ensure a smooth, lump-free batter. Full-fat cream cheese and sour cream yield the creamiest texture and best flavor. When adding eggs, mix them in on low speed and avoid overmixing to prevent air bubbles, which can cause cracking. To create the cleanest tie-dye effect, use gel food coloring rather than liquid; they’re more concentrated and won’t alter the consistency of the batter. For vibrant results, go bold with your color choices and be generous with the coloring. Always use a water bath to bake your cheesecake—this helps maintain even temperature and reduces the risk of cracking. Don’t skip the cooling process; allowing the cheesecake to rest in the oven after baking minimizes sudden temperature changes that can affect texture. If decorating after baking, wait until the cheesecake is fully chilled so the decorations stay intact and don’t melt or slide. To slice neatly, dip a sharp knife in hot water and wipe it clean between each cut.
Variations and Customizations
Tie-Dye Cheesecake is highly customizable to suit any occasion or theme. For holidays, adjust the colors accordingly—use red and green for Christmas, pastels for Easter, or orange and black for Halloween. To make a Pride-themed version, incorporate the full rainbow and top with rainbow sprinkles or candy. If you prefer a different flavor profile, add fruit purée to one or more of the colored batters, or use citrus zest like lemon, lime, or orange for a fresh twist. You can replace the graham cracker crust with crushed cookies like Oreos, gingersnaps, or vanilla wafers for a different base flavor. For a no-bake option, use a gelatin-based cheesecake recipe and follow the same coloring and layering method. Mini tie-dye cheesecakes can also be made using a muffin tin with cupcake liners, perfect for parties or individual servings. Vegan and dairy-free versions can be made with cashew-based cream cheese, plant-based sour cream, and egg replacers. Gluten-free graham crackers or cookies can be substituted to make the entire dessert gluten-free.
Health Considerations and Nutritional Value
While Tie-Dye Cheesecake is undeniably a festive and indulgent treat, it is also rich in calories, fat, and sugar, making it best enjoyed in moderation. A typical slice can contain 300 to 500 calories depending on the size and ingredients used. The primary sources of fat come from cream cheese, sour cream, and eggs, while sugar is present in both the crust and the filling. Artificial food coloring, though safe in small amounts, may not be suitable for everyone—particularly children or individuals with sensitivities or allergies to certain dyes. To reduce the calorie load, consider using reduced-fat cream cheese or sour cream, decreasing the sugar slightly, or serving smaller slices. Natural food colorings made from beet juice, turmeric, spinach, or spirulina can be used as alternatives for a more health-conscious version. For people following specific dietary restrictions, dairy-free and gluten-free substitutions are widely available and allow for more inclusive versions of this dessert. Despite its nutritional indulgence, Tie-Dye Cheesecake remains a fun and joyful treat that adds flair to any event.
FAQ
Q: Can I use liquid food coloring instead of gel? It’s best to use gel food coloring, as liquid versions are less concentrated and may affect the texture of the batter.
Q: Do I need a water bath to bake it? Yes, using a water bath helps prevent cracks and ensures even baking. It’s a recommended step for all baked cheesecakes.
Q: Can I make this cheesecake ahead of time? Absolutely! Cheesecakes are ideal for making ahead. Prepare it a day in advance and chill overnight for the best texture and flavor.
Q: What if I don’t have a springform pan? While a springform pan is ideal, you can use a regular cake pan lined with parchment paper and foil, but removing the cheesecake may be trickier.
Q: Can I freeze Tie-Dye Cheesecake? Yes, once fully set and chilled, wrap slices or the whole cake tightly in plastic wrap and freeze for up to 2 months. Thaw in the refrigerator before serving.
Tie-Dye Cheesecake
Ingredients
CRUST
- 2 cups of crushed Golden Oreo cookies
- 3 tablespoons of melted butter
- 1 tablespoon of sprinkles
FILLING
- 2 pounds of cream cheese softened to room temperature
- 1 1/3 cups granulated sugar
- 4 large eggs
- 1 tablespoon of vanilla extract
- 1/4 teaspoon of salt
- 2/3 cup sour cream
- 2/3 cup heavy whipping cream
- Gel food coloring
TOPPING
- 1 cup heavy whipping cream
- 1 to 2 tablespoons powdered sugar to taste
- Additional sprinkles for decoration
Instructions
For the Crust
- Preheat your oven to 350°F (175°C).
- Lightly grease a 9-inch springform pan with cooking spray.
- In a small bowl, mix the crushed Golden Oreo crumbs with the melted butter until fully combined.
- Press the crumb mixture firmly into the bottom of the springform pan and about 1/2 inch up the sides.
- Bake for 12 to 15 minutes, or until the crust is set and lightly golden.
- Remove from the oven and let it cool on a wire rack while you prepare the filling.
For the Filling
- Reduce the oven temperature to 325°F (163°C).
- Using a stand mixer fitted with a paddle attachment, beat the cream cheese until smooth, light, and fluffy.
- Add the granulated sugar and beat on high speed for about 3 minutes until fully incorporated.
- Mix in the vanilla extract and salt until just blended.
- Add the eggs one at a time, scraping down the sides of the bowl with a spatula after each addition to ensure everything is evenly mixed.
- Stir in the sour cream until fully combined, then add the heavy whipping cream and mix until smooth.
- Divide the batter evenly into four separate bowls and tint each with a few drops of gel food coloring to your desired shades.
- Transfer each colored batter into individual piping bags, twist the tops closed, and place the bags in a large bowl to keep them upright.
- Starting with one color, snip the tip off the piping bag and pipe generous dollops of batter over the crust. Continue with the remaining colors, distributing them evenly and layering until the pan is filled to the top.
- Once all the batter is in the pan, insert a knife into the batter and gently swirl it through in a swirling motion to create a tie-dye effect.
- Wrap the outside of the springform pan with aluminum foil to prevent water from seeping in.
- Place the wrapped pan into a deep roasting pan.
- Carefully pour hot water into the roasting pan until it reaches halfway up the sides of the cheesecake pan to create a water bath.
- Bake the cheesecake for 1 1/2 hours.
- After baking, turn off the oven and crack the door open about 1 inch. Leave the cheesecake in the oven for an additional hour to cool gradually.
- Remove the cheesecake from the oven, then loosely cover the top with aluminum foil, making sure the foil doesn’t touch the surface of the cheesecake.
- Refrigerate the cheesecake for at least 4 hours, or until completely chilled and set.
For the Topping
- In a stand mixer fitted with a whisk attachment, whip the heavy cream on high speed until it begins to thicken.
- Add the powdered sugar and continue whipping until stiff peaks form and the cream holds its shape.
- Transfer the whipped cream to a piping bag fitted with a star tip.
- Pipe decorative stars over the surface of the chilled cheesecake.
- Finish by adding a generous amount of sprinkles on top for a colorful, festive touch.