
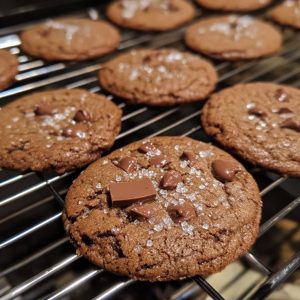
Chocolate Sugar Cookies are a delicious twist on the classic sugar cookie, combining the richness of chocolate with the sweetness of traditional sugar cookies. These soft, chewy cookies are perfect for any occasion, from holiday baking to casual treats. The deep, chocolate flavor balances perfectly with the slightly crispy edges and the soft center. When rolled in sugar before baking, they develop a sweet, slightly crunchy exterior that contrasts beautifully with the soft, rich interior. Chocolate sugar cookies are a versatile treat that can be customized with different types of chocolate, toppings, or even fillings. Whether you enjoy them with a cup of milk or as a special dessert, these cookies bring a warm, comforting sweetness that everyone loves.
The history of sugar cookies dates back to the early 1700s, and they have evolved over time to become one of the most beloved cookie varieties worldwide. The addition of chocolate to sugar cookies adds a rich, indulgent twist to the traditional recipe, blending two popular flavors that have stood the test of time. Sugar cookies themselves originated in Germany, and their popularity spread to America by the 18th century. The modern version of chocolate sugar cookies likely began to emerge in the 20th century, when chocolate became more widely available and integrated into various baked goods. Over time, the recipe has been adapted in countless ways, with chocolate being one of the most beloved variations. Whether baked for a festive occasion or simply enjoyed as a treat, chocolate sugar cookies have secured their place as a timeless favorite.
Ingredients Breakdown
For the cookie dough:
- 2 1/4 cups all-purpose flour
- 1/2 cup cocoa powder (unsweetened)
- 1 teaspoon baking soda
- 1/2 teaspoon salt
- 3/4 cup unsalted butter, softened
- 1 1/4 cups granulated sugar, divided
- 1 large egg
- 1 teaspoon vanilla extract
- 1/4 cup milk
For rolling the cookies:
- 1/4 cup granulated sugar
- 1 tablespoon cocoa powder (optional)
The ingredients in this chocolate sugar cookie recipe come together to form a dough that is easy to work with and bakes into delicious, melt-in-your-mouth cookies. The flour forms the base of the dough, providing structure and stability, while the cocoa powder adds the rich, deep chocolate flavor. Baking soda helps the cookies rise and gives them a slightly airy texture, while the salt enhances the overall flavor. The butter creates a tender, soft texture, and the granulated sugar provides sweetness. The egg helps bind the dough together, and the vanilla extract adds a subtle, aromatic flavor that complements the chocolate. Finally, the milk ensures the dough achieves the right consistency for rolling and shaping.
Step-by-Step Recipe:
- Preheat your oven to 350°F (175°C) and line a baking sheet with parchment paper or a silicone baking mat.
- In a medium bowl, whisk together the flour, cocoa powder, baking soda, and salt. Set aside.
- In a large mixing bowl, cream the softened butter with 1 cup of the granulated sugar until light and fluffy, about 2-3 minutes.
- Beat in the egg and vanilla extract until fully combined.
- Gradually add the dry ingredients to the wet ingredients, mixing until just combined. Add the milk, mixing again until the dough is smooth and thick.
- In a small bowl, combine the remaining 1/4 cup of granulated sugar with 1 tablespoon of cocoa powder (optional).
- Scoop tablespoon-sized portions of dough and roll them into balls. Roll each dough ball in the sugar-cocoa mixture to coat the cookie dough in a sweet, slightly crunchy coating.
- Place the coated dough balls onto the prepared baking sheet, spacing them about 2 inches apart.
- Flatten each dough ball slightly with the back of a spoon or your fingers.
- Bake in the preheated oven for 8-10 minutes, or until the cookies are set and slightly cracked on top.
- Allow the cookies to cool on the baking sheet for 5 minutes before transferring them to a wire rack to cool completely.
Tips for the Perfect Chocolate Sugar Cookies
To ensure your cookies are perfectly soft and chewy, avoid overbaking them. The cookies should still look slightly soft when you remove them from the oven but will continue to set as they cool. If you want extra chewy cookies, let them cool for a few minutes on the baking sheet before transferring them to a wire rack. Make sure your butter is softened, not melted, for the best texture in your dough. If the dough is too sticky to handle, refrigerate it for 30 minutes to make it easier to roll. For a more intense chocolate flavor, you can substitute dark cocoa powder for regular cocoa powder. For a decorative touch, sprinkle extra sugar or cocoa powder on top of the cookies just before baking.
Variations and Customizations
Chocolate sugar cookies can be customized in many ways to suit your tastes. You can mix in chocolate chips, chopped nuts, or even marshmallows for added texture and flavor. For a fun twist, add a teaspoon of peppermint extract to the dough for a minty version. You can also use different types of sugar for rolling the cookies, such as colored sugar for a festive look or coarse sugar for extra crunch. For a special occasion, drizzle melted white or milk chocolate over the cooled cookies for a decorative finish. If you prefer a thicker cookie, you can increase the baking time slightly, but be sure to check for doneness by gently pressing on the cookies—they should be soft but not raw in the center.
Health Considerations and Nutritional Value
While chocolate sugar cookies are a delightful treat, they are not typically considered a healthy food option. They are high in sugar and fat, which contribute to their rich flavor and texture. If you are looking to make a healthier version, you can experiment with substituting some of the butter with a healthier fat, such as coconut oil or avocado. You could also reduce the sugar content or use a sugar substitute, but keep in mind that it may alter the texture and flavor of the cookies. For those who are gluten-sensitive, using a gluten-free all-purpose flour can make these cookies suitable for a gluten-free diet. However, like most baked goods, chocolate sugar cookies should be enjoyed in moderation, as part of a balanced diet.
FAQ
Q: Can I freeze chocolate sugar cookie dough?
Yes, chocolate sugar cookie dough can be frozen. Simply roll the dough into balls, coat them in sugar, and place them on a baking sheet. Freeze the dough balls for 1-2 hours, then transfer them to a freezer-safe bag or container. When you’re ready to bake, simply place the frozen dough balls directly on the baking sheet and bake as usual, adding a minute or two to the baking time.
Q: Can I use milk chocolate cocoa powder instead of unsweetened cocoa powder?
You can use milk chocolate cocoa powder, but it will make the cookies sweeter and less intense in chocolate flavor. If you prefer a more subtle chocolate taste, feel free to try it, but expect a slightly different texture and taste.
Q: How should I store chocolate sugar cookies?
Store the cookies in an airtight container at room temperature for up to a week. For longer storage, you can freeze the cookies in an airtight container or freezer bag for up to 3 months.
Q: Can I make these cookies gluten-free?
Yes, you can make these cookies gluten-free by using a gluten-free all-purpose flour blend in place of regular flour. Be sure to check the other ingredients for any gluten-containing additives.
Chocolate Sugar Cookies
Ingredients
- 1 1/2 cups 188g all-purpose flour (spooned and leveled)
- 3/4 cup 62g unsweetened natural or Dutch-process cocoa powder, plus extra for rolling and dusting the work surface
- 1 teaspoon baking powder
- 1/8 teaspoon salt
- 3/4 cup 12 Tbsp; 170g unsalted butter, softened to room temperature
- 1 cup 200g granulated sugar
- 1 large egg at room temperature
- 1 teaspoon pure vanilla extract
For Decorating
- Royal icing or easy glaze icing royal icing is shown
- Assorted sprinkles
Instructions
- Make the cookies: In a medium bowl, whisk together the flour, cocoa powder, baking powder, and salt. Set aside.
- In a large bowl, using a handheld mixer or stand mixer fitted with the paddle attachment, beat the butter and sugar together on high speed until smooth and creamy, about 2 minutes. Add the egg and vanilla extract and beat on high speed until combined, about 1 minute. Scrape down the sides and bottom of the bowl as needed and beat again to ensure everything is fully combined.
- Add the dry ingredients to the wet ingredients and mix on low speed until just combined. The dough will be soft. If the dough feels too soft or sticky for rolling, add 1 extra tablespoon of flour.
- Roll the dough: Divide the dough into two equal portions. Dust two large pieces of parchment paper or silicone baking mats with cocoa powder or flour. Place one dough half on each sheet. Using a rolling pin lightly dusted with cocoa powder or flour, roll out the dough to about 1/4-inch thickness. Use more cocoa powder or flour if the dough becomes too sticky. The rolled dough can be any shape as long as it’s evenly 1/4-inch thick.
- Chill the dough: Lightly dust one of the rolled-out doughs with cocoa powder or flour. Place a sheet of parchment paper on top to prevent sticking. Stack the second rolled-out dough on top. Cover the dough with plastic wrap or aluminum foil and refrigerate for at least 1-2 hours, or up to 2 days.
- Preheat oven & shape cookies: Once chilled, preheat the oven to 350°F (177°C). Line 2-3 large baking sheets with parchment paper or silicone baking mats. Carefully remove the top dough sheet from the refrigerator. Using cookie cutters, cut the dough into shapes. Re-roll the remaining dough, lightly dusting your work surface and rolling pin with cocoa powder or flour, and continue cutting out shapes until all the dough is used. If the dough becomes too warm or soft, stop and return any unused dough to the refrigerator for 10 minutes to firm up. Repeat the cutting process with the second half of the dough. (Note: The dough scraps can be re-rolled, so you’ll get a lot of cookies from them.)
- Bake & cool: Arrange the shaped cookies on the baking sheets, spacing them about 3 inches apart. Bake for 11-12 minutes, or until the edges are set. If your oven has hot spots, rotate the baking sheets halfway through baking. Let the cookies cool on the baking sheets for 5 minutes before transferring them to a wire rack to cool completely before decorating.
- Make either icing: Prepare royal icing or easy glaze icing and decorate the cooled cookies as desired. You can add sprinkles on top of the icing if you’d like. Feel free to color the icing with gel food coloring. Refer to the post above for recommended decorating tools. There’s no need to cover the decorated cookies while waiting for the icing to set. For convenience, you can decorate the cookies directly on the baking sheet and place the entire sheet in the refrigerator to help speed up the icing setting.
- Enjoy: Serve the cookies right away, or wait until the icing has set. Once the icing has hardened, these cookies are perfect for gifting or sending. Plain or decorated cookies will stay soft for about 5 days when stored tightly covered at room temperature. For longer storage, cover and refrigerate the cookies for up to 10 days.