Introduction
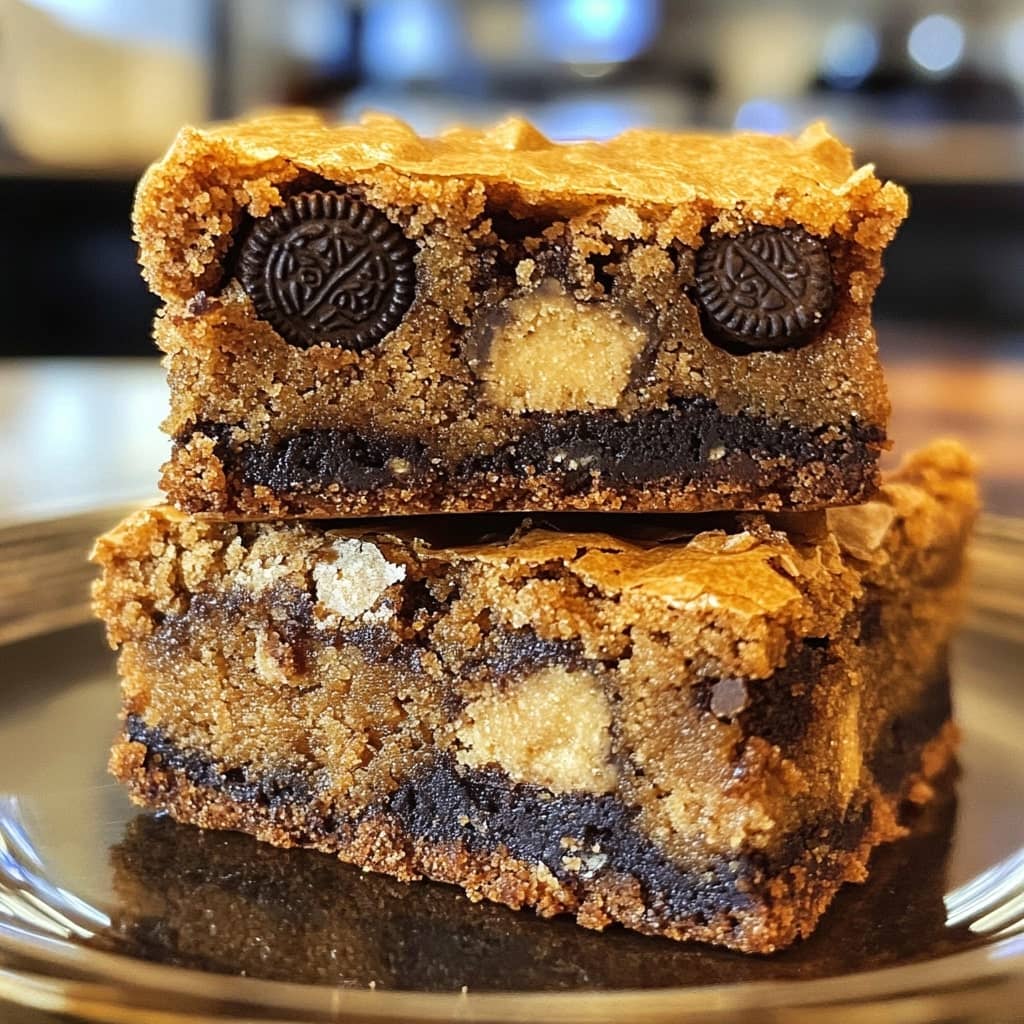
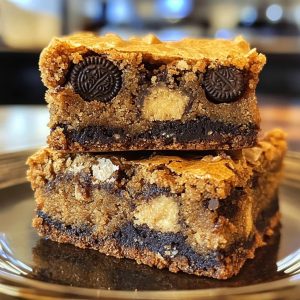
Golden Oreo Blondies are a delightful twist on the traditional blondie, combining the rich, buttery flavor of blondies with the sweet, creamy taste of Golden Oreos. These treats are perfect for any occasion, whether you’re hosting a party, craving a sweet snack, or looking for a fun dessert to share with friends and family. With their chewy texture, golden color, and decadent flavor, Golden Oreo Blondies are sure to be a crowd-pleaser.
The History of Golden Oreo Blondies
Blondies have long been a popular dessert in American baking, often regarded as the “brownie’s cousin” for their similar texture but lack of cocoa. The golden version, known for using brown sugar and butter as its base, was a twist on the traditional chocolate-filled treat. Over the years, variations of blondies have emerged, including one that incorporates Golden Oreos, adding an extra level of flavor and texture. The combination of these ingredients takes the humble blondie to new heights, offering a rich, sweet dessert that brings together the best of cookies and bars.
Ingredients Breakdown
The ingredients for Golden Oreo Blondies are simple yet flavorful. You’ll need all-purpose flour, granulated sugar, brown sugar, and butter as the base to create that delicious blondie texture. Eggs provide moisture and binding, while vanilla extract brings warmth and depth to the flavor. Golden Oreos are the star of the show, adding a crispy texture and rich, creamy taste. A pinch of salt balances the sweetness, and baking soda helps the blondies rise and achieve the perfect chewy consistency. Some recipes may include additional ingredients like white chocolate chips for extra sweetness, though this is optional.
Step-by-Step Recipe
- Preheat your oven to 350°F (175°C) and grease or line a 9×13-inch baking dish with parchment paper.
- In a medium-sized bowl, whisk together the flour and baking soda. Set aside.
- In a separate bowl, cream together the melted butter, granulated sugar, and brown sugar until the mixture is smooth and creamy.
- Add in the eggs one at a time, mixing well after each addition. Stir in the vanilla extract.
- Gradually add the dry ingredients to the wet ingredients, mixing until just combined. Avoid overmixing to keep the texture soft.
- Fold in the chopped Golden Oreos, ensuring they are evenly distributed throughout the batter.
- Pour the batter into the prepared baking dish, spreading it out evenly.
- Bake for 25-30 minutes, or until a toothpick inserted into the center comes out clean or with a few moist crumbs.
- Allow the blondies to cool in the pan for about 10 minutes before transferring them to a wire rack to cool completely.
- Cut into squares or rectangles and serve. Enjoy!
Tips for the Perfect Golden Oreo Blondies
To ensure your Golden Oreo Blondies turn out perfectly, here are a few tips:
- Don’t overmix the batter – Overmixing can result in dense, tough blondies. Mix just until the dry ingredients are incorporated.
- Chop the Golden Oreos evenly – For even distribution, chop the Golden Oreos into similar-sized pieces so each bite gets the perfect amount of cookie.
- Check for doneness early – Ovens vary, so keep an eye on your blondies. They’re done when the top is golden brown and a toothpick comes out clean.
- Let them cool completely – Allow the blondies to cool before cutting them, as this helps them set and makes slicing easier.
Variations and Customizations
While Golden Oreo Blondies are delicious as they are, there are several variations you can try to mix things up:
- Add white chocolate chips – Adding white chocolate chips can enhance the sweetness and complement the Golden Oreos.
- Include nuts – Chopped macadamia nuts or pecans can add crunch and flavor to the blondies, giving them a slightly richer texture.
- Use flavored Oreos – Swap Golden Oreos with other Oreo flavors like birthday cake, mint, or peanut butter for a fun twist.
- Make them extra gooey – If you prefer a gooey, fudge-like blondie, reduce the baking time slightly for a more moist and soft center.
Health Considerations and Nutritional Value
Golden Oreo Blondies are a delicious indulgence, but it’s important to be mindful of their nutritional content. A typical serving can be high in calories, sugar, and fat due to the combination of butter, sugar, and Golden Oreos. While they’re not considered a health food, you can make some adjustments to make them slightly healthier. For instance, using less sugar or swapping out regular butter for a plant-based version can lower the calorie count. Keep in mind that these treats should be enjoyed in moderation as part of a balanced diet.
FAQ
Can I make Golden Oreo Blondies ahead of time?
Yes, you can make them a day or two ahead of time. Store them in an airtight container to keep them fresh. They also freeze well if you want to keep them for a longer period.
Can I use regular Oreos instead of Golden Oreos?
Absolutely! Regular Oreos will work in place of Golden Oreos. The flavor will be slightly different, but it will still be delicious.
How can I make the blondies less sweet?
If you prefer less sweetness, you can reduce the amount of sugar or use a sugar substitute. Additionally, using fewer Golden Oreos will decrease the sweetness.
Can I substitute other types of flour for the all-purpose flour?
You can try substituting whole wheat flour for a healthier version, but the texture might change slightly. Gluten-free flour blends can also work if you’re avoiding gluten.
How do I know when the blondies are done baking?
Check the blondies by inserting a toothpick in the center. If it comes out clean or with a few moist crumbs, they’re ready. Don’t wait until it’s completely dry to avoid overbaking them.
Golden Oreo Blondies
Ingredients
- 3/4 cup unsalted butter 168 grams, melted and allowed to cool
- 1/2 cup brown sugar 105 grams
- 1/2 cup granulated sugar 100 grams
- 1 large egg
- 1 large egg yolk discard the egg white
- 2 teaspoons vanilla extract
- 1 3/4 cups all-purpose flour 219 grams
- 1/4 teaspoon salt
- 1/2 cup white chocolate chips 90 grams
- 16 Golden Oreos
Instructions
- Preheat the oven to 350°F (175°C).
- Lightly spray the bottom of a baking pan with non-stick cooking spray, then line it with parchment paper, ensuring there’s an overhang on all sides.
- In a large bowl, whisk together the melted butter, brown sugar, and white sugar until the mixture is smooth and the butter is fully incorporated, about 1 minute, with no visible pools of melted butter.
- Add the egg, egg yolk, and vanilla extract, whisking until combined.
- Carefully fold in the flour and salt, mixing until just combined.
- Gently stir in the white chocolate chips.
- Spoon half of the batter into the prepared pan and spread it evenly to cover the bottom.
- Place a layer of Golden Oreos on top, arranging 4 rows of 4 cookies.
- Spoon the remaining batter over the Oreos and gently spread it to cover.
- Bake in the preheated oven for 30-35 minutes, or until the top is set, the sides begin to pull away from the pan, and a toothpick inserted into the center comes out clean or with a few moist crumbs. Bake time may vary based on your oven and how gooey you prefer your blondies.
- Allow the bars to cool completely in the pan for about 4 hours. Then, lift them out of the pan using the parchment paper overhang. Transfer to a cutting board and cut into squares using a large, sharp knife.