Introduction
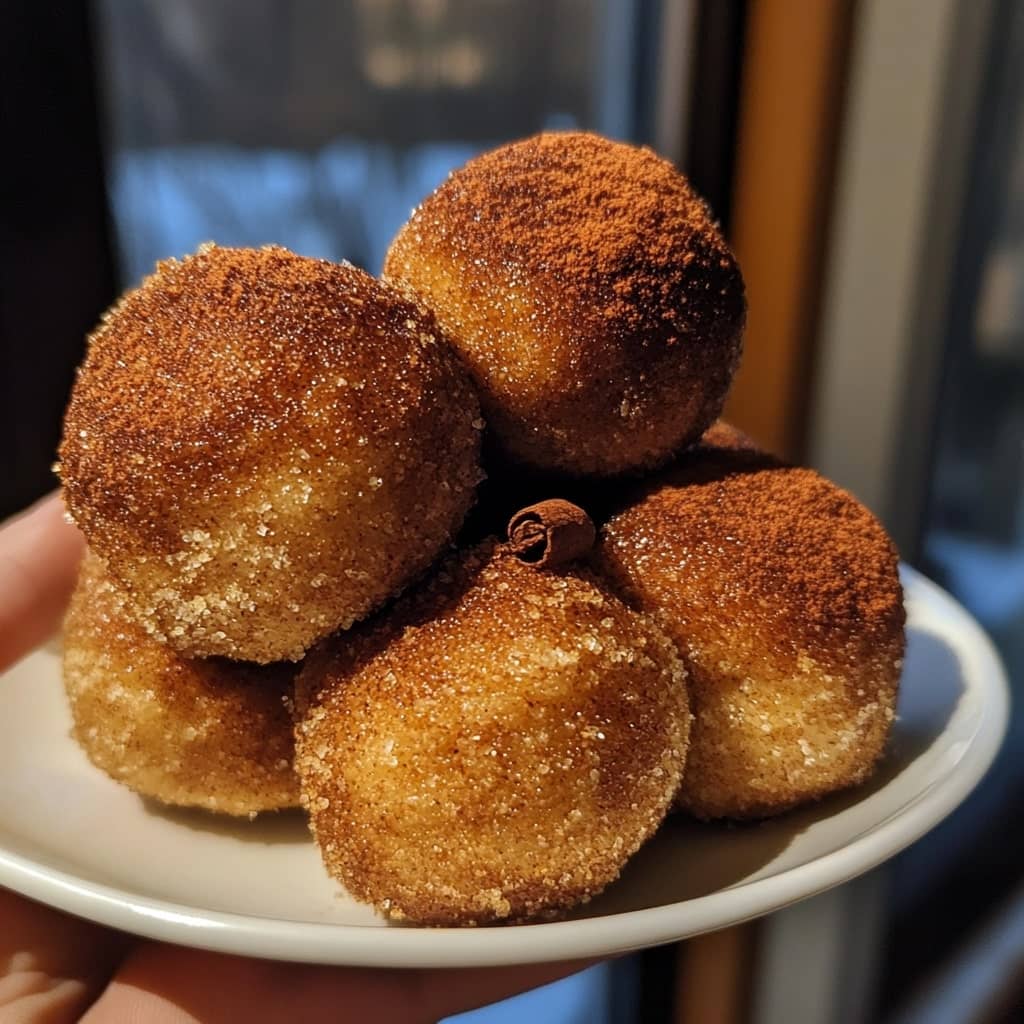
The Ultimate Cinnamon Bombs are the perfect sweet treat for anyone who loves the rich, warm, and irresistible flavor of cinnamon. These bite-sized delights are packed with a gooey cinnamon sugar center and wrapped in a soft, fluffy dough that bakes up golden and delicious. Whether you’re craving a sweet snack, a breakfast indulgence, or something to serve at a gathering, these cinnamon bombs are sure to satisfy your sweet tooth. The best part? They are incredibly easy to make and are perfect for both beginner and experienced bakers. Topped with a sweet glaze or enjoyed on their own, these cinnamon bombs are an explosion of flavor that will leave you craving more.
The History of Cinnamon Baked Goods
Cinnamon has been a beloved spice for centuries, and its use in baked goods dates back to ancient times. Cinnamon rolls, for example, have a long-standing history in Scandinavian countries, where they were first introduced in the 17th century. The popularity of cinnamon rolls spread to the U.S. in the 20th century, especially after the rise of commercial bakeries and the introduction of chains like Cinnabon in the 1980s. The concept of “cinnamon bombs” is a more recent twist on this classic treat, taking the gooey, sugar-cinnamon filling and enclosing it in a bite-sized form for maximum indulgence. With their sweet, fluffy dough and sticky filling, cinnamon bombs have become a popular alternative to traditional cinnamon rolls, offering a fun and easy-to-eat version of this classic flavor combination.
Ingredients Breakdown
To make the Ultimate Cinnamon Bombs, you’ll need a few essential ingredients that combine to create the perfect balance of sweet, cinnamon-spiced goodness. The dough calls for all-purpose flour, sugar, salt, yeast, milk, butter, and eggs. These ingredients work together to form a soft, rich dough that rises beautifully in the oven. For the cinnamon filling, you’ll need brown sugar, ground cinnamon, and butter. These ingredients come together to create the gooey, sweet center that gives the cinnamon bombs their signature flavor. Lastly, the glaze is made with powdered sugar, milk, and vanilla extract to add an extra layer of sweetness and richness to the final product. The combination of these simple ingredients creates a decadent, comforting treat that’s impossible to resist.
Step-by-Step Recipe
- Begin by preparing the dough. In a large bowl, combine 2 ½ cups of all-purpose flour, ¼ cup of sugar, 1 teaspoon of salt, and 1 packet of active dry yeast. Stir to combine.
- In a separate bowl, heat ½ cup of milk and ¼ cup of butter in the microwave or on the stove until the butter is melted and the milk is warm, but not too hot (around 110°F/45°C). Pour the milk and butter mixture into the dry ingredients and stir.
- Add 1 large egg to the dough mixture and stir until a sticky dough forms. Gradually add more flour, ¼ cup at a time, until the dough becomes soft and slightly tacky, but not sticky.
- Turn the dough onto a lightly floured surface and knead it for 5-7 minutes until it becomes smooth and elastic.
- Place the dough in a lightly greased bowl, cover it with a clean towel, and allow it to rise for 1-2 hours, or until it has doubled in size.
- While the dough is rising, prepare the cinnamon filling. In a small bowl, mix ¾ cup of brown sugar and 1 tablespoon of ground cinnamon together. Set aside.
- After the dough has risen, punch it down and roll it out into a large rectangle, about 12×18 inches. Brush the dough with ¼ cup of softened butter and sprinkle the cinnamon-sugar mixture evenly over the entire surface.
- Starting from one end, carefully roll the dough into a log, pinching the seams as you go to seal it. Slice the roll into 12 equal pieces.
- Place the cinnamon bombs in a greased 9×13-inch baking dish, making sure they are close together but not touching. Cover the dish with a towel and let the bombs rise for another 30 minutes.
- Preheat the oven to 350°F (175°C). Bake the cinnamon bombs for 18-20 minutes, or until they are golden brown and puffed up.
- While the cinnamon bombs are baking, prepare the glaze. In a small bowl, whisk together 1 cup of powdered sugar, 2 tablespoons of milk, and 1 teaspoon of vanilla extract until smooth.
- Once the cinnamon bombs are done baking, remove them from the oven and immediately drizzle the glaze over the top while they are still warm.
- Allow the cinnamon bombs to cool slightly before serving. Enjoy these gooey, sweet bites of cinnamon heaven!
Tips for the Perfect Cinnamon Bombs
- Make sure the milk and butter are warm, but not too hot, to ensure the yeast activates properly. If the milk is too hot, it can kill the yeast and prevent the dough from rising.
- Don’t overfill the cinnamon bombs with the filling. Too much filling can cause them to leak out during baking, making the dough soggy.
- Let the dough rise properly. If the dough doesn’t rise enough, the cinnamon bombs won’t be as fluffy and soft. Be patient and give it time to rise fully.
- If you prefer a stronger cinnamon flavor, feel free to add more cinnamon to the filling or sprinkle some over the glaze.
- For an extra touch, consider topping the cinnamon bombs with chopped nuts, such as pecans or walnuts, before baking them. This adds a lovely crunch and flavor contrast to the soft, gooey centers.
- If you want to make these ahead of time, you can prepare the cinnamon bombs up to the point of baking, then cover and refrigerate them overnight. The next morning, just let them rise for about 30 minutes and bake them as usual.
Variations and Customizations
While the Ultimate Cinnamon Bombs are perfect as they are, there are plenty of ways to customize them. For a chocolate twist, you can add mini chocolate chips or cocoa powder to the cinnamon-sugar filling. If you’re a fan of cream cheese, try incorporating a layer of cream cheese frosting or a swirl of cream cheese filling in the center of each bomb. For a fruitier variation, consider adding fresh berries like raspberries or blueberries to the cinnamon filling, or even a layer of apple pie filling for an autumn-inspired treat. You can also experiment with different glazes—perhaps a maple glaze for a cozy fall flavor or a salted caramel glaze for an indulgent twist. The possibilities are endless, so feel free to get creative with your cinnamon bombs!
Health Considerations and Nutritional Value
Like most indulgent desserts, the Ultimate Cinnamon Bombs are rich in calories, sugar, and fat. The dough is made with butter and eggs, providing a decent amount of fat and protein, while the cinnamon-sugar filling adds significant sugar content. While they are not the healthiest option, they are perfect for an occasional treat. If you’re looking for a slightly lighter version, you could experiment with using a lower-fat milk, reducing the sugar in the dough and filling, or swapping out some of the butter for a healthier fat alternative, such as coconut oil. Keep in mind that these cinnamon bombs are best enjoyed in moderation, especially if you’re watching your sugar intake or following a specific dietary plan. For a lower-carb option, you could also look for a keto-friendly dough recipe, though it may alter the texture and flavor of the final product.
FAQ
Can I make these ahead of time?
Yes, you can prepare the cinnamon bombs the night before and refrigerate them overnight. Just allow them to rise for about 30 minutes before baking.
Can I freeze cinnamon bombs?
Yes, you can freeze the uncooked cinnamon bombs. After rolling and slicing the dough, place them on a baking sheet and freeze them for 1-2 hours. Then, transfer them to a freezer bag or container. When ready to bake, let them thaw and rise before baking as usual.
How can I make these gluten-free?
You can try using a gluten-free flour blend in place of all-purpose flour. Keep in mind that the texture may vary, and you may need to adjust the amount of flour to get the right consistency for the dough.
Can I use a different glaze?
Absolutely! You can replace the vanilla glaze with a cream cheese glaze, maple glaze, or even a chocolate glaze for a different flavor experience.
How can I store leftover cinnamon bombs?
Store leftover cinnamon bombs in an airtight container at room temperature for up to 3 days. You can also freeze them for longer storage and reheat them in the microwave or oven.

The Ultimate Cinnamon Bombs
Ingredients
For the Tangzhong (Flour Paste):
- 5 tablespoons 71g water
- 5 tablespoons 71g whole milk
- 3 tablespoons + 1 teaspoon 28g flour*
For the Dough:
- All of the tangzhong above
- 6 tablespoons 85g unsalted butter, melted
- 3/4 cup 170g whole milk, cold or at room temperature
- 2 large eggs
- 4 cups + 2 tablespoons 496g flour*
- 3 tablespoons + 1 teaspoon 21g powdered milk (dry milk powder)
- 1 tablespoon 9g instant yeast
- 1/4 cup 50g granulated sugar
- 1 3/4 teaspoons salt
For the Filling:
- 1/2 cup 114g unsalted butter, very soft and partially melted
- 1 1/4 cups 250g soft light brown sugar, packed
- 2 tablespoons 14g cornstarch
- 2 1/2 tablespoons 13g ground cinnamon
- 1/2 teaspoon fine salt
For the Frosting:
- 1/4 cup 57g unsalted butter, softened to room temperature
- 2 oz 57g cream cheese, softened to room temperature
- 1 cup 114g powdered sugar
- 1 tablespoon milk
- 1 teaspoon fresh lemon juice
- 1/2 teaspoon vanilla extract or 1 teaspoon imitation vanilla flavoring
- Pinch of salt
Instructions
To Make the Tangzhong (Flour Paste):
- In a medium saucepan, whisk together the water, milk, and flour until the mixture is smooth and free of lumps. Place the saucepan over medium heat and, whisking constantly, cook for 2 to 3 minutes, until the mixture thickens to a smooth, pudding-like consistency. Remove from heat and set aside.
To Make the Dough:
- Add the melted butter and milk to the tangzhong in the saucepan, whisking until very smooth. Next, whisk in the eggs until fully incorporated. The liquid ingredients will cool the tangzhong, and the mixture should feel lukewarm at this point.
- In the bowl of a stand mixer (or a large bowl if kneading by hand), combine the flour, powdered milk, and yeast by whisking them together. Pour in the tangzhong and milk mixture.
- Fit the stand mixer with the dough hook and mix on low speed until the flour is moistened and a shaggy dough comes together, about 1 to 2 minutes. Cover the bowl and let the dough rest for 20 minutes to allow the flour to absorb the liquid, making it easier to knead.
- After resting, add the sugar and salt, then mix on medium-low speed for about 10 minutes until the dough is smooth, elastic, and slightly sticky. It will be very sticky at first, but resist adding more flour— the dough will absorb the excess moisture as mixing continues. After kneading, the dough should feel slightly sticky but not messy, and it should form a smooth, taut ball when handled with lightly oiled hands.
- Transfer the dough to a lightly greased large bowl and cover it tightly with plastic wrap. Allow it to rise in a warm place for about 1 hour, or until nearly doubled in size. For a slower rise, you can refrigerate it overnight—this method makes the dough easier to handle. Meanwhile, prepare the filling.
To Make the Filling:
- In a medium bowl, whisk together the brown sugar, cornstarch, cinnamon, and salt until well combined. Cover with plastic wrap and set aside until ready to use.
To Make the Rolls:
- Once the dough has risen, gently deflate it and turn it out onto a lightly floured counter or pastry mat. Pat, stretch, and roll the dough into a 16×18-inch rectangle, with the long edge facing you.
- Evenly spread the partially melted butter over the surface of the dough, then sprinkle the brown sugar filling over it, leaving a 1-inch border along the top edge. Use your hands to smooth the filling into an even layer and gently press it into the dough to help it adhere.
- Starting from the long edge nearest you, roll the dough tightly into a cylinder. Pinch the seam to seal the dough shut and roll it seam-side down. Use a knife to mark the dough into 12 equal portions. For clean cuts, slide a strand of dental floss under the cylinder, cross the ends, and pull to slice. Cut the dough into 12 portions (about 2 inches each) and transfer them to a greased 15×13-inch rimmed baking sheet or a 13×9-inch baking pan.
- Cover the pan loosely with plastic wrap and allow the rolls to rise until puffy and touching each other, about 40 to 50 minutes. In the last 15 minutes of rising, adjust the oven rack to the middle position and preheat the oven to 350°F (180°C). While the rolls rise, prepare the frosting.
To Make the Frosting:
- In a medium bowl (or using a food processor), beat the butter and cream cheese together with an electric mixer for about 2 minutes, until smooth and creamy. Gradually add the powdered sugar while continuing to beat, until fully incorporated and the mixture is light and fluffy, about 2 more minutes.
- Add the milk, lemon juice, vanilla, and salt, then beat until well combined. Cover and set aside.
To Bake the Rolls:
- Remove the plastic wrap from the rolls and bake them in the preheated oven for 20 to 25 minutes. Tent with aluminum foil halfway through baking to prevent over-browning. The rolls are done when the center of the dough registers around 190°F on an instant-read thermometer or when a toothpick inserted into the center comes out clean and smooth.
- Once baked, remove the rolls from the oven and immediately spread the frosting on top while they’re still warm, letting it melt partially into the rolls. Serve warm.
- Store any completely cooled rolls in an airtight container at room temperature for a few days.