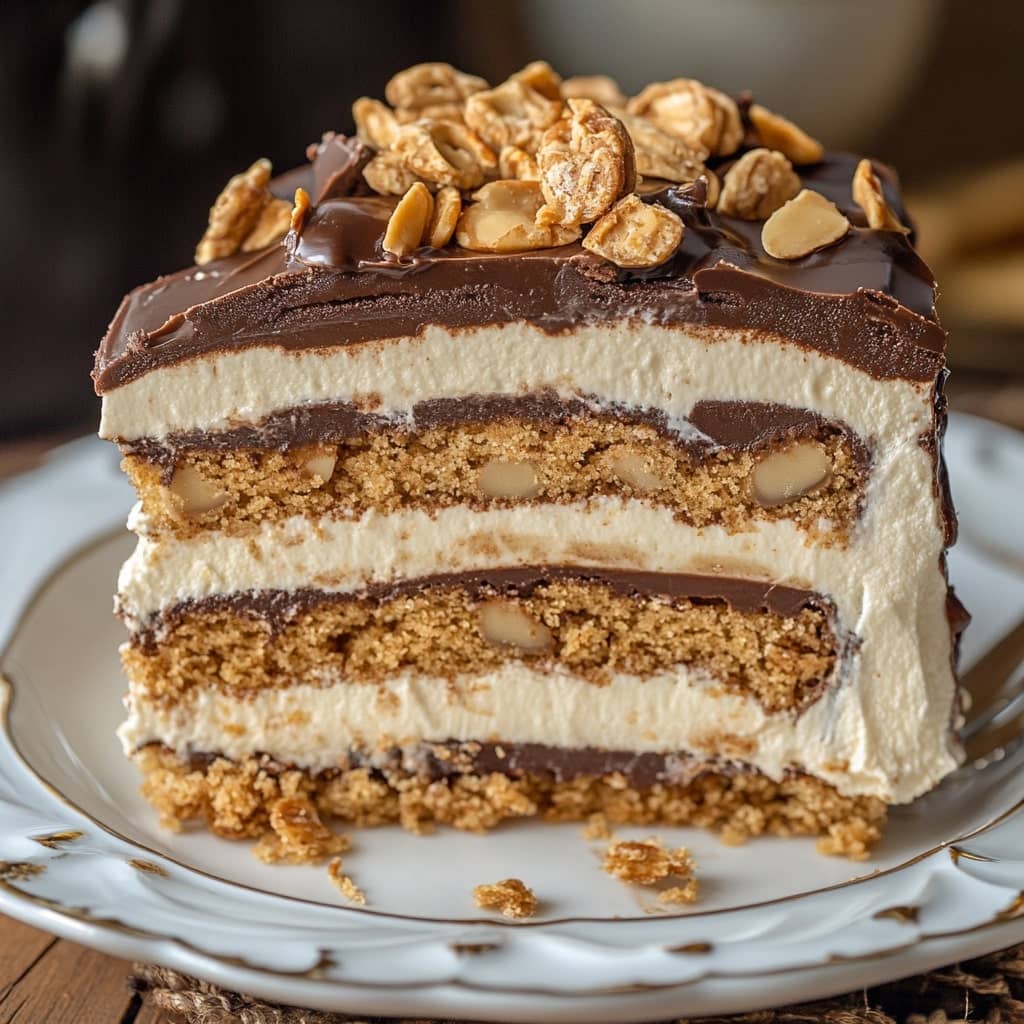
Peanut Butter Icebox Cake
is the ultimate no-bake dessert that layers creamy, rich peanut butter mousse with fluffy whipped topping and crisp graham crackers that soften into a tender cake-like texture as it chills, creating a cool, indulgent treat perfect for warm-weather days or any time you want a simple, crowd-pleasing dessert. This cake is the kind of dessert that gets better the longer it sits, as all the layers meld together into a luscious, sliceable masterpiece that offers a mix of nostalgic comfort and bold peanut butter flavor in every bite.
The history of
the icebox cake dates back to the early 20th century, when refrigeration became more common in households and companies began marketing “icebox” desserts that required minimal cooking. Originally popularized in the 1920s and 1930s in America through branded recipes from companies like Nabisco and Jell-O, the icebox cake became a staple for its simplicity, versatility, and refreshing nature, especially during hot months. Over time, variations emerged using whipped cream, pudding mixes, and cookies or crackers, and the peanut butter version evolved as peanut butter became a household staple in the mid-1900s, loved for its creamy texture and protein-packed richness. Ingredients Breakdown
typically includes graham crackers or chocolate wafers as the base and layering component, a luscious peanut butter layer made from peanut butter, cream cheese, and powdered sugar, whipped topping or whipped cream to lighten the texture, and sometimes additional toppings like crushed peanuts, chocolate chips, or a drizzle of ganache. Each component plays a key role in balancing texture and flavor—the salty creaminess of the peanut butter, the sweetness of the cream, and the slight crunch that becomes tender with time.
Step-by-Step Recipe:
Begin by lining a baking dish with a layer of graham crackers. In a mixing bowl, beat together softened cream cheese and peanut butter until smooth, then mix in powdered sugar and fold in whipped topping to create a light mousse. Spread a layer of the peanut butter mixture over the graham crackers, then repeat with additional layers of crackers and peanut butter mixture until you reach the top of the dish, finishing with the peanut butter layer. Optionally, top with crushed peanuts, mini chocolate chips, or a drizzle of chocolate syrup. Cover and refrigerate the cake for at least 4–6 hours, preferably overnight, to allow the crackers to soften into a cake-like consistency. Slice and serve chilled.
Tips for the Perfect
icebox cake include using full-fat cream cheese for structure and richness, creamy peanut butter for smoothness, and allowing ample chill time so the layers can meld properly. For neat slices, use a serrated knife and wipe it clean between cuts. Don’t rush the chill time—overnight is best for perfect texture. Make sure to cover the cake tightly in the fridge to avoid absorbing any odors. If making your own whipped cream, beat heavy cream with powdered sugar and a bit of vanilla extract until stiff peaks form. Variations and Customizations
are abundant: swap out graham crackers for chocolate wafers, Oreo cookies, or Nilla wafers; use crunchy peanut butter for added texture; mix chocolate pudding into the peanut butter layer; or layer in sliced bananas for a peanut butter banana twist. You can also create mini individual icebox cakes in mason jars or serve with a drizzle of caramel or chocolate ganache on top. For a salty-sweet combo, top with pretzel pieces. For a holiday twist, add cinnamon or nutmeg to the peanut butter layer.
Health Considerations and Nutritional Value: This dessert is rich in calories, sugar, and fat, especially due to the peanut butter, cream cheese, and whipped topping, so it’s best enjoyed in moderation. However, peanut butter provides protein and healthy fats, and you can make healthier swaps such as light cream cheese, low-sugar whipped topping, or whole grain graham crackers. For a lower-sugar option, use natural peanut butter and unsweetened whipped cream. Vegan and dairy-free versions can be made with dairy-free cream cheese, coconut whipped cream, and plant-based graham crackers.
FAQ: Can I freeze an icebox cake? Yes, you can freeze it for a firmer texture or slice neatly, but it’s best enjoyed refrigerated for softness. How long does it last? It keeps well in the fridge for 4–5 days, tightly covered. Can I make it ahead of time? Absolutely—it’s the perfect make-ahead dessert. Can I use homemade whipped cream? Yes, just beat heavy cream with sugar and vanilla until stiff peaks form. What size dish should I use? A standard 9×13-inch pan works well, but you can use a smaller or deeper dish for more layers.

Peanut Butter Ice Box Cake
Ingredients
- 3 cups chilled canned coconut cream from two 13.5 oz cans; be sure to refrigerate the full cans overnight before using. This works best with brands that contain only coconut and no fillers—great options include Trader Joe’s, Aroy-D, Savoy, or Nature’s Charm. For quicker prep, you can substitute with coconut whipped topping like So Delicious Coco Whip. If you’re not dairy-free, regular heavy cream, heavy whipping cream, or your preferred whipped topping can also be used.
- 1/2 cup creamy peanut butter; you can substitute with any nut butter or seed butter of your choice to keep it paleo-friendly.
- 1/3 cup powdered sweetener of choice; we recommend powdered pure maple sugar or powdered coconut sugar for a natural option. For a low-carb or keto version use powdered alternatives like Lakanto powdered monk fruit sweetener, erythritol, or SWERVE. You can also opt for any organic powdered icing sugar you prefer.
- 1 teaspoon pure vanilla extract.
- 25 –30 grain-free cookies or more depending on the brand and pan size you’re using. We love Simple Mills Grain-Free Honey Cinnamon Sweet Thins, Simple Mills Crunchy Cinnamon Cookies, or Hu’s Kitchen Grain-Free Snickerdoodles to keep the recipe paleo, vegan, and grain-free. For a keto-friendly option, use High Key Snickerdoodles, High Key Vanilla Wafers, or your own homemade keto shortbread cookies. You can also use regular or gluten-free graham crackers if not following paleo guidelines.
- 3/4 cup dairy-free chocolate grated or shaved and divided into three equal parts. Great dairy-free brands include Lily’s Sweets, Pascha’s, Hu’s Kitchen, or Eating Evolved.
- 3/4 cup chopped pecans also divided into three equal parts for layering.
- Optional Toppings:
- Crushed grain-free cracker crumbs
- Chopped nuts
- A drizzle of melted dairy-free chocolate
- Dairy-free caramel sauce
Instructions
MAKE WHIPPED CREAM:
- Using a hand mixer or the bowl of a stand mixer, whip the chilled coconut cream until soft peaks form. Add in the powdered sugar (and vanilla extract, if using), and continue whipping until stiff peaks hold. Set aside 1/2 cup of the whipped cream to use for the topping.
ASSEMBLE THE CAKE:
- Begin by spreading a thin layer of the cream mixture into the bottom of an 8×8-inch pan to lightly coat the base. Arrange a single layer of cookies or crackers over the cream in the center of the pan, then break 1 or 2 extra cookies or crackers as needed to fill in any remaining gaps.
- Spread half of the remaining cream mixture evenly over the cookie layer. Sprinkle one-third of the grated or shaved chocolate and chopped pecans on top. Add another layer of cookies or crackers, breaking them as needed to fully cover the surface. Spread the rest of the cream mixture on top, followed by a second portion of the chocolate and pecans. Add one final layer of cookies or crackers, then spread the reserved 1/2 cup whipped cream evenly over the top.
- Finish by sprinkling crushed cookie or cracker crumbs across the surface and topping with the remaining portion of grated chocolate and chopped pecans. If desired, drizzle melted chocolate and/or dairy-free caramel sauce over the top.
- Refrigerate the assembled cake for at least 4 hours or overnight to allow the cookies or crackers to fully soften and absorb the flavors.