Introduction:
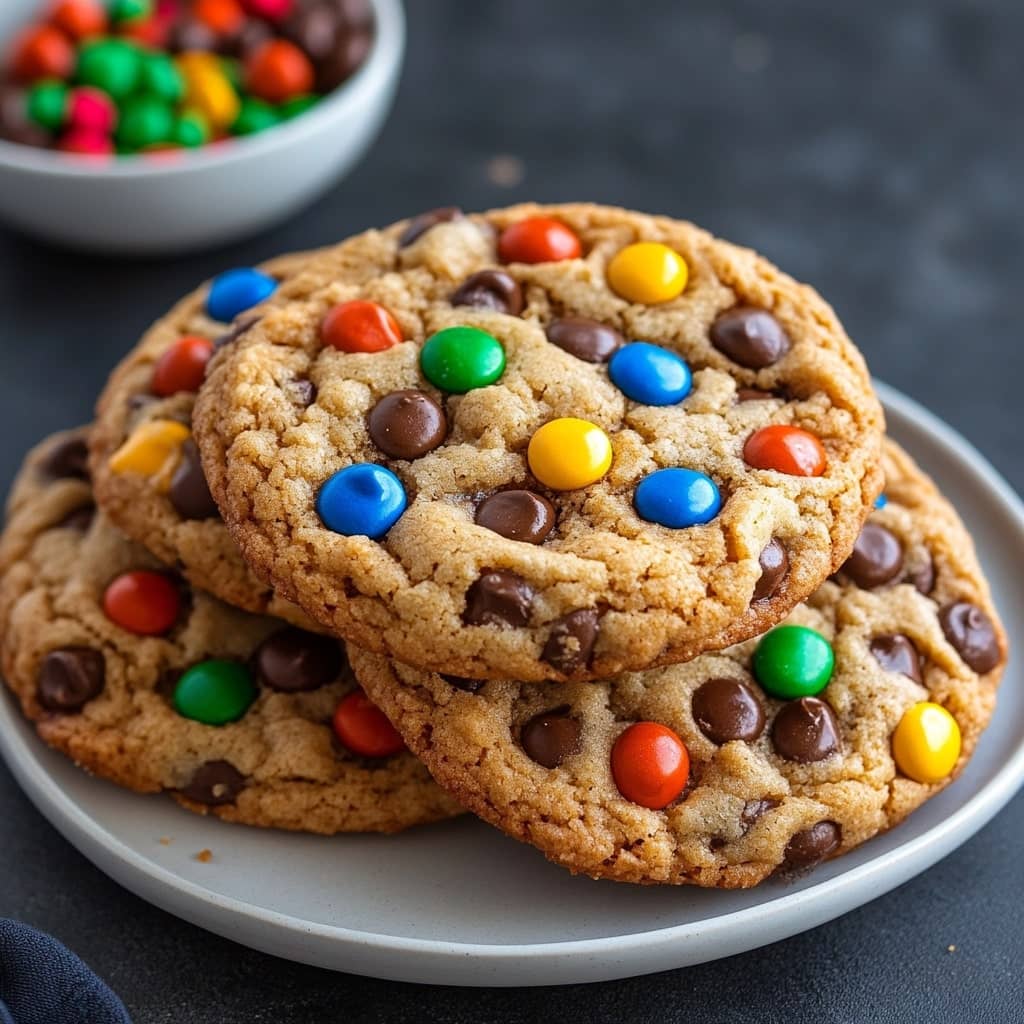
Monster cookies are a beloved, indulgent treat that combine the best of everything in a single cookie. They are a generous mixture of oats, peanut butter, chocolate chips, M&Ms, and sometimes even butterscotch chips, creating a satisfying, chewy, and slightly crunchy texture. This cookie is not only a crowd-pleaser but also a great recipe to make with kids, as they can help mix in their favorite candy pieces. These cookies are thick, hearty, and full of flavor, offering a bit of everything in each bite. Perfect for dessert tables, holiday gatherings, or simply satisfying a sweet tooth, monster cookies are sure to become a family favorite.
The History of Monster Cookies:
Monster cookies originated in the 1970s, first emerging from the home kitchens of North America. They gained popularity because of their mix of simple yet indulgent ingredients that made them perfect for both kids and adults. While the exact origin is unclear, many believe they were created as a playful twist on traditional oatmeal cookies, with the addition of colorful M&Ms and the richness of peanut butter. Over time, the recipe evolved with various additions like chocolate chips, nuts, and even candy bars, making them a customizable cookie that could be altered to suit any taste.
Ingredients Breakdown:
The beauty of monster cookies lies in their simple yet dynamic blend of ingredients. The base of the cookie is made up of butter, sugar, and brown sugar, which provide the perfect amount of sweetness and moisture. Peanut butter adds richness and depth of flavor, while oats contribute a chewy texture. The addition of eggs helps bind everything together, creating a thick, doughy consistency. Baking soda ensures a slight rise in the dough, giving the cookies their signature thick, soft center. The real fun starts when you add in the mix-ins—chocolate chips, M&Ms, and other fun candies or ingredients like butterscotch chips, raisins, or nuts, depending on your preferences.
Step-by-Step Recipe:
Start by preheating your oven to 350°F (175°C) and lining a baking sheet with parchment paper. In a large mixing bowl, cream together the softened butter, sugar, and brown sugar until light and fluffy. Add the peanut butter, eggs, and vanilla extract, and mix until smooth. In a separate bowl, combine the flour, oats, baking soda, and salt. Gradually add the dry ingredients to the wet ingredients, mixing until fully combined. Once the dough is formed, fold in the chocolate chips, M&Ms, and any other add-ins you desire. Using a cookie scoop or spoon, drop heaping tablespoon-sized balls of dough onto the prepared baking sheet, spacing them about 2 inches apart. Bake for 10-12 minutes, or until the edges are golden brown but the centers remain soft. Let the cookies cool on the baking sheet for a few minutes before transferring them to a wire rack to cool completely.
Tips for the Perfect Monster Cookies:
To get the perfect monster cookies, make sure your butter is softened to room temperature before mixing it with the sugars. This will ensure a smooth and evenly combined dough. If you prefer a thicker cookie, refrigerate the dough for about 30 minutes before baking, which will help the cookies keep their shape. Don’t overbake the cookies, as they will continue to firm up while cooling. For a soft, chewy texture, bake just until the edges are golden and the center is still slightly soft. You can also experiment with different types of oats; old-fashioned oats give the cookies a chewier texture, while quick oats can make them slightly less dense. Additionally, you can adjust the ratio of mix-ins to suit your taste—more chocolate chips, fewer M&Ms, or even a combination of different candies for an extra fun variation.
Variations and Customizations:
Monster cookies are incredibly versatile and can be customized in many ways to fit your personal preferences. If you’re not a fan of peanut butter, you can substitute it with almond butter, sunflower seed butter, or even Nutella for a different twist. You can also swap out the M&Ms for other colorful candies, or use a mix of milk, dark, and white chocolate chips for added richness. Adding nuts, like chopped peanuts, walnuts, or almonds, can provide an extra crunch and depth of flavor. For a more festive version, try using holiday-themed M&Ms or adding a sprinkle of sea salt on top for a sweet-salty contrast. If you prefer a gluten-free option, you can use certified gluten-free oats and a gluten-free flour blend. You can also experiment with adding dried fruit, such as raisins or cranberries, to make the cookies a bit more tangy and chewy.
Health Considerations and Nutritional Value:
While monster cookies are undoubtedly a treat that should be enjoyed in moderation, they do offer some nutritional benefits. The oats provide a good source of fiber, which aids digestion and helps maintain steady blood sugar levels. Peanut butter is rich in protein, healthy fats, and antioxidants, which can support heart health and help keep you full for longer. However, these cookies are high in sugar and fat, so they should be considered an occasional indulgence rather than a regular part of your diet. To make them slightly healthier, you could consider reducing the sugar or swapping in a natural sweetener like honey or maple syrup. You could also use whole wheat flour instead of all-purpose flour to add more fiber. Keep in mind, though, that these modifications may slightly alter the texture and flavor of the cookies.
FAQ:
- Can I freeze monster cookie dough? Yes, you can freeze the dough for up to 3 months. Scoop the dough into balls and freeze them on a baking sheet. Once frozen, transfer the dough balls to a zip-top bag or airtight container. When ready to bake, just place the frozen dough balls on a baking sheet and add a couple of extra minutes to the baking time.
- Can I make monster cookies without oats? While oats are a key ingredient in monster cookies, you can omit them and replace them with additional flour or a gluten-free alternative. However, the texture will change, and the cookies may lose their signature chewiness.
- Can I make these cookies without peanut butter? Yes, you can replace the peanut butter with any other nut butter (such as almond or cashew) or even sunflower seed butter for a nut-free version.
- How do I store monster cookies? Store your monster cookies in an airtight container at room temperature for up to a week. For longer storage, you can freeze them for up to 3 months.

Best Monster Cookies Recipe
Ingredients
- ▢ 1/2 cup unsalted butter softened
- ▢ 1/2 cup packed brown sugar
- ▢ 1/2 cup granulated sugar
- ▢ 1/2 cup creamy peanut butter such as Jif
- ▢ 1 large egg
- ▢ 2 teaspoons vanilla extract
- ▢ 3/4 cup rolled oats
- ▢ 1 cup all-purpose flour
- ▢ 1/2 teaspoon baking soda
- ▢ 1/4 teaspoon salt
- ▢ 3/4 cup chocolate chips
- ▢ 1 cup M&M’s chocolate candies divided
Instructions
- In a large mixing bowl, cream together the butter, brown sugar, and granulated sugar for about 4 minutes, or until the mixture is light and fluffy. Add the peanut butter, egg, and vanilla, and continue to beat for another minute.
- Fold in the oats, flour, baking soda, and salt, mixing until just combined. Gently stir in the chocolate chips and 3/4 cup of M&M’s, setting aside the remaining 1/4 cup for after baking.
- Cover the dough and chill it in the refrigerator for 30 minutes.
- Once chilled, preheat the oven to 365°F. Scoop the dough onto a light-colored baking sheet, ensuring the cookies are spaced at least two inches apart.
- Bake for 9-10 minutes. Remove the cookies from the oven and immediately press the remaining 1/4 cup of M&M’s into the tops of the warm cookies. Allow them to cool for 5-10 minutes before transferring to a cooling rack.