Baked crispy chicken tenders are a healthier twist on a beloved classic that doesn’t sacrifice flavor or texture. These golden-brown, crunchy strips of chicken are coated in a flavorful breadcrumb mixture and baked to perfection, offering a satisfying crunch with every bite—without the need for deep frying. Loved by both kids and adults, they are quick to prepare, customizable with different seasonings and dips, and perfect as a main dish, party snack, or protein-packed addition to salads and wraps. With a crispy exterior and juicy interior, baked chicken tenders strike the perfect balance between comfort food and health-conscious cooking, making them a staple in family kitchens and meal prep routines alike.
The History of Baked Crispy Chicken Tenders
The origin of chicken tenders, sometimes referred to as chicken strips or fingers, can be traced back to mid-20th-century America, when fast-food chains and casual dining restaurants began promoting boneless, breaded chicken as an alternative to traditional fried chicken. The concept of using the tenderloin—an especially soft, lean strip of meat under the chicken breast—made it easy to cook quickly and appealed especially to younger eaters. While traditionally deep-fried, health trends in the late 20th and early 21st centuries led to increased popularity of baked alternatives. Baked crispy chicken tenders emerged as a healthier version, combining the appeal of crispy coatings with methods that reduce saturated fat and calories. With the rise of air fryers, oven-crisping techniques, and better breading methods, baked tenders have gained favor among home cooks seeking guilt-free indulgence. Today, they are often featured in cookbooks, health blogs, and online cooking shows, praised for their versatility, convenience, and ability to deliver crispy satisfaction without frying.
Ingredients Breakdown
Boneless, skinless chicken tenders or breasts: These are the main protein, cut into strips for even baking and easy serving. Salt and black pepper: Simple but essential seasonings to enhance the flavor of the chicken. Eggs: Used to coat the chicken and help the breadcrumbs adhere properly. Flour: The first coating layer that helps the egg bind to the chicken. Panko breadcrumbs: These Japanese-style breadcrumbs are lighter and crispier than traditional breadcrumbs, making them perfect for a crunchy texture. Optional Parmesan cheese: Adds a salty, umami-rich note to the breadcrumb coating. Garlic powder, onion powder, paprika: Common spices that add warmth, depth, and color to the breading. Olive oil or cooking spray: Used to lightly coat the tenders or the baking rack to promote crispiness and prevent sticking. Optional herbs (like parsley, thyme, or oregano): Add a fresh, herby flavor to the breading.
Step-by-Step Recipe
- Preheat your oven to 425°F (220°C) and line a baking sheet with parchment paper or place a wire rack on top of the sheet for maximum crispiness. 2. Prepare a breading station with three shallow bowls: one with flour mixed with a pinch of salt and pepper, the second with beaten eggs, and the third with panko breadcrumbs mixed with garlic powder, paprika, and optional Parmesan. 3. Pat the chicken pieces dry with paper towels to ensure the breading adheres well. 4. Dredge each chicken strip first in the flour, then dip into the egg mixture, and finally coat thoroughly with the breadcrumb mixture. 5. Place the coated chicken tenders on the prepared baking rack or sheet in a single layer without overlapping. Lightly spray them with cooking spray or drizzle with a small amount of olive oil. 6. Bake for 20–25 minutes, flipping once halfway through, until the chicken is golden brown and cooked through (internal temperature should reach 165°F or 74°C). 7. Remove from the oven and let rest for a few minutes before serving. Serve with your choice of dipping sauces like honey mustard, ranch, barbecue, or sriracha mayo.
Tips for the Perfect Baked Crispy Chicken Tenders
Use a wire rack on the baking sheet to allow air circulation around the chicken, ensuring even crisping on all sides. Pat the chicken dry before breading to help the coating stick and prevent sogginess. Toast the panko breadcrumbs in a dry skillet for a few minutes before breading for an extra crunchy finish. Don’t overcrowd the baking sheet—space between tenders allows them to bake rather than steam. Flip the tenders halfway through baking for even browning. Use a meat thermometer to ensure doneness without overcooking. Let the tenders rest a few minutes after baking to set the coating and retain juices. Add a small sprinkle of salt immediately after baking to enhance flavor.
Variations and Customizations
Make spicy tenders by adding cayenne pepper or hot sauce to the egg mixture or including crushed red pepper flakes in the breadcrumbs. Try different herbs and spices such as Italian seasoning, cumin, or smoked paprika to suit your taste. For a cheesy twist, increase the amount of grated Parmesan in the breading. Swap panko for crushed cornflakes or almond meal for different textures and dietary needs. Make gluten-free tenders by using gluten-free flour and breadcrumbs or crushed rice cereal. For dairy-free versions, skip the Parmesan or use a plant-based cheese alternative. Add a hint of citrus by including lemon zest in the breading. Pair with different sauces for variety—buffalo sauce, tzatziki, chimichurri, or Korean gochujang work great.
Health Considerations and Nutritional Value
Baked crispy chicken tenders offer a lean source of protein with significantly less fat and calories compared to their deep-fried counterparts. Using chicken breast or tenderloin keeps the fat content low, while baking eliminates the need for large amounts of oil. Panko breadcrumbs provide the satisfying crunch without heavy frying. To further reduce calories, use egg whites instead of whole eggs and opt for whole-wheat flour and breadcrumbs for added fiber. Adding spinach or kale to a side salad boosts the meal’s overall nutrient profile. While the dish can be high in sodium if over-seasoned, using low-sodium ingredients and herbs as flavor enhancers helps maintain balance. The tenders are also highly customizable for different dietary needs, including gluten-free, dairy-free, or low-carb versions. Portion control is still important, especially if serving with dips high in sugar or fat. Overall, baked chicken tenders are a balanced option for those looking for comfort food with a healthier twist.
FAQ
Can I use chicken breasts instead of tenders? Yes, simply slice the chicken breasts into strips to mimic tenderloin size for even cooking.
How do I make them extra crispy? Toast the breadcrumbs first or use a wire rack during baking to allow air circulation.
Can I freeze them? Yes, freeze them in a single layer after baking, then reheat in the oven at 375°F until hot and crispy.
Can I prepare them ahead of time? Yes, bread the tenders and refrigerate them for up to 24 hours before baking.
What dipping sauces go well with them? Honey mustard, ranch, spicy mayo, barbecue, and garlic aioli are all great choices.
Are they kid-friendly? Absolutely—just skip any spicy seasonings if serving to younger children.
Can I use an air fryer instead of an oven? Yes, air fry at 375°F for 10–12 minutes, flipping halfway through for even crisping.
What sides pair well with these tenders? Serve with fries, salad, roasted vegetables, sweet potato wedges, or rice.
Is it okay to double the recipe? Yes, just make sure to bake in batches so the tenders aren’t crowded on the baking sheet.

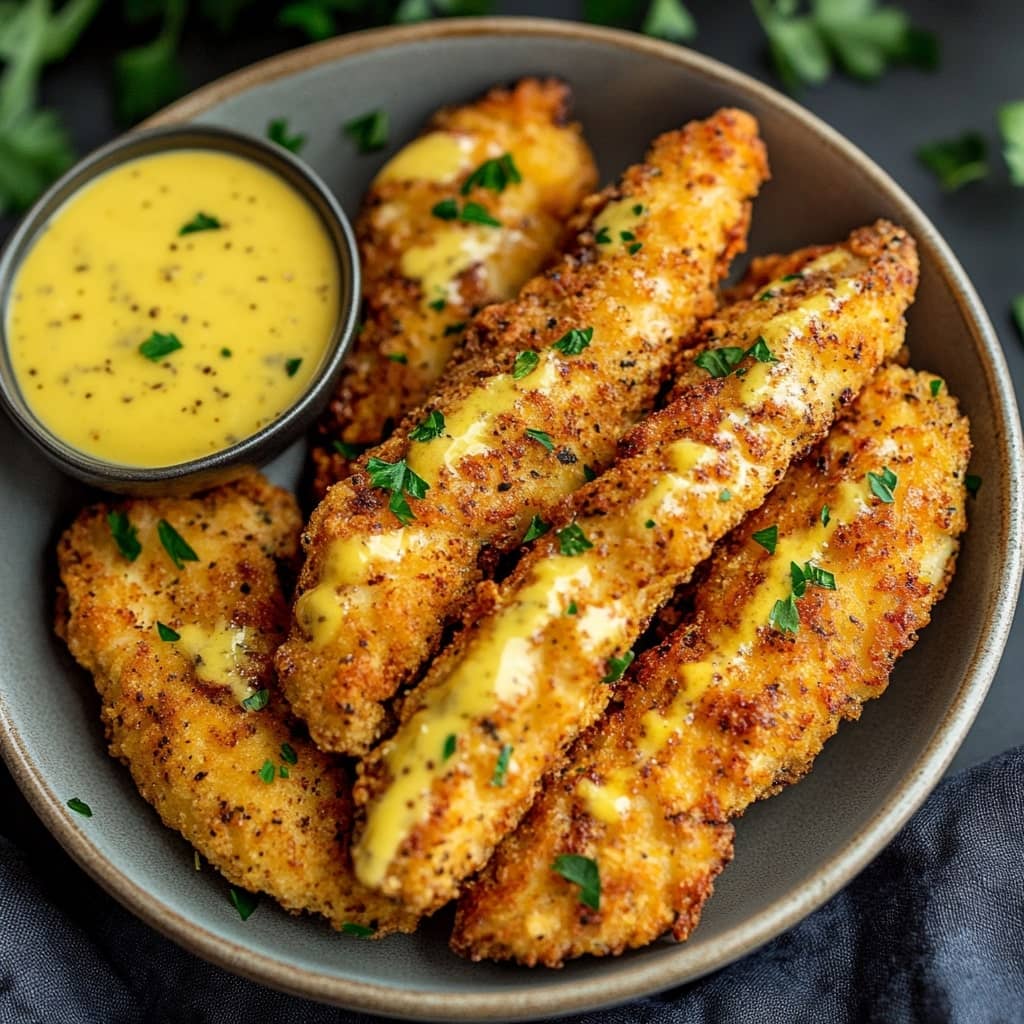
Baked crispy chicken tenders
Ingredients
Breadcrumb Coating
- 1½ cups of panko breadcrumbs see Note 1
- Oil spray for crisping
Batter
- 1 large egg
- 1 tablespoon of mayonnaise
- 1½ tablespoons of Dijon mustard or your preferred mustard variety
- 2 tablespoons of all-purpose flour
- ½ teaspoon of salt
- Freshly ground black pepper to taste
Chicken
- 500 g / 1 lb of chicken tenderloins or chicken breast sliced lengthwise into ⅔-inch (1.5 cm) thick strips
- Oil spray for baking
Instructions
- Preheat your oven to 200°C (390°F) or 180°C if using a fan-forced setting.
- To prepare the panko, spread it out evenly on a baking tray and lightly spray with oil. Spray vertically to prevent the breadcrumbs from flying off the tray. Bake for 3 to 5 minutes, or until they’re lightly golden. Transfer the toasted panko to a bowl and set aside.
- For even baking, place a wire rack on a baking tray—this step is optional but helps ensure uniform crispiness.
- In a separate bowl, combine all the batter ingredients and whisk together with a fork until smooth. Add the chicken pieces to the batter and toss well to coat thoroughly.
- For crumbing, use tongs to lift a piece of battered chicken and place it in the bowl of toasted panko.
- Generously sprinkle panko over the top of the chicken, then press gently to help the crumbs adhere. Place the breaded piece on the prepared baking tray. Repeat the process with the remaining chicken. Enjoy clean fingers throughout!
- Lightly spray the coated chicken pieces with oil and, if desired, sprinkle with a little salt. Bake for 15 minutes if the pieces are medium-sized, or up to 20 minutes for larger cuts—avoid baking longer as this may dry out the chicken.
- Once baked, remove from the oven and serve immediately. Enjoy with your favorite dipping sauce (such as Honey Mustard—see Note 2) and garnish with fresh parsley if you like.
Notes
- Panko Breadcrumbs – Panko is a type of Japanese breadcrumb known for its larger, flakier texture compared to regular breadcrumbs. It’s widely available in most major supermarkets, typically found in the Asian food aisle, and only slightly more expensive than standard breadcrumbs. The larger crumb size creates a significantly better crunch, making it a worthwhile upgrade for crispy coatings.
-
Sauces
Honey Mustard Sauce (as pictured): Combine ⅓ cup of mayonnaise, 2 tablespoons of Dijon mustard, 2 tablespoons of honey, 1 to 2 teaspoons of lemon juice, and a pinch of salt and pepper. Adjust lemon juice to taste for desired tang.
Ranch Sauce: Mix together ¼ cup each of mayonnaise (preferably whole egg) and sour cream, 2 tablespoons of milk, 1 teaspoon of lemon juice or white vinegar, and ¼ teaspoon each of dried parsley (or dill), dried dill, dried chives (see Note a), garlic powder, plus ⅛ teaspoon each of salt and black pepper.
Note a: If you prefer to use fresh herbs, they can easily be substituted—just finely chop and double the amount (e.g., use ½ teaspoon fresh herbs instead of ¼ teaspoon dried). Don’t worry if you don’t have every herb listed; even just one will still provide a familiar ranch flavor. If using fewer herbs, increase the quantity slightly (aim for about ¾ teaspoon total of whatever you have on hand). -
Make-Ahead Tips – For best results when prepping in advance, toast the panko breadcrumbs and coat the chicken in the batter. Store the battered chicken for up to 2 days in the fridge. Bread the chicken with panko just before baking for maximum crispiness. If needed, you can fully bread the chicken up to 24 hours ahead and refrigerate. Freezing the raw, breaded chicken is not recommended as it affects texture.
Reheating: To revive leftovers, reheat in a hot oven at 200°C (390°F) for just 3 to 5 minutes until warmed through—this helps maintain a crispy coating without drying out the chicken. - Nutrition Information – Nutritional values are based on 3 servings, excluding any dipping sauces.