
Introduction
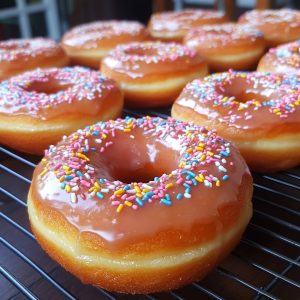
Original glazed donuts are a beloved classic that have stood the test of time as one of the most iconic sweet treats in the world. Soft, fluffy, and irresistibly sweet, these donuts are coated in a shiny glaze that gives them their signature flavor and texture. Perfectly light yet indulgent, they are a staple in bakeries, coffee shops, and home kitchens alike. Whether enjoyed with a hot cup of coffee in the morning or as a midday snack, original glazed donuts are the epitome of comfort food. Their melt-in-your-mouth quality and balanced sweetness make them the ideal donut to satisfy a sweet craving. Often considered a symbol of warmth and happiness, these donuts hold a special place in many people’s hearts and have been passed down through generations as a timeless recipe. The perfect combination of yeast dough and glaze results in a donut that’s tender on the inside with a slightly crisp outer layer, making it an undeniable favorite. The process of making original glazed donuts, whether from scratch or using a store-bought dough, is a fun and rewarding baking project that results in a treat that brings joy to any occasion.
The History of Original Glazed Donuts
The origin of the donut dates back to the 19th century, with the modern version we know today evolving over time. While donuts themselves can be traced to Dutch settlers in New York who brought “olykoeks” (sweet, fried dough) to America, the creation of the original glazed donut is most often attributed to the early 20th century, specifically to the birth of Krispy Kreme in 1937. Founded by Vernon Rudolph in Winston-Salem, North Carolina, Krispy Kreme revolutionized the donut world with its signature original glazed recipe. The combination of its light, fluffy yeast dough and sweet, sticky glaze quickly became a favorite among donut enthusiasts. The iconic glazed donut gained further popularity throughout the years, with Krispy Kreme’s hot, fresh donuts becoming a symbol of indulgence and quality. Over time, other donut shops followed suit, creating their versions of the original glazed donut, but none quite matched the specific texture and flavor that Krispy Kreme perfected. Today, the original glazed donut continues to be a global sensation, frequently associated with the joy of indulgence and shared experiences. The original glazed donut has cemented itself as a piece of culinary history, influencing everything from donut shop culture to morning rituals and beyond.
Ingredients Breakdown
For the Dough:
2½ cups all-purpose flour, plus extra for dusting
¼ cup granulated sugar
1 packet (2¼ teaspoons) active dry yeast
½ teaspoon salt
¾ cup whole milk, lukewarm
¼ cup warm water
1 large egg
2 tablespoons unsalted butter, softened
1 teaspoon vanilla extract
For the Glaze:
1 cup powdered sugar
2 tablespoons milk (more if needed for desired consistency)
1 teaspoon vanilla extract
A pinch of salt
Step-by-Step Recipe
- Prepare the Dough: In a large mixing bowl, combine 2¼ teaspoons of active dry yeast with warm water and a pinch of sugar. Stir it gently and allow the yeast to bloom for about 5 minutes.
- Make the Dough: Once the yeast is activated, add the milk, egg, softened butter, and vanilla extract to the yeast mixture. Stir to combine. Gradually add the all-purpose flour, sugar, and salt, mixing until a dough forms. Knead the dough on a floured surface for about 5-7 minutes, or until smooth and elastic.
- First Rise: Place the dough in a lightly greased bowl and cover with a clean kitchen towel or plastic wrap. Let it rise in a warm place for 1-1.5 hours, or until it has doubled in size.
- Shape the Donuts: Once the dough has risen, punch it down gently to release any air bubbles. Roll the dough out onto a floured surface to about ½ inch thick. Using a donut cutter or two round cutters (one larger and one smaller for the hole), cut out the donut shapes. Place the shaped donuts onto a parchment-lined baking sheet, leaving space between each one.
- Second Rise: Cover the shaped donuts with a clean kitchen towel and allow them to rise for another 30-45 minutes, or until puffy and slightly increased in size.
- Fry the Donuts: Heat vegetable oil in a deep frying pan or a large pot to 350°F (175°C). Fry the donuts in batches, cooking each side for about 1-2 minutes, or until golden brown. Use a slotted spoon to remove the donuts from the oil and place them on paper towels to drain any excess oil.
- Make the Glaze: While the donuts are cooling slightly, whisk together the powdered sugar, milk, vanilla extract, and a pinch of salt in a bowl until smooth. Adjust the consistency by adding more milk if needed to reach a thin, pourable texture.
- Glaze the Donuts: Once the donuts are still warm but not too hot, dip them into the glaze, ensuring that both the tops and sides are evenly coated. Allow the glaze to set for a few minutes before serving.
- Serve: Enjoy the original glazed donuts fresh, or store them in an airtight container for up to two days.
Tips for the Perfect Original Glazed Donut
Be sure to use warm water (about 110°F) when activating the yeast to ensure it blooms properly. Do not use water that’s too hot, as this will kill the yeast. When rolling out the dough, aim for a thickness of ½ inch, as this will ensure a light, airy texture. If you don’t have a donut cutter, you can use two round cutters (one larger for the outer shape and one smaller for the hole in the middle). Make sure the oil temperature stays around 350°F—too hot, and the donuts will burn, too cold, and they will absorb too much oil. Glaze the donuts while they are still warm, as this allows the glaze to stick better. For a more indulgent treat, you can double dip the donuts in the glaze for a thicker coating.
Variations and Customizations
Chocolate Glazed Donuts: Dip the fried donuts into a mixture of melted chocolate and heavy cream for a rich, glossy coating.
Cinnamon Sugar Donuts: Instead of glazing, toss the freshly fried donuts in a mixture of cinnamon and sugar for a simple yet flavorful alternative.
Filled Donuts: After frying, inject the donuts with your favorite fillings like jam, custard, or chocolate cream using a piping bag.
Maple Glazed Donuts: For a fall-inspired variation, create a maple glaze by mixing powdered sugar with maple syrup instead of milk.
Vegan Donuts: Substitute the egg with a flax egg (1 tablespoon ground flaxseed mixed with 2 tablespoons water) and use non-dairy milk and butter for a vegan-friendly version.
Gluten-Free Donuts: Use a gluten-free all-purpose flour blend to replace the regular flour for a gluten-free option.
Health Considerations and Nutritional Value
While donuts are undeniably delicious, they are typically high in sugar, fats, and calories, which can contribute to weight gain and increased risk of chronic diseases when consumed in excess. A typical original glazed donut contains around 200-300 calories, with a fair amount of sugar and saturated fats. To make them slightly healthier, you can experiment with reducing the sugar in the glaze or using whole wheat flour for the dough. As with any indulgence, moderation is key—enjoying a donut as a treat now and then is perfectly fine, but they should not be a daily indulgence. The donuts provide small amounts of protein from the eggs and milk used in the dough but are not considered a significant source of vitamins or minerals.
FAQ
Can I make the dough ahead of time? Yes, you can prepare the dough in advance, allow it to rise, then punch it down and refrigerate it overnight. Allow it to come to room temperature before rolling and frying.
Can I use store-bought dough? While homemade dough is ideal for the best texture and flavor, you can use store-bought biscuit dough or even pizza dough in a pinch for a quicker version.
How do I store leftovers? Store leftover donuts in an airtight container at room temperature for up to two days. They are best enjoyed fresh but can be reheated in the microwave for a few seconds to restore some softness.
Can I freeze the donuts? Yes, you can freeze the unglazed donuts once they’ve been fried and cooled. To reheat, simply thaw them and glaze them as usual.
Why are my donuts not rising? If your yeast doesn’t activate, the dough won’t rise properly. Ensure your yeast is fresh, and the water you use is the right temperature—around 110°F.
Can I bake the donuts instead of frying them? While traditional donuts are deep-fried for that light, fluffy texture, you can bake them in a donut pan at 350°F for 10-12 minutes for a lighter version, though they will not have the same crispness.
Original Glazed Donuts
Ingredients
- 1 cup 240ml whole milk, warmed to around 110°F (43°C)*
- 2 and 1/4 teaspoons 7g instant or active dry yeast (1 standard packet)*
- 1/3 cup 65g granulated sugar, divided
- 2 large eggs
- 6 tablespoons 85g unsalted butter, melted and slightly cooled
- 1 teaspoon pure vanilla extract
- 1/4 teaspoon ground nutmeg
- 1/2 teaspoon salt
- 4 cups 500g all-purpose flour (spooned & leveled), plus more as needed
- 1 –2 quarts vegetable oil*
Donut Glaze
- 2 cups 240g confectioners’ sugar, sifted
- 1/3 cup 80ml heavy cream, half-and-half, or whole milk
- 1/2 teaspoon pure vanilla extract
Instructions
- Prepare the Dough: In the bowl of your stand mixer, whisk together the warm milk, yeast, and 1 tablespoon of sugar. Loosely cover the bowl and let it sit for 5–10 minutes until it becomes foamy and frothy on top. If you don’t have a stand mixer, you can do this in a large mixing bowl, and mix the dough with a large wooden spoon or silicone spatula. It will require a bit of arm strength. A hand mixer works, but the sticky dough often gets stuck in the beaters, so mixing by hand with a wooden spoon or silicone spatula is a better choice.
- Next, add the remaining sugar, eggs, melted butter, vanilla, nutmeg, salt, and 2 cups (about 250g) of flour to the bowl. Beat on low speed for 1 minute. Scrape down the sides of the bowl with a silicone spatula as needed. Add the remaining flour and beat on medium speed until the dough comes together and pulls away from the sides of the bowl, which should take about 2 minutes. If needed, add more flour, 1 tablespoon at a time, until the dough pulls away from the sides. Be careful not to add too much flour, as the dough should remain slightly sticky.
- Knead the Dough: Keep the dough in the mixer and knead on low speed for an additional 5-7 minutes, or knead by hand on a lightly floured surface for 5-7 minutes. (If you’re new to bread-baking, my How to Knead Dough video tutorial can help guide you through this step.) If the dough becomes too sticky during kneading, sprinkle 1 teaspoon of flour at a time on the dough or work surface to make a soft, slightly tacky dough. Do not add more flour than needed, as you don’t want the dough to become dry. After kneading, the dough should still feel soft. To check, poke it with your finger—if it slowly bounces back, your dough is ready to rise. You can also perform the “windowpane test” to check the dough’s readiness: tear off a small piece of dough (roughly the size of a golf ball) and gently stretch it until it’s thin enough to allow light to pass through it. Hold it up to a light source. If light passes through without the dough tearing, it’s ready to rise. If not, continue kneading until the dough passes the test.
- Let Dough Rise: Lightly grease a large bowl with oil or nonstick spray. Place the dough in the bowl, turning it to coat all sides with oil. Cover the bowl and allow the dough to rise in a warm environment for 1.5–2 hours, or until it has doubled in size. (For a slight reduction in rise time, refer to my answer to “Where Should Dough Rise?” in my Baking with Yeast Guide.)
- Shape the Doughnuts: Once the dough has risen, punch it down to release the air. Remove the dough from the bowl and transfer it onto a lightly floured surface. Roll the dough out to a thickness of about 1/2 inch. Using a 3–3.5-inch donut cutter, cut the dough into donut shapes. Re-roll the scraps and cut out more donuts. If you don’t have a donut cutter, use 1 large and 1 smaller round cookie cutter (the large one should be about 3 and 1/2 inches).
- Line 1 or 2 baking sheets with parchment paper or silicone baking mats. Place the doughnuts and doughnut holes on the sheets. Loosely cover them and let them rest for 30 minutes while you heat the oil. The dough will rise a little during this resting period.
- Heat the Oil: Pour the oil into a large, heavy-duty pot fitted with an oil thermometer. Turn the heat to medium and bring the oil to 375°F (191°C). Add 2–3 doughnuts at a time and fry for 1 minute on each side. Carefully remove the donuts with a metal slotted spatula or metal slotted spoon. If the oil temperature begins to rise too much, lower the heat to maintain 375°F (191°C). Wear kitchen gloves if necessary to protect yourself from oil splashes. Place the fried donuts onto a prepared cooling rack. Repeat with the remaining donuts and turn off the heat when finished. For doughnut holes, see the note.
- Make the Glaze: In a bowl, whisk together all the glaze ingredients. Dip each warm donut (don’t wait for them to cool) into the glaze, making sure to coat both sides. Place the donuts back onto the prepared rack to let the excess glaze drip off. Allow the glaze to set for about 20 minutes.
- Storage: Doughnuts are best enjoyed the same day. Leftover doughnuts can be stored in an airtight container at room temperature or in the refrigerator for 1-2 days.